User Guide
How to Manage Users
Overview
You can manage your users in the User Management page.
You can:
-
View users
-
Search for a specific user
-
Edit users
-
Create new users
Note: See Defining Access Controls for more information on how to manage your users' access to data.
IMPORTANT! Always use a strong password. A strong password is at least 10 characters long.
It must include at least 1 alpha character, 1 uppercase, 1 lowercase, 1 number, and 1 special character (#$%-&*+!).
Use only passwords which conform to these rules.
Roles
-
Users inherit permissions from the role they are a member of.
-
For information about roles, see How to Manage User Roles.
How to View a User
Procedure:
-
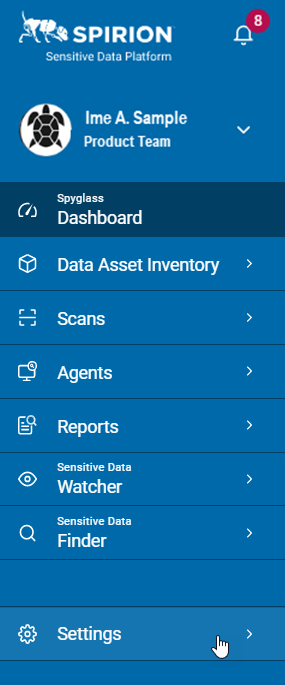
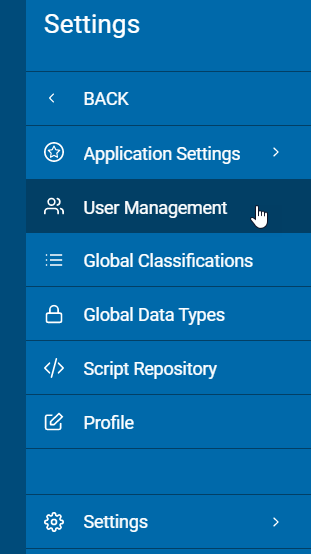
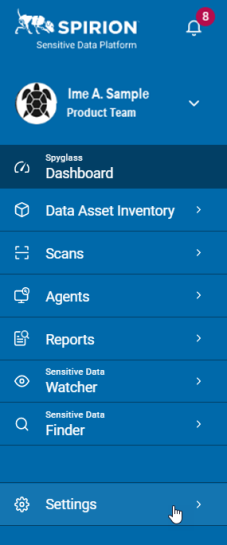
On the left menu, click Settings.
-
Click User Management.
-
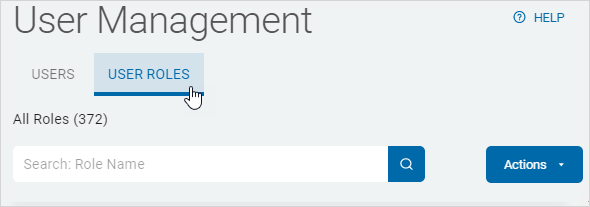
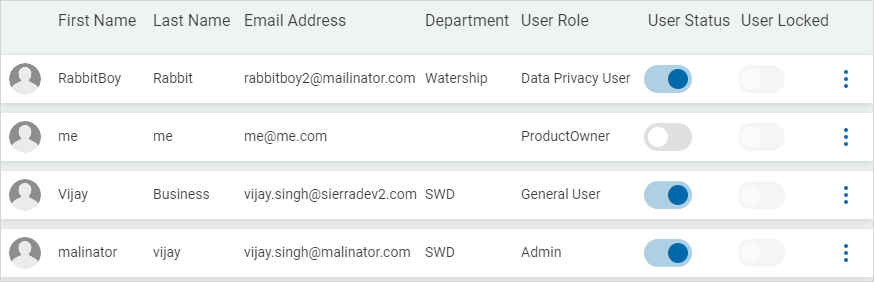
The User Management screen displays a table sorted by tab.
-
Click a tab to switch between views:
-
USERS
-
USER ROLES
-
-
Users are displayed in a table sorted by the following columns:
- First Name
- Last Name
- Email Address
- Department
- User Role
- User Status
- User Locked
- More options
-
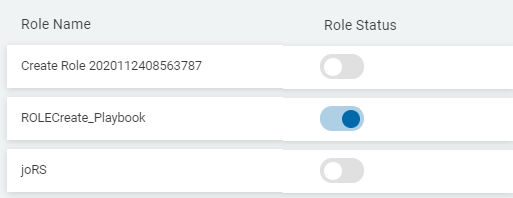
User Roles are displayed in a table sorted by:
-
Role Name
-
Role Status
-
Default User Roles
How to Search for a User
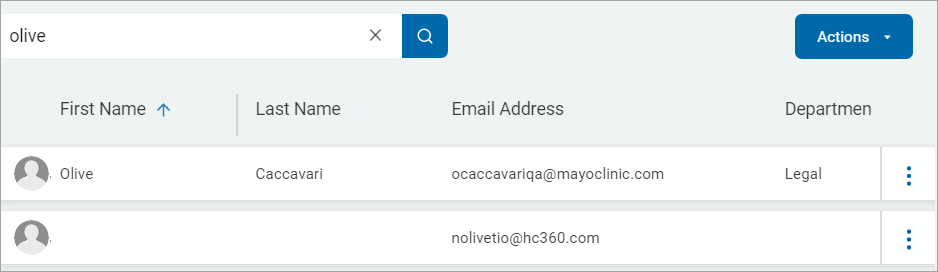
Ensure the USERS tab is selected.
-
Type any of the following in the box:
- First Name
- Last Name
- Email Address
-
The results are sorted and displayed in the table below.
-
Click the x to clear the search term.
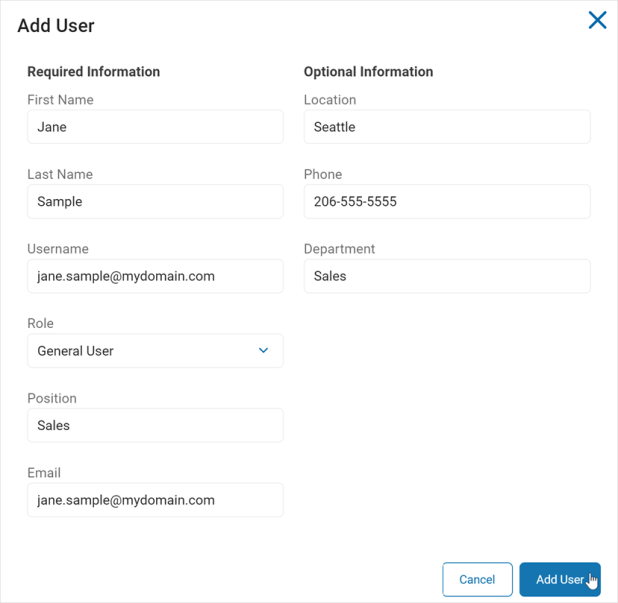
How to Add a New User
To add a new user:
Ensure you are on the USERS tab.
-
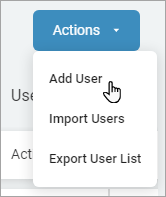
In the top right of the screen, click Actions.
-
Click Add User.
-
In the Add User pop-up window, fill in the following:
Required:
- First Name
- Last Name
- Username
- Role: Click an option from the drop-down list. (Note: If you need to create a new Role, see How to Manage User Roles.)
- Position
Optional:
- Location
- Phone
- Department
-
Click Add User to save and add the user or Cancel to discard.
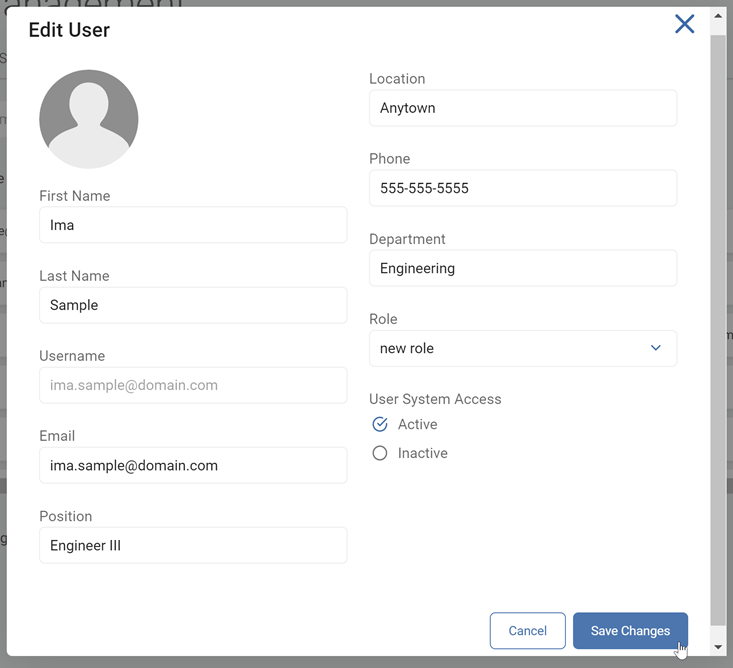
How to Edit a User
To edit a User:
-
On the left menu, click Settings.
-
Click User Management.

-
Locate the user you want to edit in the list.
-
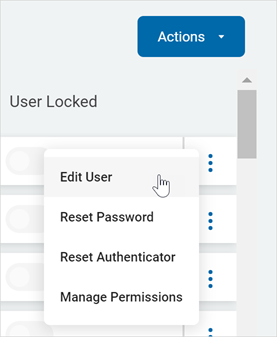
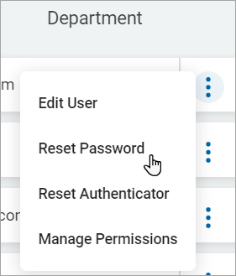
Click the ellipse menu at the end of the row.
-
Click Edit User.
-
In the Edit User pop-up window, make needed changes.
-
Click Save Changes to save your changes or Cancel to discard.
Tag Permissions
How to Edit User Tag Permissions
To edit user Tag permissions:
-
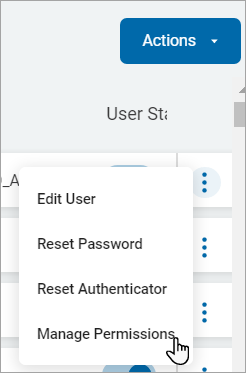
Locate the user for which you want to edit permissions in the list.
-
Click the ellipse menu at the end of the row.
-
Click Manage Permissions.
-
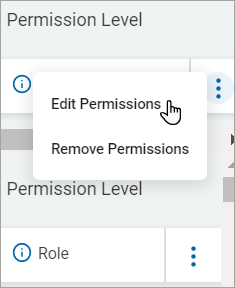
Locate the tag name to edit permissions for a user.
-
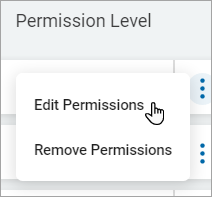
On the far right of the tag row, click the more options menu.
-
Click Edit Permissions.
-
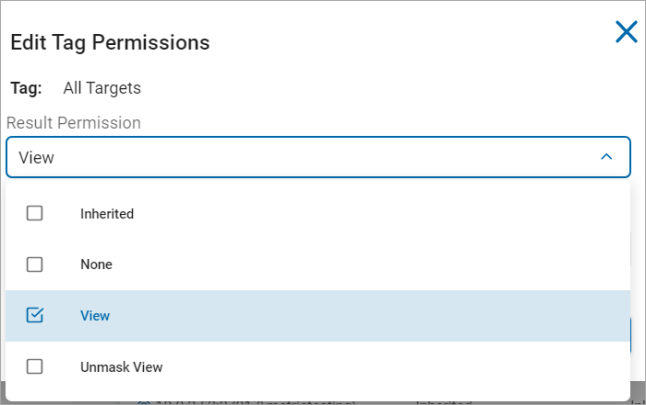
On the Edit Tag Permissions pop-up window, select any of the following options from the Result Permission drop-down list.
-
Inherited
-
None
-
View
-
Unmask view
-
-
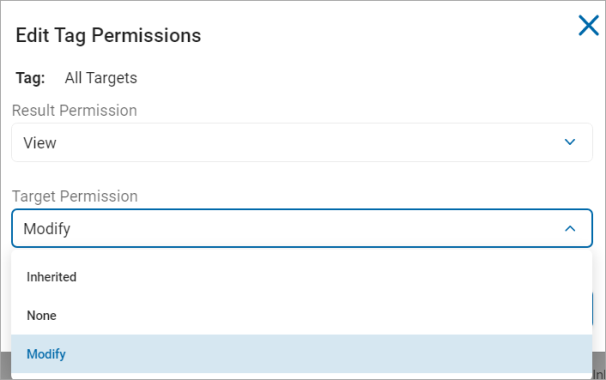
Select any of the following options from the Target Permission drop-down list.
-
Inherited
-
None
-
Modify
-
-
Click Confirm to save or Cancel to discard.
A tag permission can be inherited by the user role assigned to the user.
You can change the permission level to Individual by overriding role level result and target permissions. Also, you can change the permission level to Individual/Role by overriding either role level result or target permissions.
How to Remove User Tag Permissions
To remove user Tag permissions:
-
Locate the user for which you want to remove permissions in the list.
-
Click the ellipse menu at the end of the row.
-
Click Manage Permissions.

-
Locate the tag name to remove permissions for a role.
-
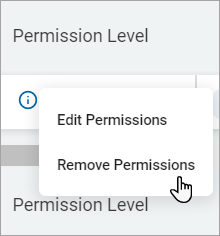
On the far right of the tag row, click the more options menu.
-
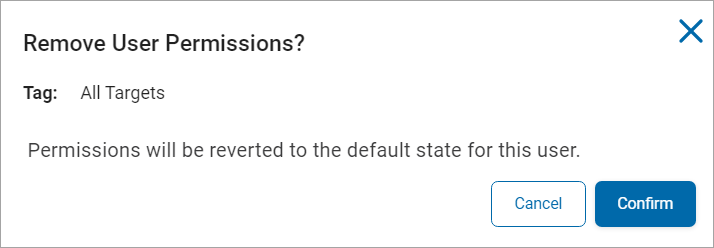
Click Remove Permissions.
-
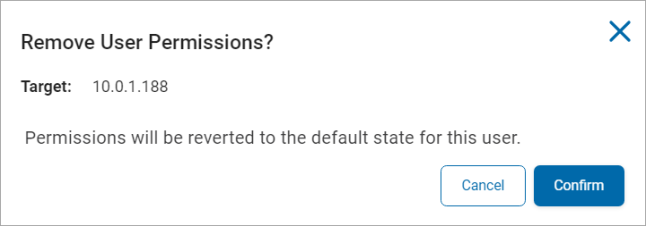
On the Remove User Permissions pop-up window, click Confirm to revert the user permissions to its default state else click Cancel.
Target Permissions
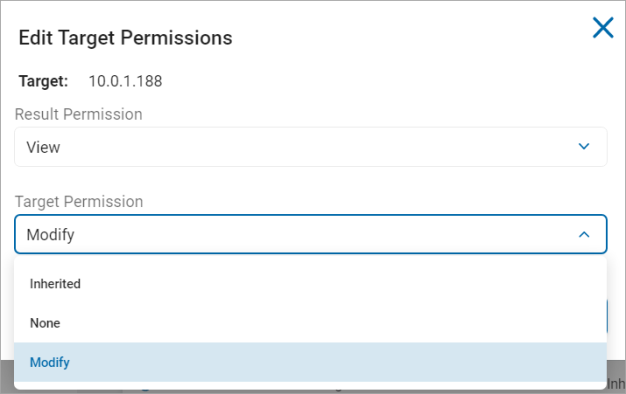
How to Edit User Target Permissions
To edit user Target permissions:
-
Locate the user for which you want to edit permissions in the list.
-
Click the ellipse menu at the end of the row.
-
Click Manage Permissions.
-
On the Manage User Permissions page, locate a target to edit permissions for a user.
-
On the far right of the target, click the more options menu.
-
Click Edit Permissions.
-
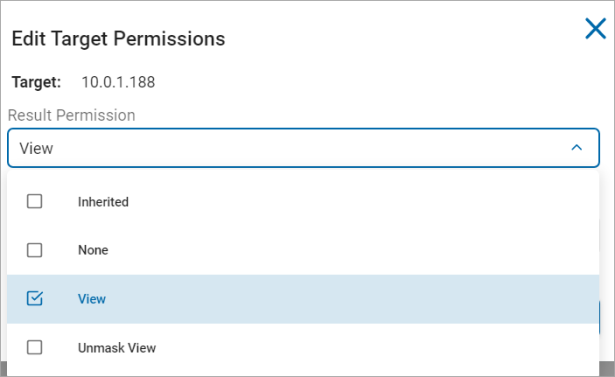
On the Edit Target Permissions pop-up window, select any of the following options from the Result Permission drop-down list.
-
Inherited
-
None
-
View
-
Unmask view
-
-
Select any of the following options from the Target Permission drop-down list.
-
Inherited
-
None
-
Modify
-
-
Click Confirm to save or Cancel to discard.
A target permission might be inherited by the user role assigned to the user.
You can change the permission level to Individual by overriding role level result and target permissions. Also, you can change the permission level to Individual/Role by overriding either role level result or target permissions.
How to Remove User Target Permissions
To remove user Target permissions:
-
Locate the user for which you want to remove permissions in the list.
-
Click the ellipse menu at the end of the row.
-
Click Manage Permissions.
-
On the Manage User Permissions page, locate the target name to remove permissions for a user.
-
On the far right of the row, click the more options menu.
-
Click Remove Permissions.
-
On the Remove User Permissions pop-up window, click Confirm to revert the user permissions to its default state else click Cancel.
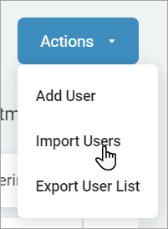
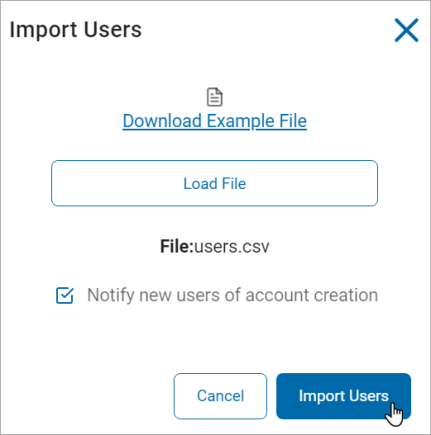
How to Import Users
To import a user:
-
Ensure you are on the USERS tab.
-
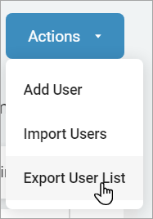
In the top right of the screen, click Actions.
-
Click Import Users.
-
On the Import Users pop-up window:
-
Click Download Example File to download a user template
-
Click Load File to browse and upload a user file from a location on your system.
-
Select the Notify new users of account creation check box to notify new users about their accounts.
-
-
Click Import Users else click Cancel to discard the changes.
How to Export User List
To export a user list:
-
Ensure you are on the USERS tab.
-
In the top right of the screen, click Actions.
-
Click Export User List.
-
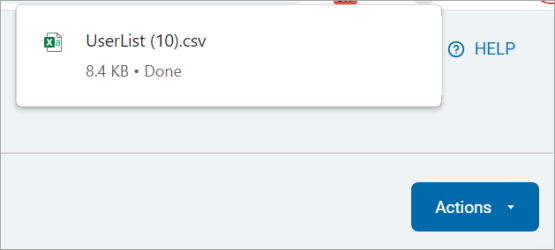
The exported user list displays on the top of the page. Click it to open and check the details.
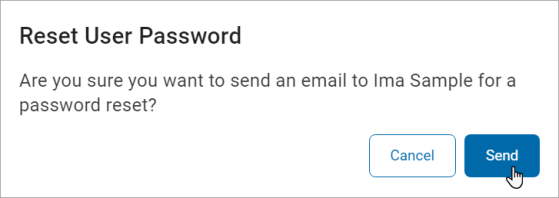
How to Reset Password for Users
To reset password for users:
-
Locate the user for which you want to reset the password.
-
Click the ellipse menu at the end of the row.
-
Click Reset Password. A pop-up window displays to confirm whether to send an email to the user for password reset or not.
-
Click Send to send the email else click Cancel.
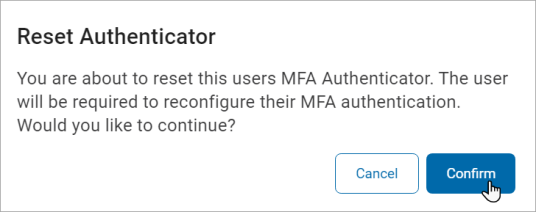
How to Reset the Authenticator for Users
To reset authenticator for users:
-
Locate the user for which you want to reset the MFA Authenticator.
-
Click the ellipse menu at the end of the row.
-
Click Reset Authenticator.
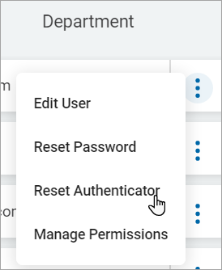
-
A pop-up window displays to confirm whether to reset authenticator for the user or not.
-
The user then reconfigures their MFA authentication.
-
Click Confirm to reset the authenticator else click Cancel.