
User Guide
How to Manage User Roles
Overview
You can manage your roles on the User Management screen:
-
View a Role
-
Search for a Specific Role
-
Create a new Role
-
Identify Spirion Defined Roles
Granular Permissions
Roles include granular permissions to determine whether users can read, create or manage:
-
Individual Scans
-
Playbooks
-
Reports created by other users
-
Note: All Role permissions can be modified, (including deletion). This does not apply to the Admin role.
Default User Roles
Below is a list of native user roles and their permissions.
Note: By default all users assigned to a custom role have access to the SPIglass™ Dashboard, Data Asset Inventory (including the SDV3™ dashboard, Targets, and Tags), Agent Management, scans, playbooks, and reports.
-
The agents, targets, scans, playbooks, and reports a user can view and manage are controlled by Role-based Access Control (RBAC) permissions that can be setup after the role is created.
-
Access to all tags, targets, scans, and reports are denied by default, excluding only those the user created before being assigned to the role.
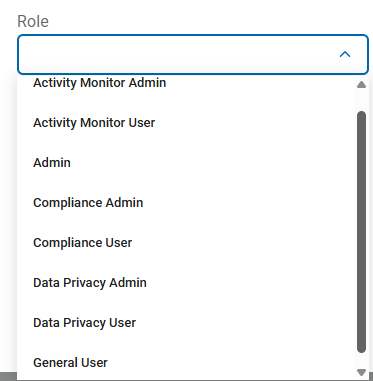
Native User Roles
You can assign users to the following roles. Users inherit the permissions provided by the role they are assigned.
Note: An admin can create a custom role if the following default roles and their inherent permissions do not meet your needs.
-
Activity Monitor Admin
-
View permissions:
-
Agent Policies/Installation - User can view agent policies and agent configuration installations
-
Sensitive Data Watchers* - User can view Sensitive Data Watchers. See Spirion User Guide.
-
* requires User Guide feature (requires separate license)
-
-
Manage permissions:
-
Agent Policies/Installation - User can manage agent policies and agent configuration installations
-
Sensitive Data Watchers* - User can manage Sensitive Data Watchers
-
* requires User Guide feature (requires separate license)
-
-
-
Activity Monitor User
-
View permissions:
-
Sensitive Data Watchers* - User can view Sensitive Data Watchers
-
* requires User Guide feature (requires separate license)
-
-
Manage permissions:
-
None
-
-
-
Admin
-
No restrictions
-
Admin users have full control
-
Admin role permissions cannot be changed
-
Only Admin users have permission to view and use the Global Ignore Lists section on Scans Settings page (under Settings>Application Settings).
-
-
Compliance Admin
-
View-Only permissions:
-
Sensitive Data Finder* - User can view Sensitive Data Finders
-
Sensitive Data Finder* (Erasure Checklist)
-
* requires Sensitive Data Finder feature (requires separate license)
-
-
Manage permissions:
-
Sensitive Data Finder* - User can manage Sensitive Data Finders
-
Sensitive Data Finder* (Erasure Checklist)
-
* requires User Guide feature (requires separate license)
-
-
-
Compliance User
-
View-Only permissions:
-
Sensitive Data Finder* - User can view Sensitive Data Finders
-
Sensitive Data Finder* (Erasure Checklist)
-
* requires User Guide feature (requires separate license)
-
-
Manage permissions:
-
None
-
-
-
Data Privacy Admin
-
View permissions:
-
Agent Policies/Installation - User can view agent policies and agent configuration installations
-
Script Repository - User can view the custom script repository
-
Scan Results - User can view sensitive data and discovery scan results
-
-
Manage permissions:
-
Create Tags and Targets - User can create tags and targets
-
Role-based Access Control (RBAC) permissions are used to control the playbooks a user in this role can view, modify, or delete. By default, users are permitted to view and manage any tag or target they create.
-
-
Create Scans - User can create sensitive data and discovery scans
-
Role-based Access Control (RBAC) permissions are used to control the playbooks a user in this role can view, modify, or delete. By default, users are permitted to view and manage any scan they create.
-
-
Create Playbooks - User can create playbooks. Creating playbooks requires read-only access to the custom script repository. The Manage option grants this access when the user role is created.
-
Role-based Access Control (RBAC) permissions are used to control the playbooks a user in this role can view, modify, or delete. By default, users are permitted to view and manage any playbook they create.
-
-
Create Custom Reports - User can create custom reports
-
Role-based Access Control (RBAC) permissions are used to control the playbooks a user in this role can view, modify, or delete. By default, users are permitted to view and manage any report they create.
-
-
Scan Results - User can manage sensitive data and discovery scan results
-
-
-
Data Privacy User
-
View permissions:
-
Agent Policies/Installation - User can view agent policies and agent configuration installations
-
Scan Results - User can view sensitive data and discovery scan results
-
Script Repository - User can view the custom script repository
-
-
Manage permissions:
-
None
-
-
-
General User
-
View permissions:
-
Scan Results - User can view sensitive data and discovery scan results
-
-
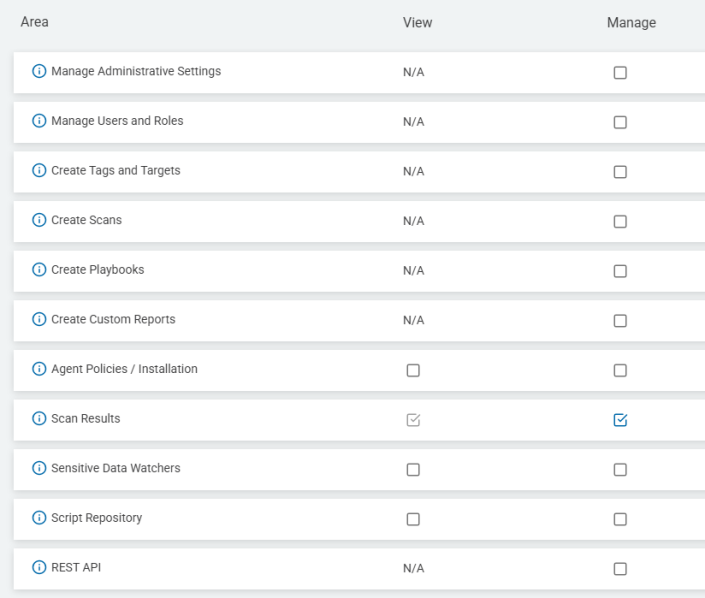
Available User Role Permissions
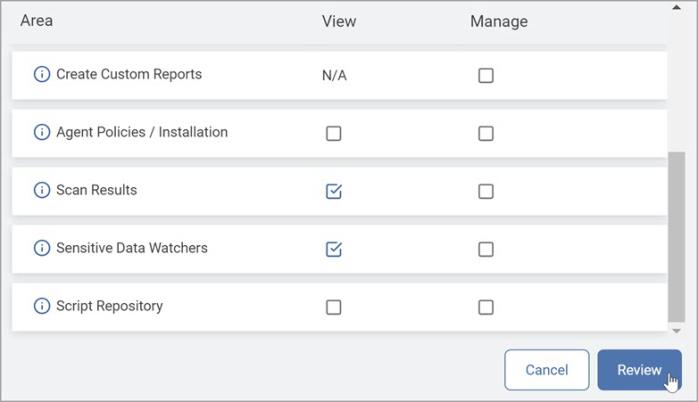
When you create or edit a role in Sensitive Data Platform, the screen below appears which provides you a list of available permissions to assign to your user role.
-
Permissions can assigned as either or both:
-
View (Read) - Check the View box for a permission to enable read access.
-
Manage (Write/Create/Delete) - Check the Manage box for a permission to enable write, create, and delete actions. Check the Manage box for a permission and the correlated View box (Read access) is automatically enabled.
-
Custom Roles
When creating custom roles for subsets of users:
-
Access is built through explicit inclusion by specifying what playbooks, scans and reports should be available.
Read Permission
-
Scan Policy: the Read permission for a Scan Policy enables users to only initiate a scan.
-
This means the policy details cannot be seen via the create/edit screen.
-
-
Playbook: the Read permission for a Playbook enables users to select a playbook when defining a scan.
-
Users with this level of access are not able to view the playbook itself until navigating to a result’s executor view (if authorized).
Note: Users have full control over objects they create, even if their permissions to create new items are subsequently restricted.
Note: See Defining Access Controls for more information on how to manage your Roles' access to data.
-
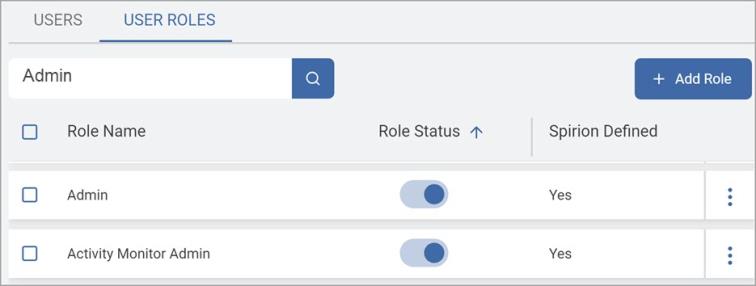
How to View a Role
-
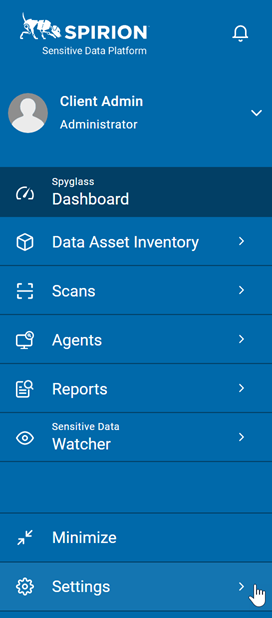
From the left menu, click Settings.
-
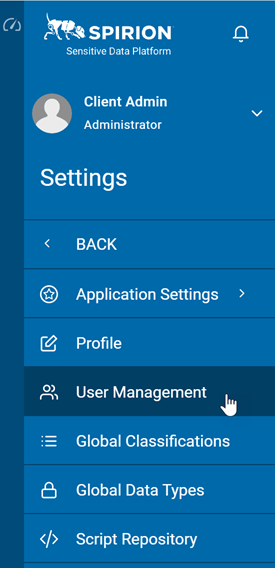
Click User Management.
-
Click the Roles tab.

-
Roles are displayed in a table by Role Name and Role Status (enabled or disabled).

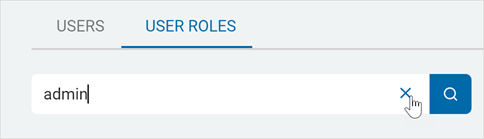
How to Search for a Role
To search for a specific Role:
-
Ensure the Roles tab is selected.
-
In the search box, type the Role name.
-
Roles matching your search criteria are displayed in the list.
-
Click x to clear the search term.
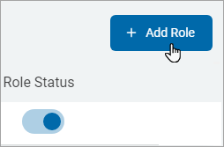
How to Add a New Role
To add a new Role:
-
Ensure you are on the User Roles tab.
-
In the top right of the screen, click Add Role.
- SPIglass™ Dashboard
- Data Asset Inventory (including the SDV3™ dashboard, targets, and tags)
- Agent Management
- Scans
- Playbooks
- Reports
-
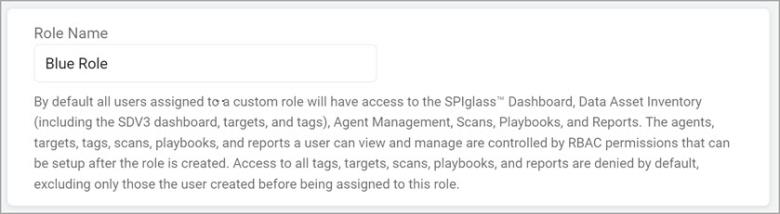
On the Create New Role page, complete the following:
-
Type a name in the Role Name box.
Note: User Role names must be unique.
-
Select the appropriate access for View and Manage.
Note: Custom roles do not have access to existing scans, playbooks, or reports by default.
Permissions to Read or Manage these resources are handled in the subsequent step. -
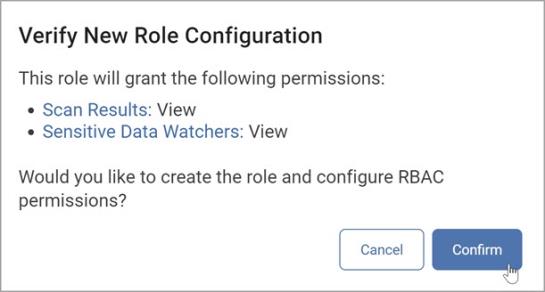
Click Review. The Verify New Role Configuration pop-up window displays.
-
Review the permissions you have granted for the new role.
-
Click Confirm to create the new role or click Cancel to discard.
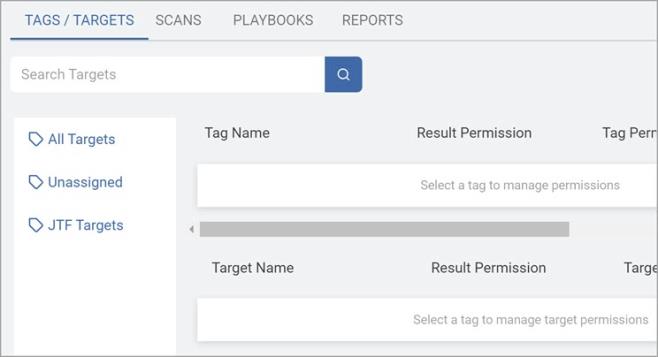
-
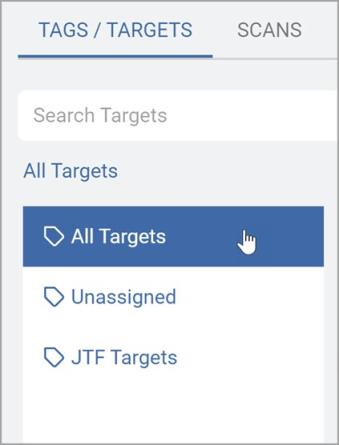
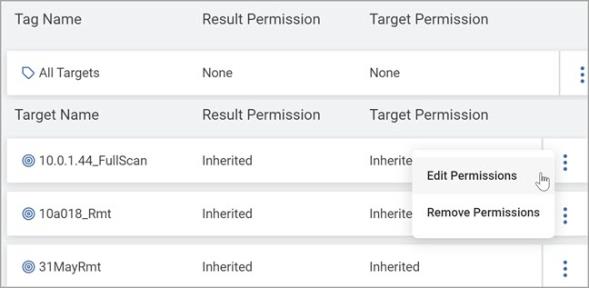
On the Tags/Targets tab, select any relevant Tag groups or Targets for the role.
Select either:
-
All Targets
-
Custom tag (which is Inherited by default)
-
-
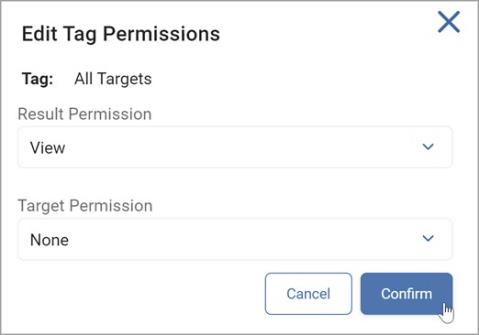
From the kebab menu, select Edit Permissions.
-
In the Edit Tag Permissions pop-up window controls, select from the following:
-
Partial or full visibility of matches against the Tag or Target.
-
Whether users can add Targets or create nested Tags when working with manual Tag types.
-
Enables Modify access to be assigned to edit target details
-
-
Click Confirm to save the settings or Cancel to discard.
-
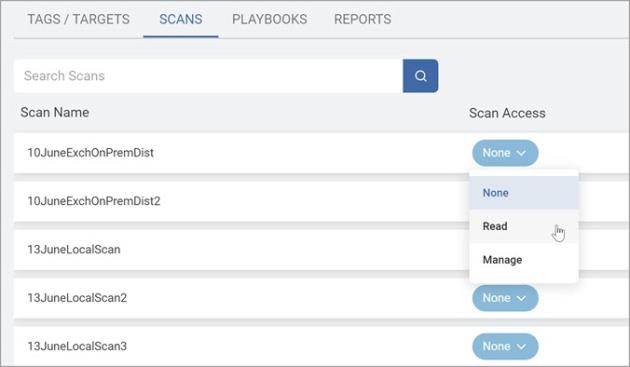
On the SCANS tab, select which scan(s) should be accessible to the role.
-
As previously stated above, Read enables scans to be executed from the kebab menu from the Scans table.
-
Select from:
-
None
-
Read
-
Manage
-
-
-
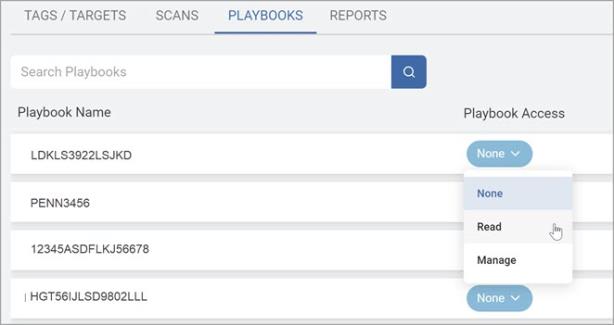
From the Playbooks tab, select which playbook(s) should be accessible to the role.
-
As previously stated above, Read enables playbooks to be selected during the scan creation process (if authorized to create scans).
-
Select from:
-
None
-
Read
-
Manage
Note: The Playbook Override option controls whether a role is authorized to perform user-level remediation against the specified Target(s).
-
-
From the Reports tab, select which report(s) should be accessible to the role.
-
Select one of the following:
-
None
-
Read
-
Manage
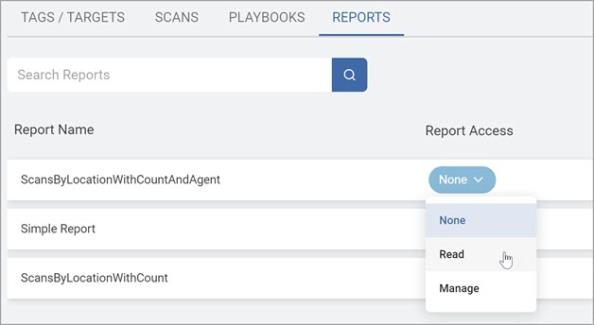
Note: Reports with Read access can be viewed in the console only and exporting is not allowed.
-
-
Note: By default all users assigned to a custom role have access to the following Sensitive Data Platform pages (pages only):
Specific Sensitive Data Platform objects, such as specific: Agents, Targets, Tags, Scans, Playbooks, and Reports are accessed and/or managed by users as set by the role they are a member of (RBAC). This can be set up after the role is created.
By default, user access to all Tags, Targets, Scans, Playbooks, and Reports is denied (excluding to those objects the user created before being assigned to their role).
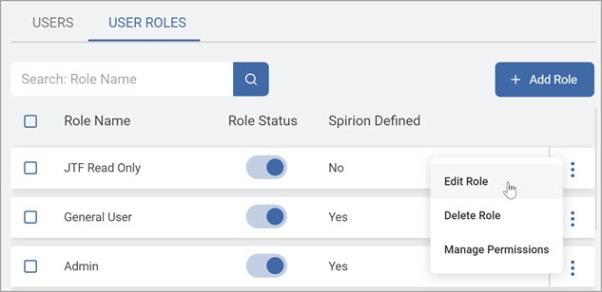
How to Edit a Role
To edit a Role:
-
Ensure you are on the User Roles tab.
-
Locate the role you want to edit.
-
Select Edit Role from the kebab menu.
-
Select the appropriate View and Manage access for the role.
-
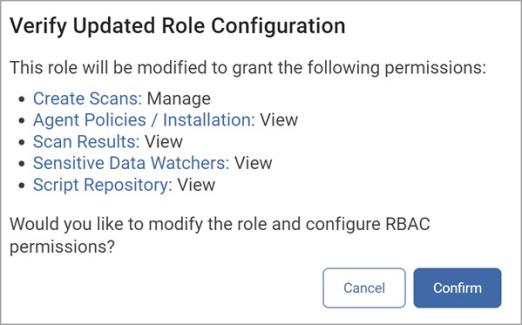
Click Review.
-
In the Verify Updated Role Configuration pop-up window, click Confirm to save your selections or Cancel to discard.
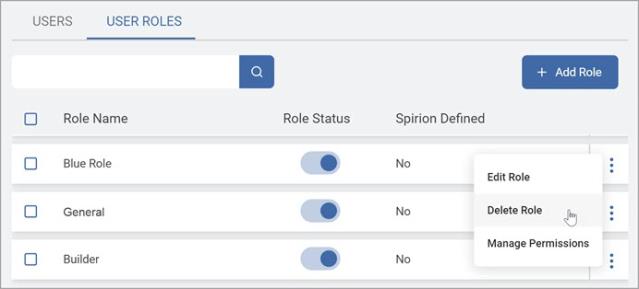
How to Delete a Role
To delete a Role:
-
Ensure you are on the User Roles tab.
-
Locate the Role you want to delete.
-
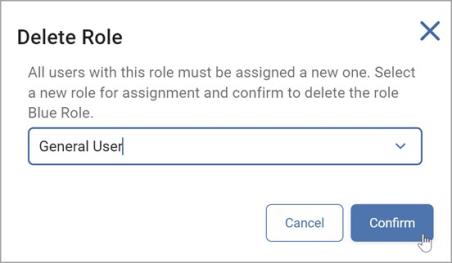
From the kebab menu, select Delete Role.
-
In the Delete Role pop-up window, you must select a new role for users currently assigned the role to be deleted.
-
Click Confirm to save your changes or Cancel to discard.
Note: Disabling a role prevents it from being assigned to new users but does not impede the access of currently assigned users.