User Guide
How to Use Scan Results
Overview
The Scan Results screen shows the results of all scans.
It's important to remember:
-
There are two types of scans:
-
Discovery Scans
-
Sensitive Data Scans
-
-
You can search for scans based on different criteria and filter views.
Sorting
The blue arrow next to a column heading indicates what metric is being used to sort the scan result shown.
By default, scan results are shown sorted by the Date/Time Most Recent column. Select any column head to sort by that column metric.
Scan Results help you understand:
-
What data is being scanned
-
Type of scan
-
Date of the scan
-
What Playbook(s) are being used
-
What Data Types are being used
-
Who owns the Targets being scanned
-
Location(s) of sensitive data
-
Results and resolution status of the scans
See the following topics for more information:
How to View Scan Results
To view Scan Results use the following steps:
-
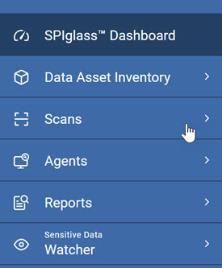
From the left menu, click Scans.
-
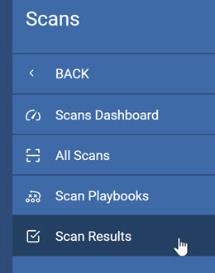
Click Scan Results.
-
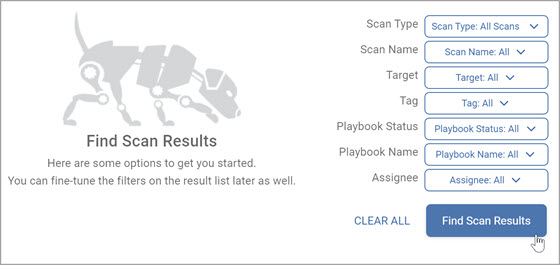
The Find Scan Results page displays.
-
From the selection criteria on the right, select options from the drop-down list to sort scan results and click Find Scan Results.
-
Else, just click Find Scan Results.
-
-
Scans Results are displayed in a list sorted by column.
NOTE: The blue arrow next to a column heading indicates what metric is being used to sort the scan result shown. By default, scan results are shown sorted by the Date/Time Most Recent column. Select any column head to sort by that column metric.
-
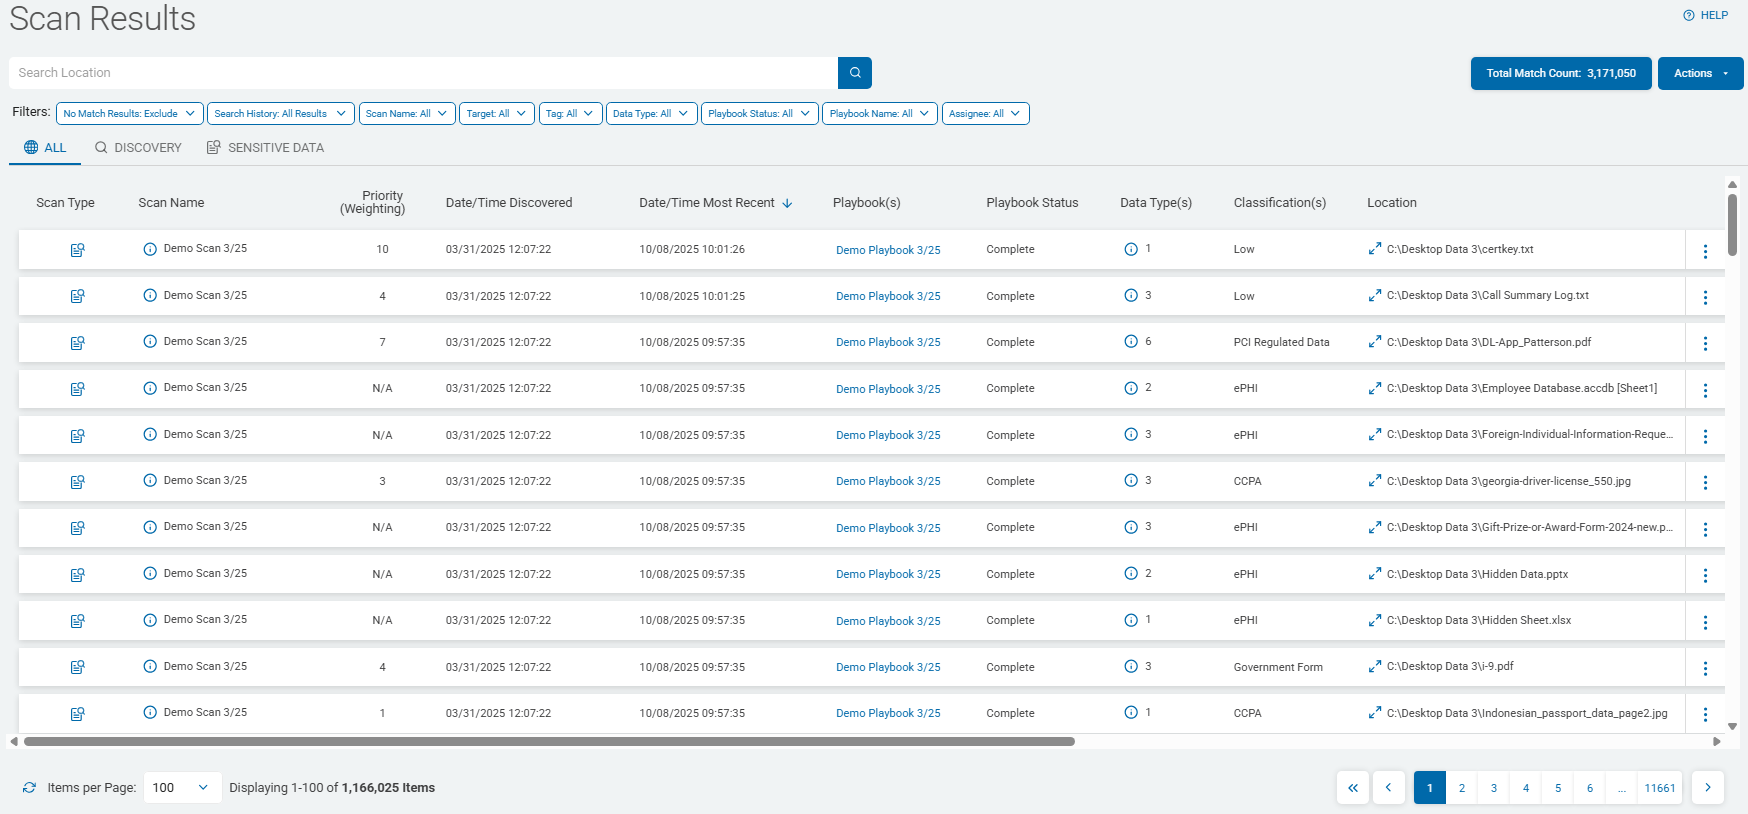
Scan Type - Either Discovery (metadata only) or Sensitive Data scan.
-
See the icons below.
-
Note that Discovery scans scan for metadata only, they do not scan for sensitive data.

-
-
Scan Name - Name of the scan. Click the icon to see a history of scans that have found the location (shown in the location column).
-
Priority (Weighting) - Calculated from the weight assigned to the playbook decision combined with playbook nodes directly after the playbook, the data type weights, and the number of matches in a given location.
-
Date/Time Discovered - Date/time the location was discovered (Discovery scan). First date/time a match was discovered in the location (Sensitive Data scan). Does not change if the location is discovered multiple times.
-
Date/Time Most Recent - The most recent time a scan found the location.
-
Playbook(s) - List of every playbook that has been used by any scan that found this location. Mouse over entry for more information.
-
Playbook Status - Status of each playbook from the Playbook(s) column. Mouse over entry for more information.
-
Examples: Processing, Complete, User action required (such as manual input needed), User intervention required (such as file cannot be redacted, action failed), etc.
-
-
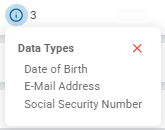
Data Type(s) - Sensitive data types found in the location (social security numbers, credit card numbers, SIN, etc.).
-
Example 1: A scan searches for 10 data types, but a given location contains only 1 data type.
-
Example 2: Multiple data types are in the same location: Date of Birth, E-Mail Address, Social Security Number. See below.
-
-
Classification(s) - Classifications of the data captured by the scan (Classified, Secret, Top Secret, custom classifications, etc.)
-
Location - Location from your scan where sensitive data matches were found.
-
Examples:
-
C:\Passwords\passwords.txt
-
\\20.60.220.111\project-Adam-files\myproject\addresses.txt
-
Google Drive: smithj@myCompany.net/ProjectData.docx
-
https://MyCompany.sharepoint.com/ProjectA/Shared Documents/SensitiveData.docx
-
-
-
Match Count - The count of sensitive data matches found in the location.
-
This count can include matches from multiple different scans. It simply counts the data matches linked to the location. If a scan finds 10 instances of the same SSN in a location, the count is 10, not 1.
-
-
Most Recent Action - Most recent playbook action taken (sensitive data file shredded, redacted, classified, etc.). Click the icon for recent action history.
-
Agent Scanning - Agents performing the scan that discovered the location.
-
Target Being Scanned - Target being scanned
-
File Owner - Owner of the Location file
-
Assignee - User or role is assigned to a location via a playbook Assign card.
Sample Scan Results - 1st half
Sample Scan Results - 2nd half (scroll right)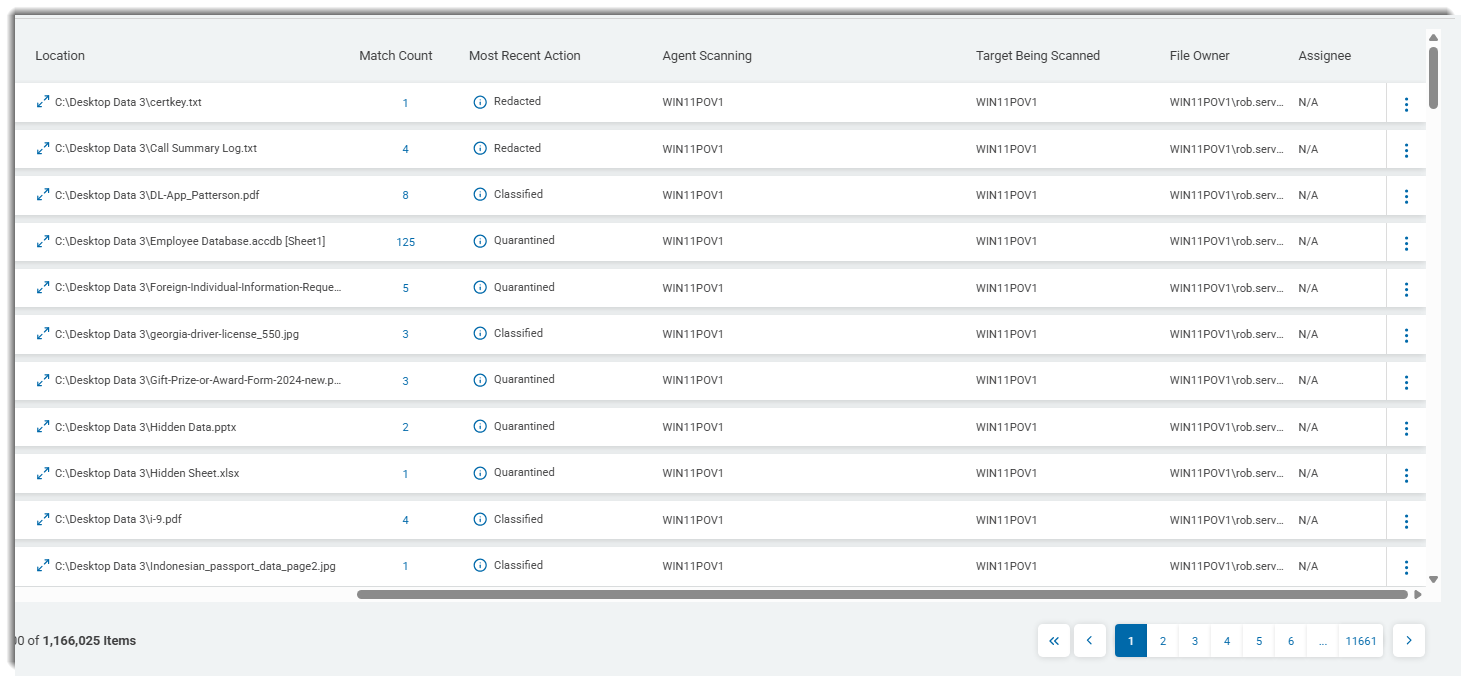
-
-
You can further sort the results:
-
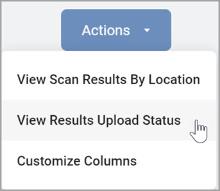
Click Actions.
-
Select any of the following options:
-
View Scan Results by Match - View scan results by sensitive data match, such as
-
View Results Upload Status -
-
-
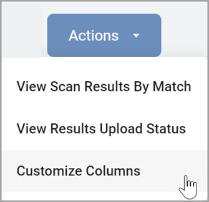
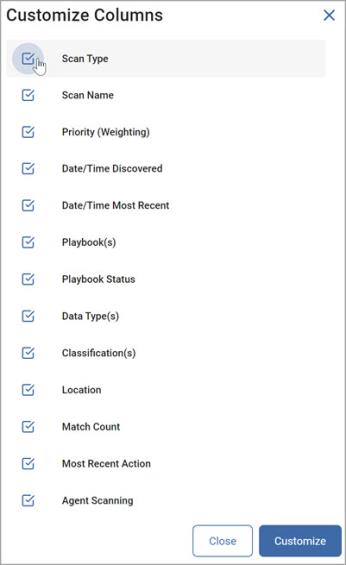
You can Customize the Columns:
-
Click Actions.
-
Select Customize Columns.
-
-
-
Select the columns you want to display and click Customize.
-
See How to Customize Scan Results Columns for more information.
-
-
Use Filters to locate scans using specific criteria.
-
See How to Use Filters to Find Scan Results for more information.

-
How to Search for a Scan Result By Location
To search for a Scan result by location:
-
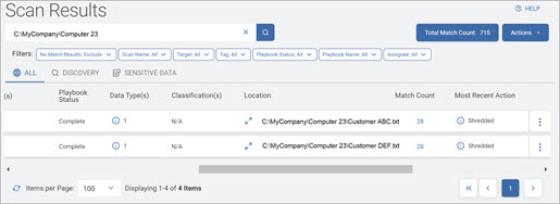
Type a location name in the search box and click the lens icon or Enter on your keyboard.

-
The results are displayed in a list below.
-
Click the x to clear the search term.
How to Use Filters to Find Scan Results
To use the filter feature to find Scan Results based on specific criteria:
-
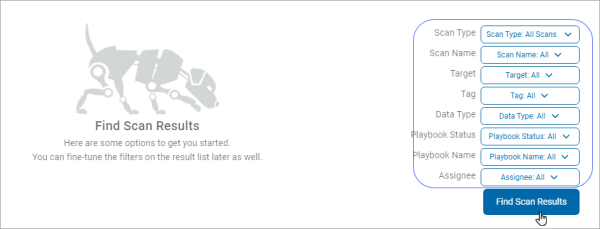
On the Find Scan Results screen, select a criteria with which you want to sort the scan results.
-
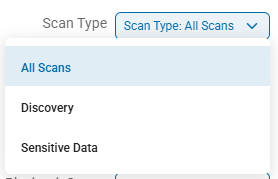
From the drop-down list, select a Scan Type:
- All Scans - Both Discovery and Sensitive Data scans
- Discovery - Scan for locations which contain sensitive data (metadata only)
- Sensitive Data - Scan identified locations for sensitive data (social security numbers, credit card numbers, phone numbers, addresses, IMEI, etc.)
-
For the below selection criteria, select one or more items from the drop-down list.
- Scan Name - Name of the scan(s) to include in scan results
- Target - Name of the Target(s) to include in scan results
- Tag - Name of the Tag(s) (collection of Assets/Targets or Agents) to include in scan results
- Data Type - Type of sensitive data to include in scan results. Example: social security numbers, credit card numbers, SIN, etc.
- Playbook Status - Status of the playbook to include in scan results, such as complete, user action required (such as manual input needed), user intervention required (such as file cannot be redacted, action failed), etc.
- Playbook Name - Name of the playbook(s) to include in scan results.
- Assignee - Any sensitive data discovered by the scan that match the criteria in the playbook are assigned to the role or user (email address) specified here. This user then applies remediation action to the data such as quarantine, shred, restrict access, etc.. See Assign.
-
Playbook name - In this case, multiple playbooks are selected.
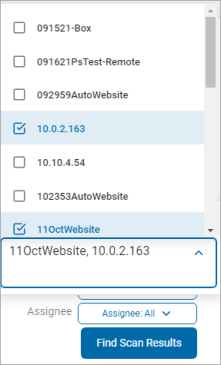
-
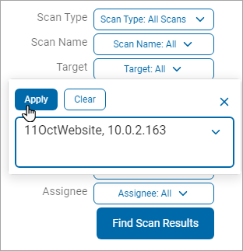
Click Apply to apply the filter.
-
Click Clear and then click Apply to remove the filter.
Note: You can add multiple filters.
However, adding multiple filters can extend the wait time for the search results. -
Click Clear All to clear all the filters, else click Find Scan Results. The Scan Results screen appears.
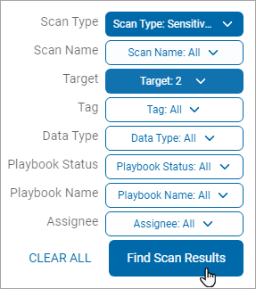
-
In the upper left of the screen, go to the Filters.

-
For the below selection criteria, select one or more items from the drop-down list.
- Scan Name - Name of scan
- Target - Name of Target
- Tag - Name of Tag
- Data Type - Type of data, such as:
- Date of birth, Social Security number, SIN, IMEI, file hash, keyword, etc.
- Playbook Status - Status of playbook:
- Complete, Error, Overridden, Processing, User Action Required, User Intervention Required
- Playbook Name - Name of playbook
- Assignee - User or role assigned via playbook action. See Assign.
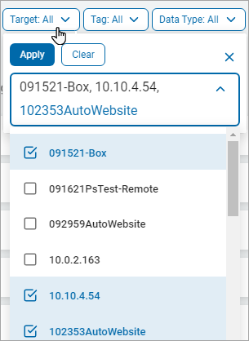
-
Click Apply to apply the filter to the Scan Results list.
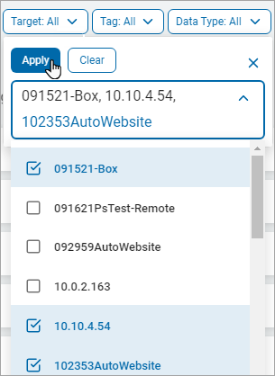
-
Click Clear and then click Apply to remove the filter.
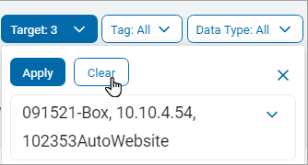
-
The results are displayed in the Scan Results table.
-
To remove all the set filters click Clear All.
Note: You can add multiple filters. However, adding multiple filters can extend the wait time for the search results.
How to Customize Scan Results Columns
To customize scan results columns:
-
In the top right of the screen, click Actions.
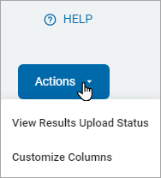
-
Click Customize Columns from the drop-down list.
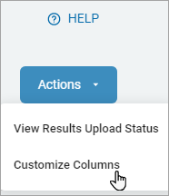
-
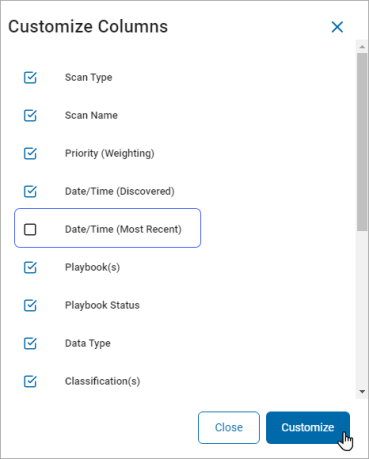
In the Customize Columns pop-up window, select the columns to display in the Scan Results.
-
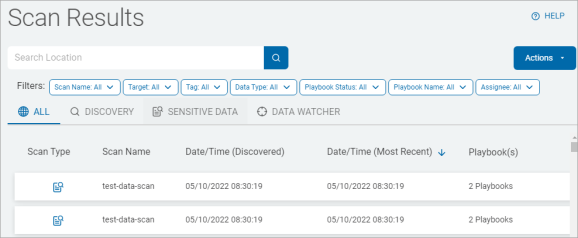
For example, if you select all the columns except Date/Time (Most Recent), it does not display in the Scan Results.
-
-
Click Customize. The Scan Results page displays with the selected columns.
How to Ignore Sensitive Data Matches
To ignore specific scan results:
-
From the Scan Results screen, locate the result you want to ignore.
-
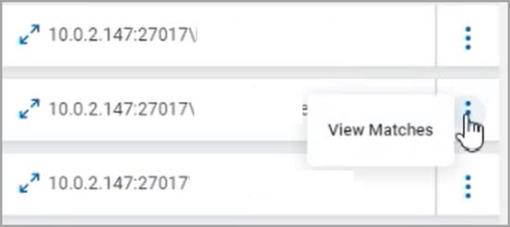
Click the kebab menu on the right and select View Matches.
-
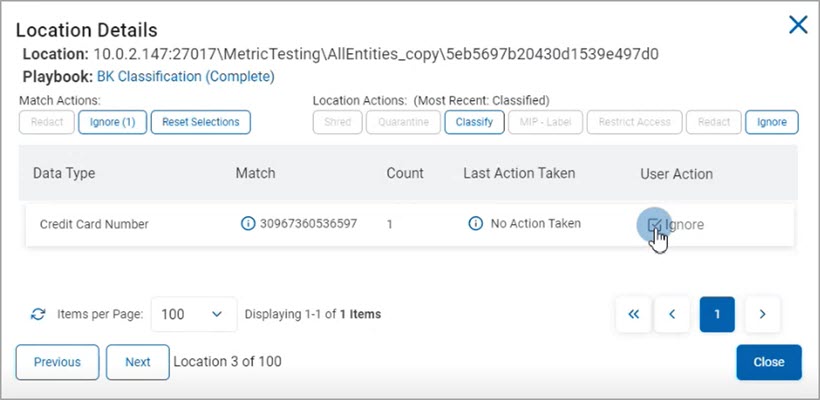
In the Location Details pop-up window, locate the specific record you want to ignore - such as a specific credit card number match - and in the User Action column, select Ignore.
-
In the Match Actions section, click Ignore.
-
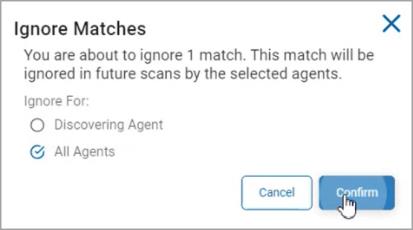
In the Ignore Matches pop-up window, select one:
-
Discovering Agent
-
All Agents
-
-
Click Confirm to save or Cancel to discard.
-
Click Close.
How to View Ignored Sensitive Data Matches
You can view ignored results from your scan by:
-
Location - The file - including file path - that contains one or more sensitive data matches. For example: C:\windows\users\passwords\password.txt
-
Matches - Specific sensitive data matches, such as a specific: social security number, date of birth, SIN, IMEI, credit card number, etc..
How to View or Change the Status of Ignored Locations
To view or change the status of ignored Locations:
-
Go to Scans then Scan Results.
-
Select one or more scans you want to review for ignored results.
-
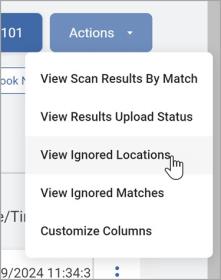
Click Actions.
-
Select View Ignored Locations.
-
In the Ignored Locations pop-up window, you can view all ignored Locations.
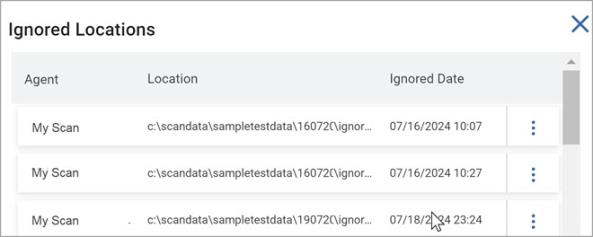
To unignore a Location:
-
In the Ignored Locations pop-up window, find the specific file Location you want to unignore.
-
From the kebab menu on the right, select Unignore.

-
The Location status is updated when you next run the scan.
How to View or Change Status of Ignored Sensitive Data Matches
Procedure:
-
Go to Scans then Scan Results.
-
Select one or more scans you want to review for ignored results.
-
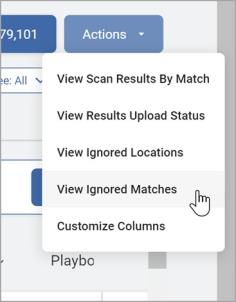
Click Actions.
-
Select View Ignored Matches.
-
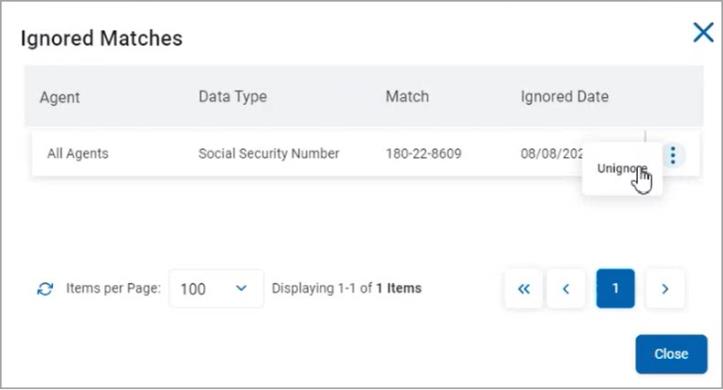
In the Ignored Matches pop-up window, you can view all ignored matches.
-
To unignore a Match:
-
In the Ignored Matches pop-up window, find the Match you want to stop ignoring (unignore).
-
From the kebab menu on the right, select Unignore.
-
The Match status is updated when you next run the scan.
-
How to View the Upload Status of Scan Results
To view the detailed status of all your scans and the total Uploads Count:
-
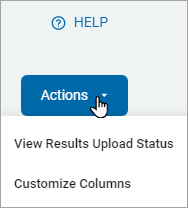
In the top right of the screen, click Actions.
-
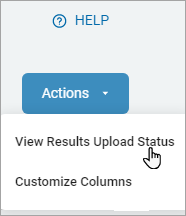
Click View Results Upload Status from the drop-down list.
-
The results are displayed in a list sorted by column:
-
ID
-
Type
-
Flag
-
Error
-
State
-
Size
-
Search Detail Id
-
Begin Import Timestamp
-
Agent Name
-
Error Details
-
Target GUID

-
-
The Upload Counts sections shows count of the following:
-
Uploads Working
-
Uploads Failed
-
Uploads Done

-
-
Click Back To Scan Results to go back to the Scan Results page.
How to View Scan Results File Information
To view detailed information of a scan result:
- Click the playbook(s) link of a scan result.
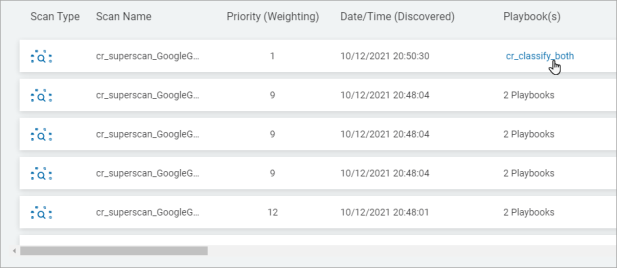
- Expand to view each file information section on the Playbook Executor page.
- Each section displays the playbook executor of the scan result until you click the down arrow (
 ) and then appears at the bottom of the section.
- Each section displays the playbook executor of the scan result until you click the down arrow (
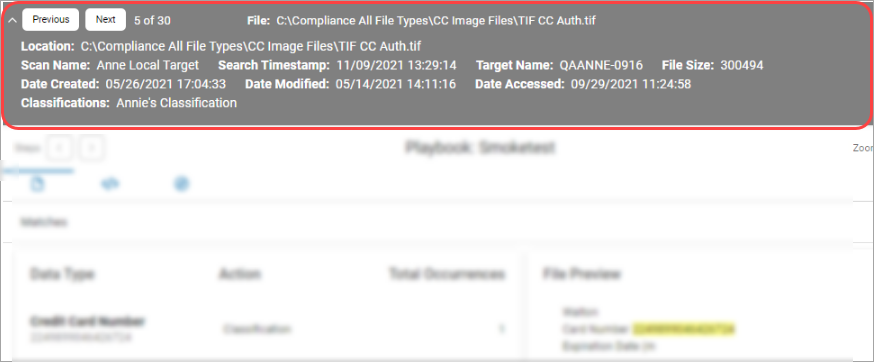
Header Information
The header displays the following information.
- Previous: Navigates to the previous result location. The button is disabled if you are on the first location.
- Next: Navigates to the next result location. The button is disabled if you are on the last location.
- Back to List: Navigates to the Scan Results page.
- File: The path of the file where the scan results are found.
- Location: The path of the location where the scan results are found.
- Scan Name: The name of the scan performed on the scanned file.
- Last Search Date/Time: The date and time when the scan was last performed.
- Target Name: The Target of the scanned file.
- Date Created: The create date of the scanned file.
- Date Modified: The last modified date of the scanned file.
- Date Accessed: The access date of the scanned file.
- Classification: The classification applied to the scanned file.
Matches
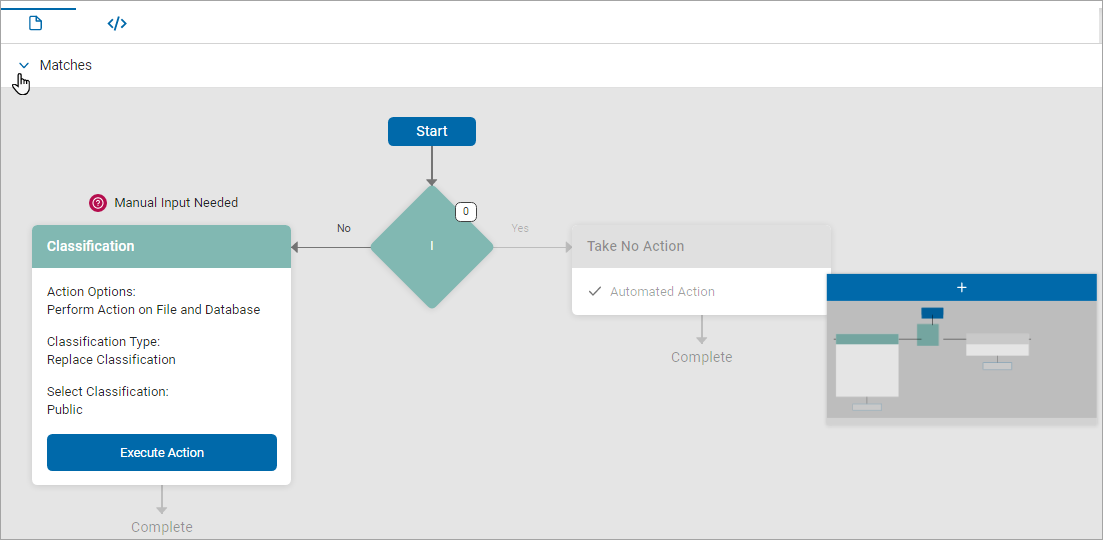
Procedure:
-
In the Matches section, click the down arrow (
 ).
). 
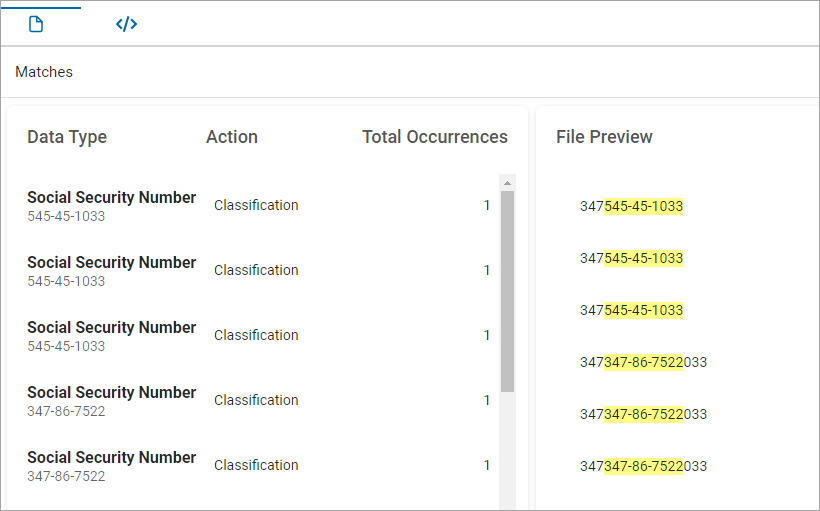
The following information displays:
-
Data Type: The data type that is found in the scan result.
-
Action: The action that is performed on the data type. For example: Classification
-
Total Occurrences: Total occurrences of a data type found in the file scanned.
-
File Preview: Data type match from the file scanned.
Meta Data
The matches section displays the following:
-
Access Date: The access date of the scanned file.
-
Create Date: The create date of the scanned file.
-
Data Type: The data type searched in the scanned file.
-
File Attribute: The attribute of the scanned file.
-
File Owner: The owner of the scanned file.
-
File Name: The name of the file being scanned.
-
File Size:The size of the scanned file.
-
File Location: The location of the scanned file.
-
Modify Date: The last modified date of the scanned file.
-
Scan Name: The name of the scan performed on the scanned file.
-
Last Search Time/Date: The date and time when the last scan was performed.
-
Search User: The user who performed a search on the file.
-
Target Name: The endpoint where the file was scanned.

