User Guide
Working with Data Assets and Targets
Overview
The Data Assets and Targets page is where you can view and manage Assets and Targets.
Assets
-
Locations, physical or cloud, that contain Targets.
-
Examples
-
A SQL Server hosted on-premise at your business
-
A Dropbox account you maintain.
-
Assets can contain single or multiple Targets
Targets
-
Any data location(s) within an Asset that Sensitive Data Platform can scan for sensitive data.
-
They can be in a “physical” box that can be scanned or a cloud Asset with data.
Examples of Assets and Targets
-
An SQL server (Asset) with multiple SQL Databases hosted on it (Targets)
-
A SharePoint Online instance (Asset) with multiple sites (Targets)
-
A Workstation (Asset and single Target), or a Azure Data lake (Asset that can’t be scanned)
See the sections below for more information:
Access and View Data Assets and Targets
Procedure:
-
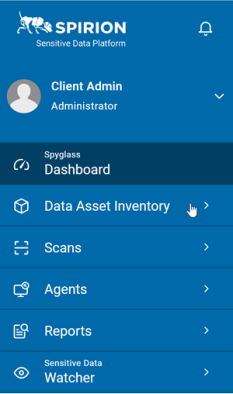
From the left menu, click Data Asset Inventory.
-
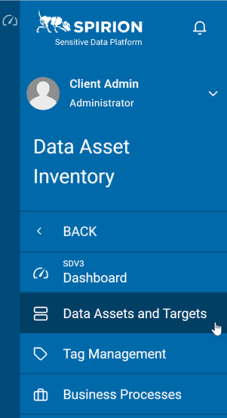
Click Data Assets and Targets.
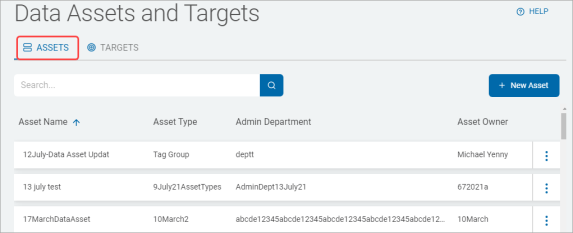
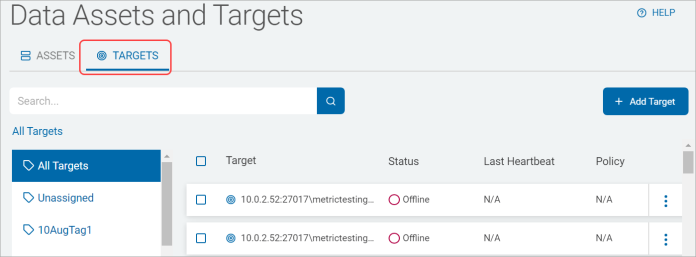
On the Data Assets and Targets screen there are two tabs, Assets and Targets.
Assets
The Assets tab displays in a table with these column headings:
- Asset Name - Name of the asset
- Asset Type
-
Cloud Sources - Cloud sources such as: Google Drive, OneDrive, etc.
-
Collaboration - Collaboration tools such as: SharePoint and Bitbucket
-
Database - Databases such as: Oracle, Snowflake, SQL, etc.
-
Email - Email sources such as Exchange, Gmail, etc.
-
Files & Folders - For asset types such as a File servers or the files and folders on a workstation, laptop, desktop, etc.
-
Tag Group - Defines the asset as a Tag group
-
Websites - Defines the asset as a website
-
- Admin Department - Department that primarily manages the asset
- Asset Owner - Name of the person that primarily manages the asset
- Hosting Location - Name of the location where the asset is hosted. Example: Tampa data center
- Status - Status of the asset - Active or Inactive.
-
SDV3 Risk - SDV3 risk of the asset. See Working with SDV3™.
-
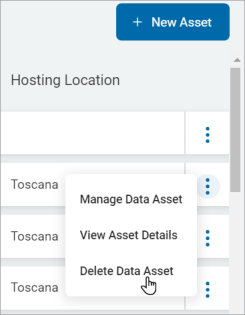
More options 3 vertical dots - The options here enable you to change the values of the settings above.
-
Manage Data Asset
-
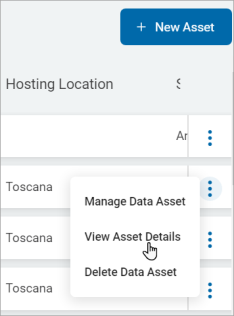
View Asset Details
-
Delete Data Asset
-
The Asset information in the table is automatically populated by the Scan history.
Targets
The Targets tab displays two sections:
-
List of Targets:
-
This column displays all available Targets.
-
If applicable, click the (>) icon next to a Target in the list to expand the parent Target and view the child Target(s).
-
-
Table with these column headings:
-
Target - Your Agents and Targets are listed in alphabetical order.
-
Icons:
-
Legacy/Mac/Linux Agents are indicated by the icon shown at the far left, below.
-
Windows Agents (v13.0 and later) are indicated by the middle icon.
-
Targets are indicated by the right icon.

-
-
-
Status - Current status of the Agent:
-
Offline
-
N/A (not applicable, shown for all Targets)
-
Scanning
-
-
Last Heartbeat - The last time the agent sent a signal indicating it was active/ready.
-
Policy - Name of the policy that applies to the Agent or Target.
-
Version - Version of the Agent
-
SDV3 Risk - The risk score of the Asset measured by its quantity (volume) and vulnerability. Only Targets assigned to a data asset with scan results since the assignment display a value; otherwise, N/A is displayed.
-
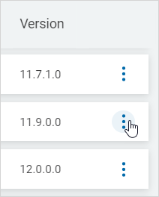
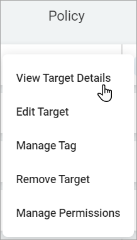
More options (3 vertical dots) - View Target Details, Assign a Policy to an Agent, Manage Agent Tags, Gather Data, or Manage Permissions.
-
Search for a Data Asset
You can search for a Data Asset by:
- Asset Name - Name of the asset
- Asset Type:
Cloud Sources - Cloud sources such as: Google Drive, OneDrive, etc.
Collaboration - Collaboration tools such as: SharePoint and Bitbucket
Database - Databases such as: Oracle, Snowflake, SQL, etc.
Email - Email sources such as Exchange, Gmail, etc.
Files & Folders - For asset types such as a File servers or the files and folders on a workstation, laptop, desktop, etc.
Tag Group - Defines the asset as a Tag group
Websites - Defines the asset as a website
- Admin Department - Department that primarily manages the asset
- Asset Owner - Name of the person that primarily manages the asset
- Hosting Location - Name of the location where the asset is hosted. Example: Tampa data center
- Status - Status of the asset: Active or Inactive.

To search for a Data Asset use the following steps:
- Type the query in the search box and the results are sorted and displayed in the list.
- Click the x to clear the search term.
Create a New Data Asset
When you create a new Data Asset, you must fill out the information in the tabs and their respective fields.
-
Some data is required and some is optional.
-
Each section indicates what the requirements are (red *) and if you have met them using this criteria:
| • Some of the fields are required: |

|
|
| • Fields in this section are optional: |

|
|
| • All required fields are completed: |

|
To create a new Data Asset use the following steps:
- In the top right of the screen, click New Asset.
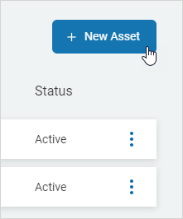
- The New Asset screen opens to the Technical Info tab. It displays a table with four collapsed sections.
- This screen is one of 4 tabs: Technical Info, Targets, Business processes, and Summary.
- Use the (˅) icon to expand any section on a tab.

Technical Info Tab
Procedure:
- Names, Description, & Status: Enter this information:
- Name: Type the Asset name. This is required entry field.
- Description: Type the Asset description.
- Asset Type: Select an option from the drop-down list.
- Tag Group ID: Select an option from the drop-down list.
- Status: Select an option from the drop-down list. This is a required entry field.
Owner & Department
Procedure:
- Each entry field is required.
- Asset Owner: Select an option from the drop-down list.
- You can manually add an owner and this activates the Edit option.
- Administrating Department: Select an option from the drop-down list.
- You can add and edit an administrating department as well.
- Asset Owner: Select an option from the drop-down list.
Add an Asset Owner
Procedure:
- Click the ADD link at the entry field.
- Enter this information in the New Asset Owner pop-up window:
- Name:
- Title:
- Phone:
- Email:
Note: The New Asset Owner window contains a message at the bottom: By choosing to create this new entry, you are populating a global list that you will be able to re-use in other Data Assets.
- Click Save & Add to save or Cancel to discard the changes.
Edit an Asset Owner
Procedure:
- Select an asset owner from the drop-down list to edit.
- Click the EDIT link at the entry field.
- The Edit Asset Owner window opens. Add this information:
- Name:
- Title:
- Phone:
- Email:
- You can select Delete in this window to delete the Asset Owner. Click Save to save or Cancel to discard the changes.
- If deleting an Asset Owner you are prompted to Confirm your selection.
Add an Administrating Department
Procedure:
- Click the ADD link at the entry field.
- Fill in the Name on the New Administrating Department pop-up window.
- Click Save & Add to save or Cancel to discard the changes.
Edit an Administrating Department
Procedure:
- Select an administrating department from the drop-down list to edit.
- Select EDIT to edit the Department information.
- Edit the Name on the Edit Administrating Department pop-up window:
- Click Save to save or Cancel to discard the changes or Delete to delete the Administrating Department.
- If deleting an Administrating Department you are prompted to Confirm your selection.
Hosting
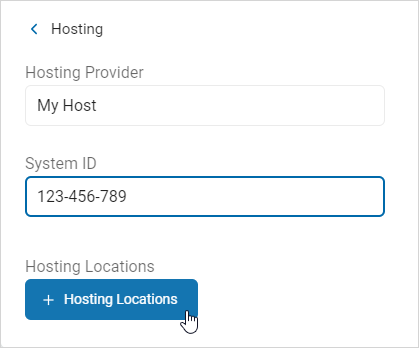
This setting is optional.
- Hosting Provider: Type the hosting provider name.
- System ID: Type the provider system ID.
- Hosting Locations: Name of the location where the asset is hosted. Example: Tampa data center
- Click the + Hosting Locations button.
Select an Existing Hosting Location
Procedure:
- Select a location from the list.
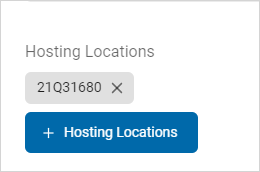
- Click Add Selected.
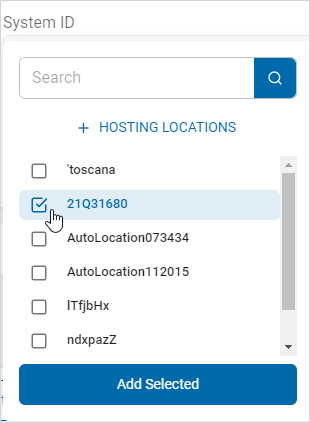
- The location appears as a tile in the Hosting Locations section.
Search for a Hosting Location and Select
Procedure:
- Click + Hosting Locations.
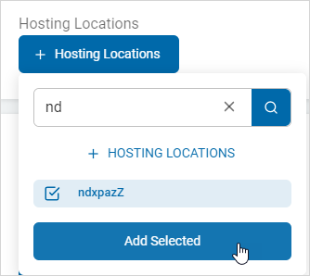
- Type the name of the location in the search box. The matching location(s) are displayed.
- Select the location and click Add Selected.
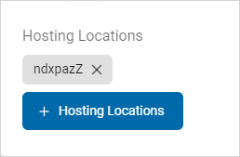
- The location appears as a tile in the Hosting Locations section.
Add a New Hosting Location
Procedure:
- Click + Hosting Locations.
- Enter the information:
- Name: Type the name of the hosting location.
- Country: Select an option from the drop-down list.
- Address Line 1: Type the address.
- Address Line 2: Type the second address line, if applicable.
- City: Type the name.
- State/Province: Type the name.
- Zip/Postal Code: Type the code.
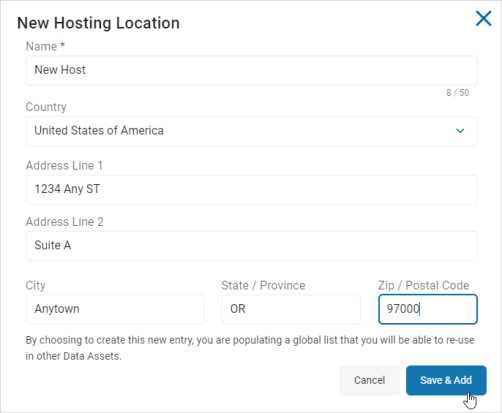
- Click Save & Add to add the new location or Cancel to discard.
- Click +Hosting Locations.
- Search and select the newly added location from the list.
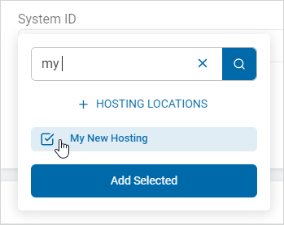
- Click Add Selected.
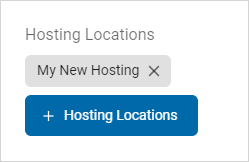
- The location appears as a tile in the Hosting Locations section.
Delete a Hosting Location
The selected Hosting Location appears in the Hosting Locations section.
-
Click the x and the selected Hosting Location is deleted.
Note: This action is immediate and cannot be undone.
-
Security Measures: This is optional.
Organizational Security Measures
Add an Existing Security Measure
Procedure:
-
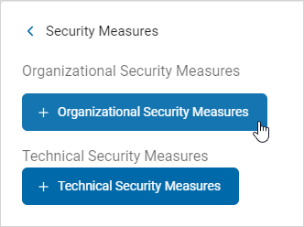
Click + Organizational Security Measures.
-
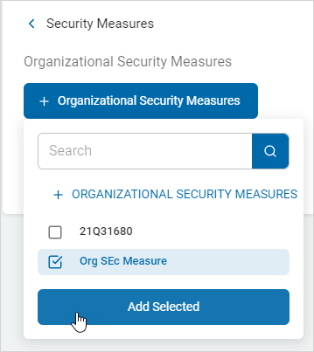
Select a security measure from the list and click Add Selected.
-
The security measure appears as a tile in the Organization Security Measures section.
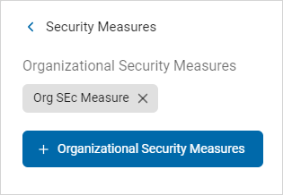
Search and Add an Existing Security Measure
Procedure:
-
Click + Organizational Security Measures.
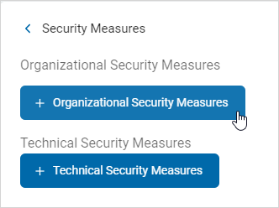
-
Type the name of the security measure in the search box. The matching measure(s) are displayed.
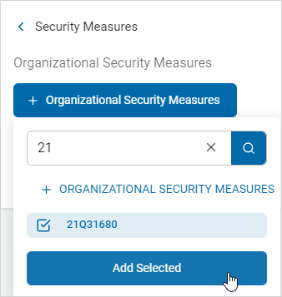
-
Select the location and click Add Selected.
-
The security measure appears as a tile in the Organizational Security Measures section.
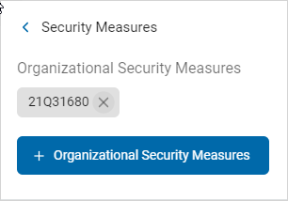
Create and Add a Security Measure
Procedure:
-
Click + Organizational Security Measures.
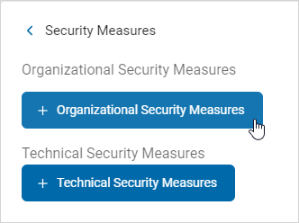
-
Click + Organization Security Measures.
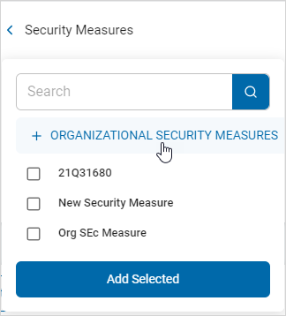
-
Select + Organizational Security Measures and enter the information.
-
The Name is the only required field.
-
The Description field is optional.
-
-
Click Save & Add to create the security measure or Cancel to discard.
-
Select the new security measure from the list and click Add Selected.
Delete an Organizational Security Measure
Procedure:
-
The selected security measure appears in the Organizational Security Measures section.

-
Click the x to delete the security measure.
Note: This action is immediate and cannot be undone.
Technical Security Measure
You can manage your Technical Security Measures with the following:
Add an Existing Technical Security Measure
Procedure:
-
Click + Technical Security Measures.
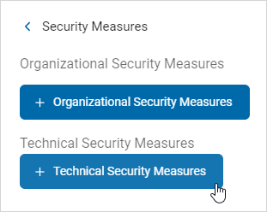
-
Select a security measure from the list and click Add Selected.
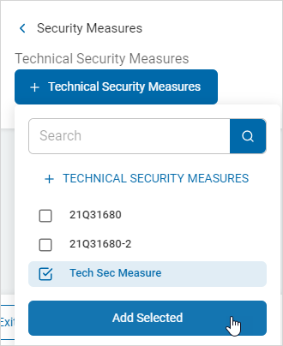
-
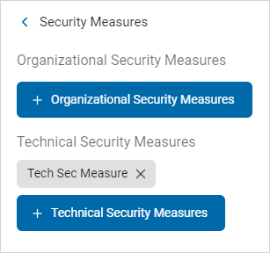
The technical security measure is displayed in the Technical Security Measures section.
Search and Add an Existing Technical Security Measure
Procedure:
-
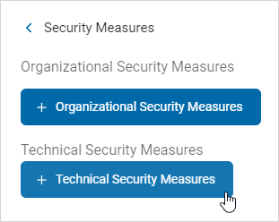
Click the +Technical Security Measures button.
-
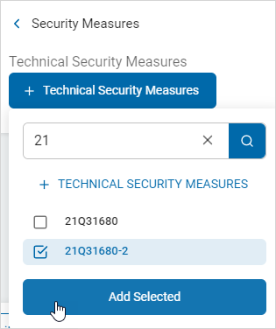
Type the name of the technical security measure in the search entry field. The matching measure(s) are displayed.
-
Select the technical security measure from the list and click Add Selected.
-
The selected technical security measure appears in the Technical Security Measures section.

Create and Add a Technical Security Measure
Procedure:
-
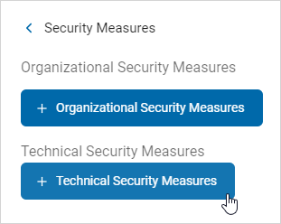
Click +Technical Security Measures.
-
Click +Technical Security Measures.
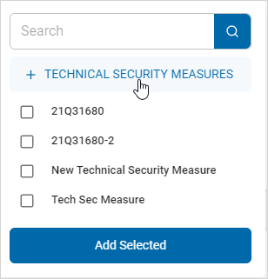
-
In the + Technical Security Measure window, enter this information:
- Name: Type the name of the new technical security measure.
- Description: Type a description of the new technical security measure.
- Vendor: Select an option from the drop-down list.
- Vulnerability Reduction: Assign a vulnerability reduction value to the security measure.
-
Click Save & Add to create the security measure or Cancel to discard.

-
Select the new technical security measure from the list and click Add Selected
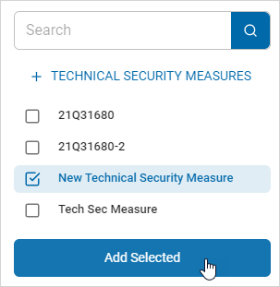
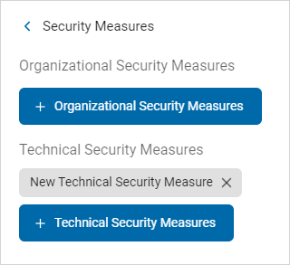
-
The security measure appears in the Technical Security Measures section.
Delete a Technical Security Measure
Procedure:
-
In the Technical Security Measures section, locate the security measure you want to delete.
-
Click the x next to the selected technical security measure and it is deleted.
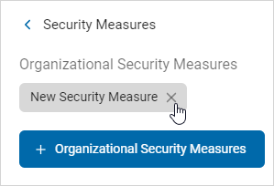
Note: This action is immediate and cannot be undone.
-
Click Next to go to the next tab or Exit Without Saving to discard.
Targets Tab
The tab allows you to select the Targets and the Asset Type.
- Click the ˅ icon to expand the Asset Type & Targets section.
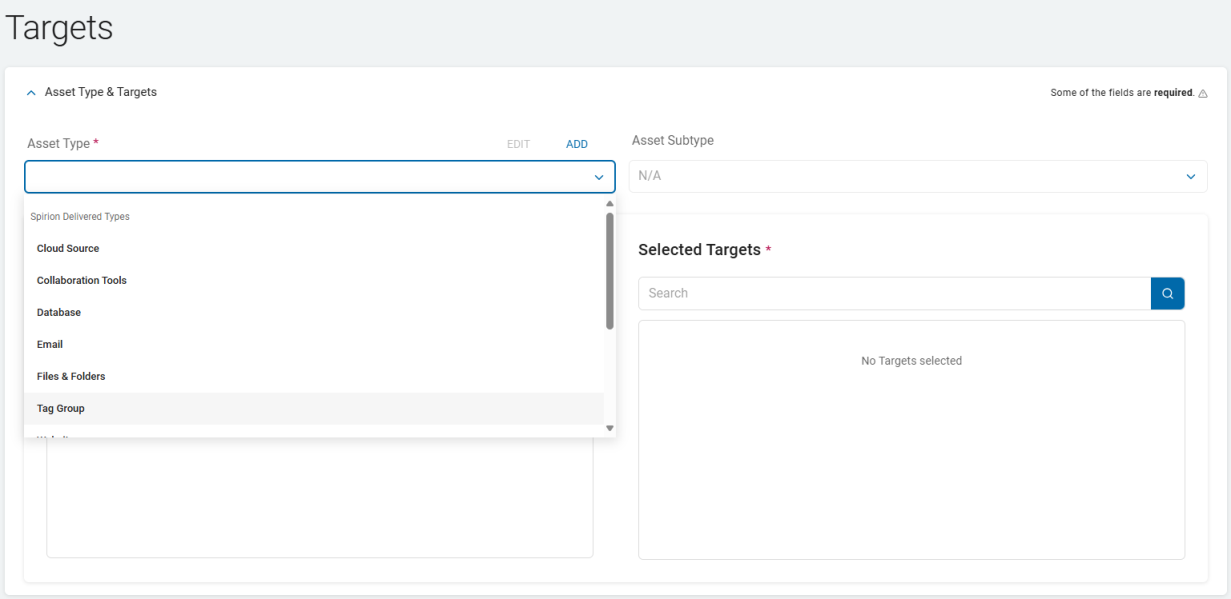
- Asset Type:
- Required
- Select a type from the Spirion Delivered list from the drop-down list.
Cloud Sources - Google Drive, OneDrive, etc.
Collaboration - SharePoint, Bitbucket
Database - Oracle, Snowflake, SQL, etc.
Email - Exchange, Gmail, etc.
Files & Folders - For asset types such as a File servers or workstation files and folders
Tag Group - Defines the asset as a Tag group
Websites - Defines the asset as a website
- Use Edit and Add options to manage the asset types.
- Asset Subtype:
- Optional
- The Subtype list is based on the chosen Asset Type.
- Select a Subtype for the selected Asset Type from the drop-down list.
- Targets:
- Targets display based on the selection in the Asset Type section.
- When a Target in the list has a Tag assigned an arrow (circled in this image) appears next to the listed Target.
- All Targets:
- To search a specific Target, type the name in the search entry field.

Note: Target appears gray if it is already selected in another data asset.
- To search a specific Target, type the name in the search entry field.
- Asset Type:
- To expand a Target in the list, click the chevron (>) next to the name.
- To add a Target, click the right arrow next to the Target name and it moves to the Selected Targets field.
- Selected Targets: To move a Target back to the All Targets field, click the arrow next to the Target name. This field is required.

- Click Next to go to the next tab, Previous to go to the previous tab, or Exit Without Saving to discard.
Business Processes Tab
Add Existing Business Processes:
- Click the Business Processes button.
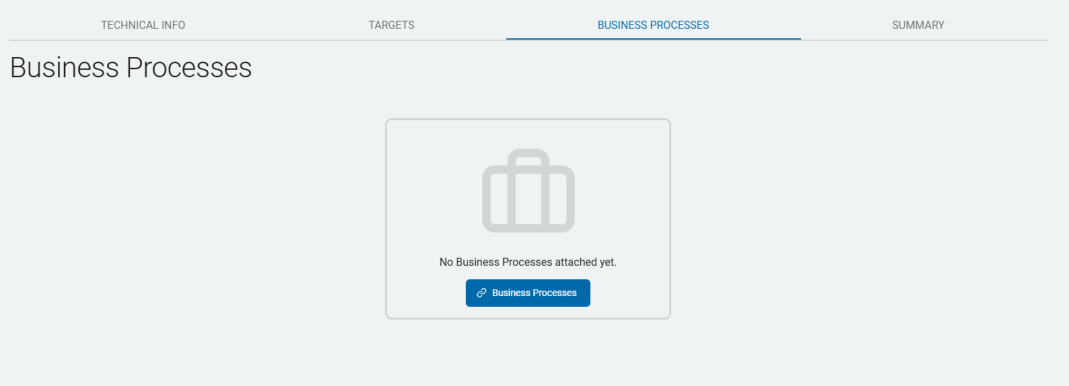
- Select a process to add and click Add Selected.

- The selected process appears as a row section. Click the chevron (>) to expand the section.

Search and Add Business Processes
Procedure:
-
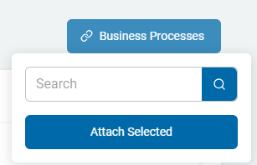
Click the Business Processes button in the top, right corner of the screen.
-
Type the process name in the search field.
-
When found, Add Selected.
Detach a Business Process
Procedure:
-
Locate a business process in the list.
-
Click
 Detach.
 -
Click Next to go to the next tab, Previous to return to a previous tab, or Exit Without Saving to discard.
Note: This action is immediate and cannot be undone.
Summary Tab
Procedure:
-
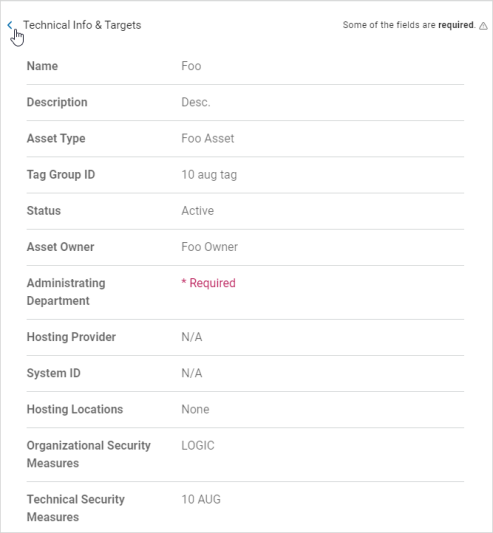
Click the right arrow to expand each section.
-
Review for any missing required information or additional needed information.
-
Click Finish & Save to save, Previous to return to previous screens or click a tab to navigate to other tabs to change information, or Exit Without Saving to discard.
Manage an Existing Data Asset
To manage an existing Data Asset:
-
Locate the Data Asset in the list.
-
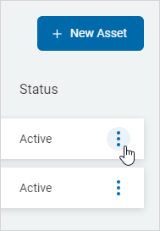
On the right end of the row, click the more options menu.
-
Click Manage Data Asset.

-
Locate the section and details you want to manage.
They are displayed in a list sorted by tabs and then into rows: -
Technical Info
-
Names, Status & Type
-
Owner & Department
-
Hosting
-
Security Measures
-
Targets
-
Business Processes
-
Summary
-
Technical Info
-
Data Content
-
Business Process
-
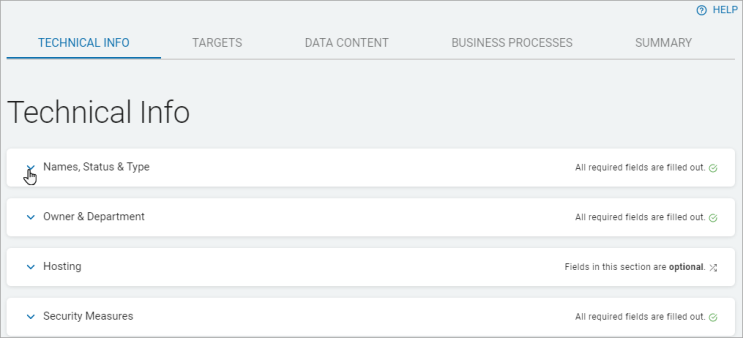
Click the ˅ icon to expand a section.
-
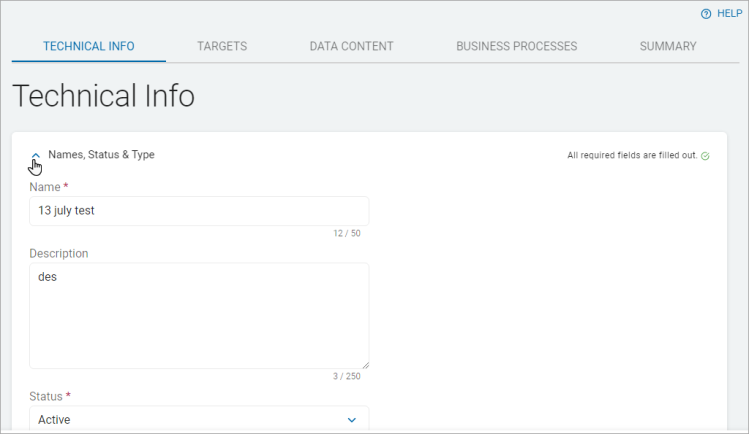
Click ˄ icon to collapse a section.
-
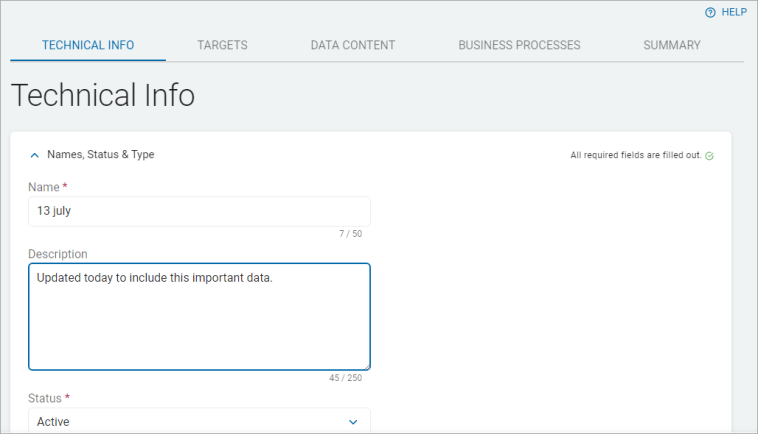
Make required updates to the details.
-
Click Next to proceed or Exit Without Saving to discard.
-
Make any additional changes to the remaining tabs, click Next to proceed or Exit Without Saving to discard.
-
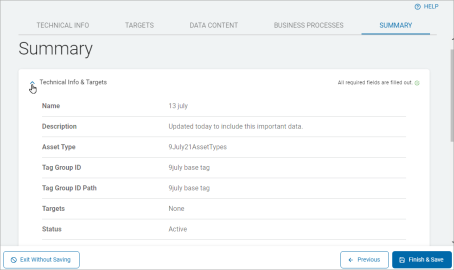
On the Summary tab, expand the sections to review your changes.
-
Click Finish & Save to save the updates, Previous to return to previous tabs, or Exit Without Saving to discard.
View Asset Details
Use the following steps to view asset details:
-
Locate the Data Asset in the list.
-
On the right end of the row, click the more options menu.
-
Click View Asset Details.
-
The Asset Details screen now has two tabs, the Data Content tab and the Coverage & Data Types tab.
-
The Data Content tab displays a data table.

-
The data table displays the following columns:
-
Target - Targets the Asset contains
-
Data Volume - The amount of data on the Asset scanned by Sensitive Data Platform
-
Data Types - Here is listed the data types this asset contains. Options include:
-
Bank Account Number
-
Credit Card Number
-
Date of Birth
-
E-Mail Address
-
Password
-
Personal Address
-
Social Security Number
-
Telephone Number
-
-
Classifications - Any classifications attached to the Target
-
-
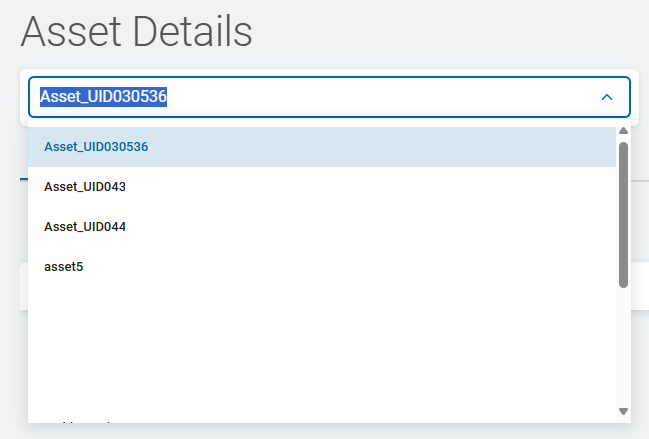
When you select an asset from the drop-down list, the table is automatically populated.
-
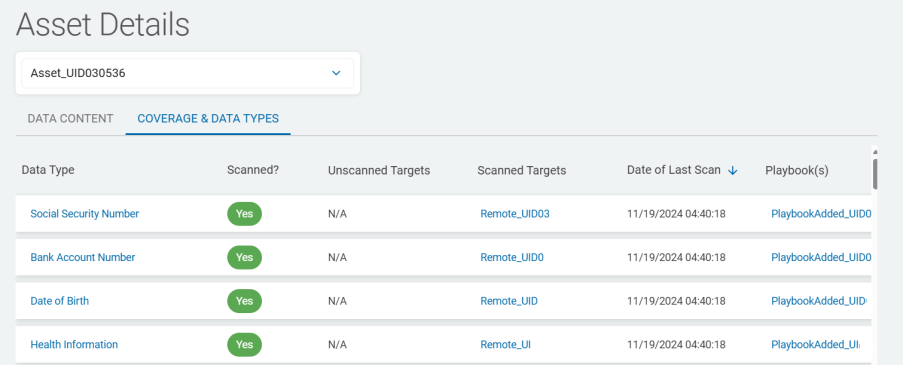
The Coverage & Data Types tab provides scan coverage details about the Targets associated with the asset.
The tab displays these columns:
-
Data Type - The data types scanned for the Targets associated with the asset.
-
Scanned? - Indicates whether the scan is performed on a data type.
-
Unscanned Targets - Targets that are not scanned for a data type.
-
Scanned Targets - Targets that are scanned for a data type.
-
Date of Last Scan - Date when the last data type scan was performed.
-
Playbook(s) - The playbook associated with the scan to find and perform actions on the data types.
-
Delete a Data Asset
Procedure:
-
Locate the Data Asset in the list.
-
On the right end of the row, click the More options menu.
-
Click Delete Data Asset.
-
Click Confirm to delete the asset or Cancel to discard.

Targets
View Target Details
Use the following steps:
-
From the All Targets section of the Targets tab, locate the Target you want to view in the list.
-
On the far right of the row, click the more options menu.
-
Click View Target Details.
-
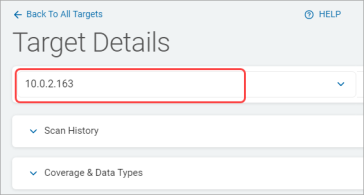
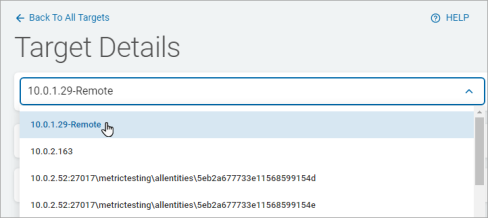
The Target Details screen displays detailed information about the Target.
-
By default the selected Target name appears in the drop-down list.
-
If you select any other Target name, the details below displays for the selected Target only.
-
If you select any other Target name, the details below displays for the selected Target only.
-
Click the down arrow to display the Scan History section.
The section lists the scans run on the Target and displays the following information in columns: -
Scan Name: The name of scan.
-
Data Type(s): The data type searched for in the scan.
-
Date of Scan: The date when the last scan for this data type was performed.
-
Playbook: The playbook associated with the scan to search and perform action on the data type.

-
Click the down arrow to display the Coverage & Data Types section.
-
The section displays which data types are scanned and not scanned for the selected Target.
The section displays the following information:
-
Data Type: The name of data type.
-
Scanned: Indicates whether a data type is scanned or not.
-
Date of Last Scan: The date of last scan for a data type.
-
Playbook: The playbook associated with the scan to search and perform actions on the data types.

-
Click Back to All Targets on the top of the Target Details screen to go back to the Targets tab.
-
Click Close to close the window.
Search for a Target
Procedure:
-
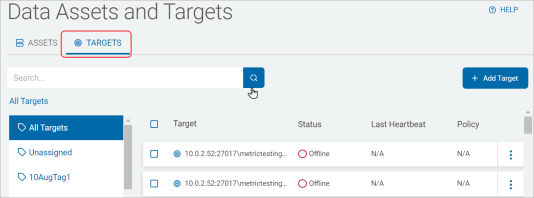
Type a Target name in the search box.
-
Click the search lens or Enter on your keyboard.
-
The results are displayed in the list below.
-
Click the x to clear the search term.
Add a New Target
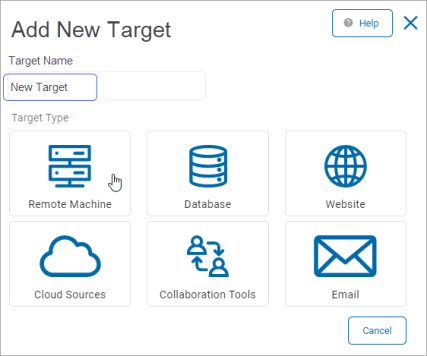
There are 6 Target types available.
Add a Remote Machine
To add a new Remote Machine:
-
In the upper right screen, click Add Target.
-
Target Name: In the Add New Target pop-up window, type the name of the Target.
-
Click Remote Machine to proceed or Cancel to discard.
-
Address Type: Click an option from the drop-down list:
-
NETBIOS Name
-
IP Address
-
IP Wildcard
-
IP Range
-
FQDN
-
Address: Enter the address of your chosen address type.
Refer to the address syntax message that displays on the page to type the valid address values in the box.
-
Username: Enter the username associated with the account.
-
Password: Enter the password associated with the username.
-
Mode:
Select one:
-
Authenticate
-
Authenticate and Scan
-
Scan
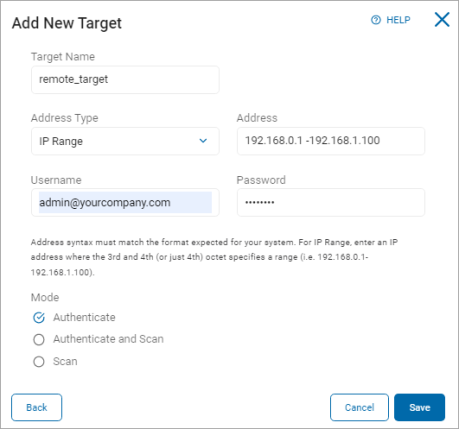
- Click Save to save, Cancel to discard, or Back to return to the previous screen.
Add a Database
To add a new database:
-
In the upper right screen, click Add Target.
-
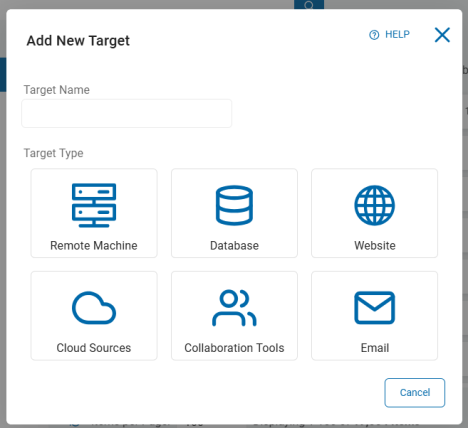
Target Name: In the Add New Target pop-up window, type the name of the Target.
-
Click the Database tile to proceed or Cancel to discard.
-
In the Select a Database to Configure pop-up window:
-
Click a Database tile to configure:
-
Oracle
-
SQLServer
-
SYBASE
-
IBM DB2
-
Informix
-
InterBase
-
SQLBase
-
SAP SQL Anywhere
-
MySQL
-
SQLite
-
PostgreSQL
-
ODBC
-
OLEDB
-
mongoDB
-
Snowflake
-
Click Back to return to the previous screen.
-
Click Cancel to discard.
-
When you select an SQL database, the Add New SQL Database Target enables you to select the option Active Directory Authentication.
-
This enables you to connect an agent to a remote SQL database server.
-
Otherwise, continue with these steps.
-
Connection String: Enter the connection string to your type of database.
-
Examples are provided at the end of this section.
-
Click Save to save, Cancel to discard, or Back to return to the previous screen.
-
Sample Connection Strings
Oracle
Provider=OracleSQLAPI;DB Name=instance_name;Host=host_name;Port=port;Service=service_name;Username=user_name;Password=password;DB Type=2;APPNAME=SDP;MS SQL
SQL Server Authentication:
Provider=MSSqlSQLAPI;DB Name=database_name;Server=server_name;Username=user_name;Password=password;DB Type=3;Windows/AD Authentication:
Provider=MSSqlSQLAPI;DB Name=database_name;Server=server_name;Trusted_Connection=yesSybase
Provider=SybaseSQLAPI;DB Name=database_name;Server=server_name;Username=user_name;Password=password;DB Type=8;APPNAME=SDP;DB2
Provider=DB2SQLAPI;DB Name=database_name;Username=user_name;Password=password;DB Type=6;Informix
Provider=InformixSQLAPI;DB Name=database_name;Username=user_name;Password=password;DB Type=7;InterBase
Provider=InterBaseSQLAPI;DB Name=database_name;Username=user_name;Password=password;DB Type=4;SQLBase
Provider=SQLBaseSQLAPI;DB Name=database_name;Username=user_name;Password=password;DB Type=5;SQL Anywhere
Provider=SQLAnywhereSQLAPI;DB Name=database_name;Server=server_name;Host=host_name;Username=user_name;Password=password;DB Type=12;MySQL
Provider=MySQLSQLAPI;DB Name=database_name;Server=server_name;Port=port;Username=user_name;Password=password;DB Type=9;SQLite
Provider=SQLiteSQLAPI;DB Name=database_path;DB Type=11;PostgreSQL
Provider=PostgreSQLAPI;DB Name=database_name;Server=server_name;Port=port;Username=user_name;Password=password;DB Type=10;APPNAME=SDP;Snowflake
DRIVER={SnowflakeDSIIDriver};Server=HOSTNAME;Database=DBNAME;Warehouse=WAREHOUSENAME;UID=USER;PWD=PASSWORD;ODBC (generic)
Provider=ODBCSQLAPI;DB Name=database_name;Username=user_name;Password=password;DB Type=1;Add a Website
To add a new website:
-
In the upper right screen, click Add Target.
-
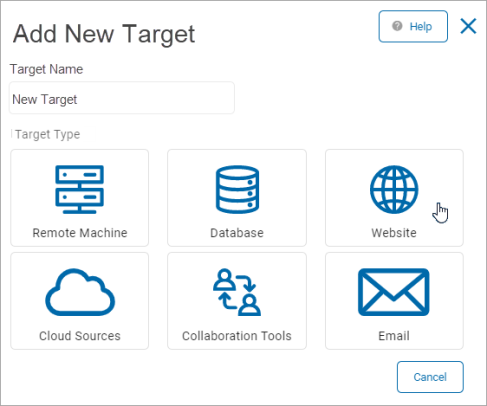
Target Name: In the Add New Target pop-up window, type the name of the Target.
-
Click Website to proceed or Cancel to discard.
-
In the Add a Target pop-up window, fill in the following:
-
Address: Type the website address.
-
Username: Type the username for the website management.
-
Password: Type the password associated with the username.

-
-
Click Save to save, Cancel to discard, or Back to return to the previous screen.
Add a Cloud Source
To add new cloud source:
-
In the upper right screen, click Add Target.
-
Target Name: In the Add New Target pop-up window, type the name of the Target.
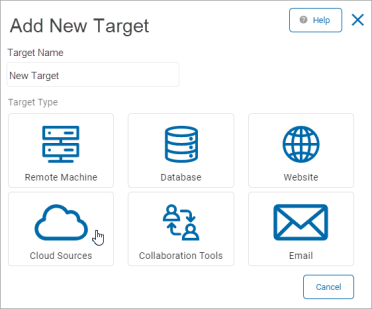
- Click Cloud Sources to proceed or Cancel to discard.
- In the Select a Cloud Source to Configure pop-up window, click a tile:
Dropbox
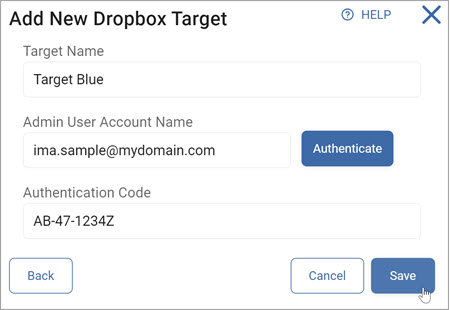
To add a Dropbox Target:
- Target Name: Type the Target name
- Admin User Account Name: Type the admin user account name and click Authenticate
- Authentication Code: Enter the code
- Click Save to save, Cancel to discard, or Back to return to the previous screen
OneDrive for Business
Note: For OneDrive Targets, Spirion added the ability to authenticate using an (user configured) Azure app.
Note this requires version 13.5 or later agents. If you attempt to use this method with agents earlier than v13.5, an EPS failure occurs requiring the reboot of the machine or manual intervention.
When creating a new scan, you are notified of the agent v13.5 requirement if you are attempting to scan an OneDrive Target:
If you assign agents to a scan that are pre-13.5, you receive the following message which prevents the scan from being run:
Note: Sensitive Data Platform cannot scan shared user folders in Microsoft OneDrive. This is due to limitations of the Microsoft Graph API.
Accounts
Service Account
To authenticate Cloud Storage scans for OneDrive for Business, Spirion recommends you create:
-
A service account with the SharePoint Admin role
-
The Global Admin role (temporarily)*
*The reason for temporary Global Admin role is the initial authorization process creates a “Spirion Azure App” our system uses to connect to the tenant. Once this App is created, the Global Admin role can be removed.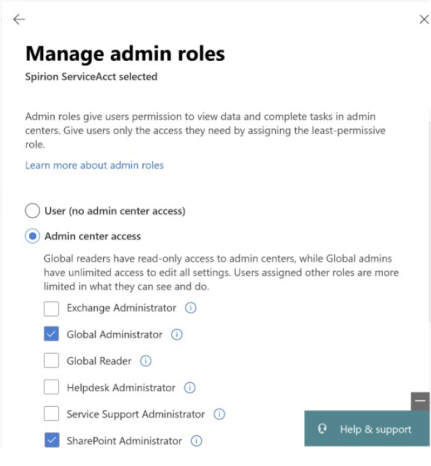
To add a OneDrive for Business Target:
- Target Name: Enter the Target name.
- Admin User Account Name: Enter the admin user account name and click Authenticate.
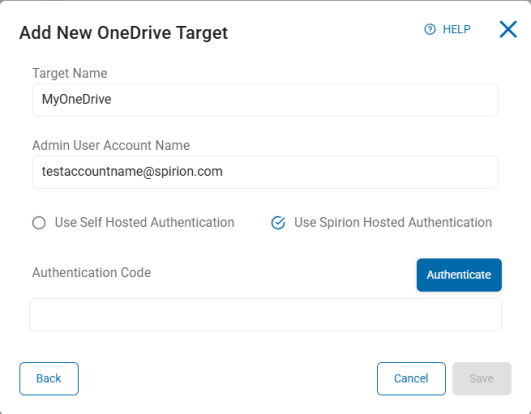
Spirion Hosted Authentication
Procedure:
- Select the "Use Spirion Hosted Authentication" radio button.
Note: Depending on how your tenant is configured in Azure Active Directory, it’s possible this step needs either:
A higher-level permissioned user (Global Admin, Cloud Application Admin)
Consent requests which may need to be approved by a specified user within the tenant
-
This takes you to the Microsoft (Office 365) login page where you enter the same Admin user account from the previous step and complete the login process.
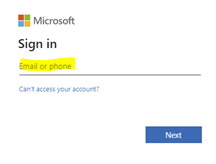
-
You are asked to authorize claims to create the “Spirion Azure App”.
-
Accept the claims. The Spirion Azure App is created. The browser page is redirected to a loopback page “127.0.0.1/code=xxxx”.
-
Select and copy the entire URL.
-
Paste the URL into the Authentication Code box.
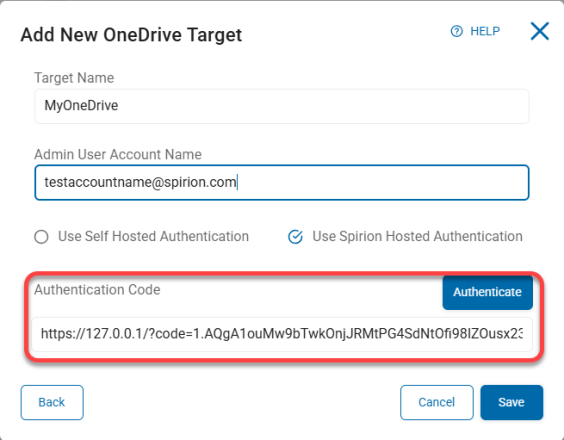
-
Click Save to create the Target, Cancel to discard, or Back to return to the previous screen.
Self Hosted Authentication
Procedure:
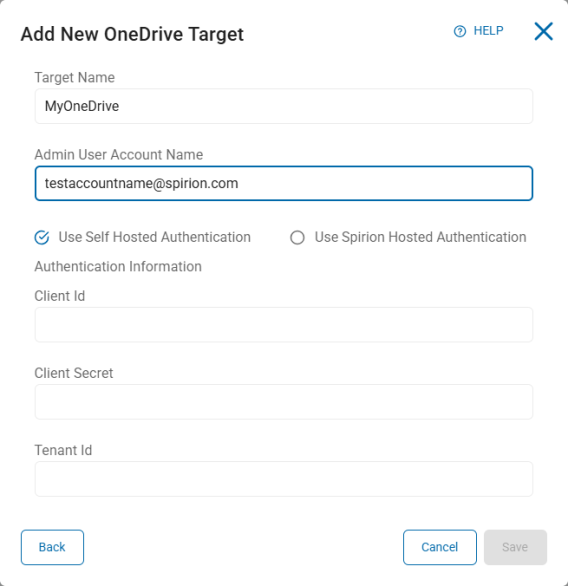
- Select the "Use Self Hosted Authentication" radio button.
-
Enter the following information from your Azure App. If you do not have an Azure App, see Create an Azure App (Optional) below:
-
Client ID – Enter your Microsoft Client ID
-
Client Secret – Enter your Microsoft Client Secret
-
Tenant ID – Enter your Microsoft Tenant ID
-
-
To confirm your Azure App has the necessary permissions, see Add API Permissions to Your Azure App below.
- Click Save to create the Target, Cancel to discard, or Back to return to the previous screen.
- This completes the authentication process.
- Proceed to "Adjust the Service Account" below.
Adjust the Service Account
-
The Spirion Azure App is now created (if you selected Spirion Hosted Authentication).
-
Remove the Global Admin role from the service account
Create an Azure App (Optional)
If you do not have an Azure App, use the following instructions to create the app and record the information you need to create your OneDrive for Business Target.
App Registration
Procedure:
-
Log in to the Azure Portal
-
Search for and select Microsoft Entra ID

-
Select App Registrations under Manage on the left side menu. (Alternatively, click "Add application registration" under Quick Actions at the bottom of the page)
-
Click New registration
-
Select one of the first two radio buttons based on your needs:
-
Accounts in this organizational directory only (YourDev only - Single tenant)
-
Accounts in any organizational directory (Any Microsoft Entra ID tenant - Multitenant)
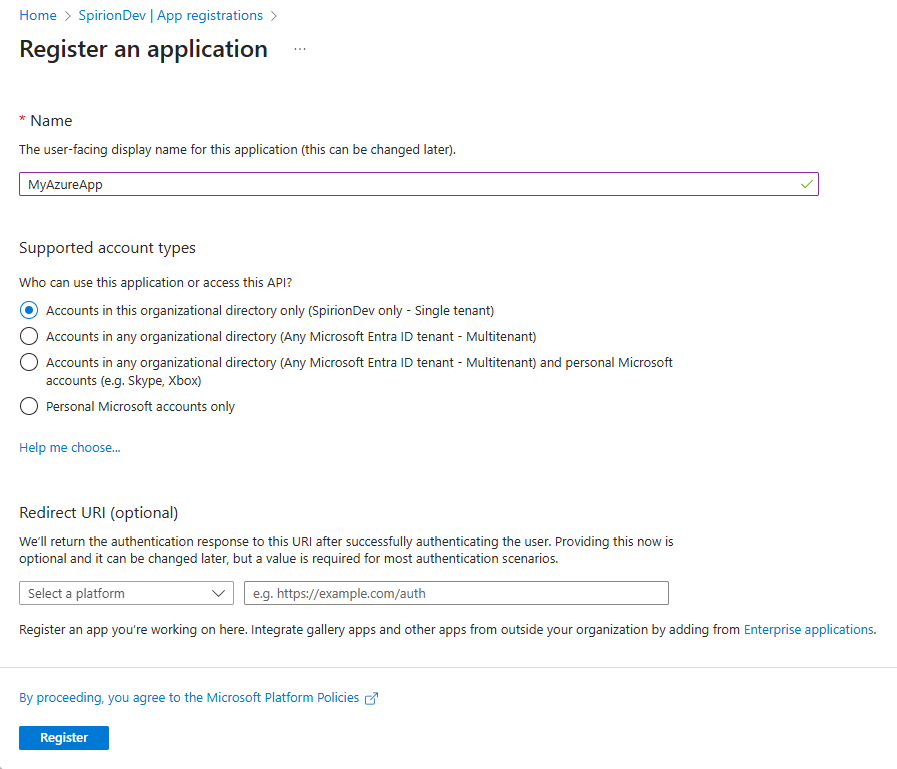
Note: Redirect URI is not required
-
-
Click Register at the bottom of the page.
Note the IDs
Record the following information:
-
Application (client) ID
-
Directory (tenant) ID
Certificates and Secrets
Procedure:
-
From the left side menu, under Manage, click Certificates & secrets
-
Click New client secret.

-
Enter an appropriate name and record the name.
-
Record your Client Secret Value and Secret ID.
NOTE: You will not have access to your client secret again.
Add API Permissions to Your Azure App
Use the following procedure to add the required API permissions to your Azure App (see "Required Azure App API Permissions" below):
-
One the left side menu, under Manage, select API Permissions
-
Click Add a permission
-
Select Microsoft Graph at the top of the collection of APIs.
-
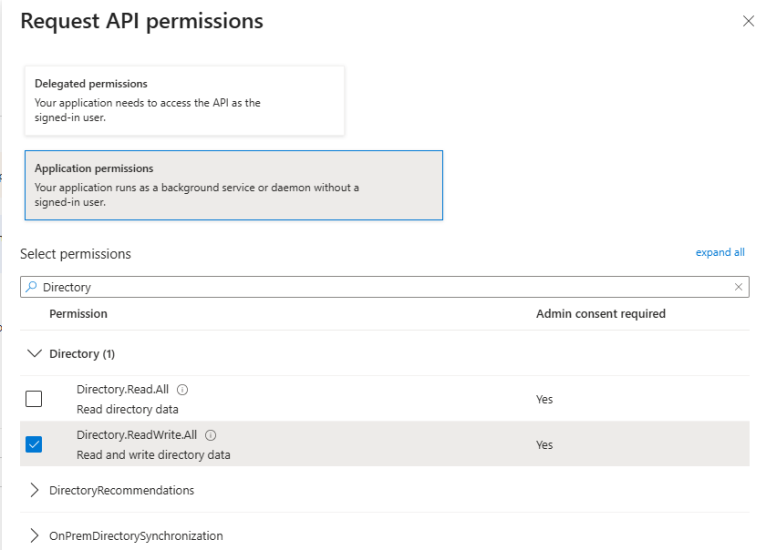
Select Application Permissions
-
In the Select permissions search field type the name of each permission to find it in the list and then select it. See below.
-
Click the Add permissions button at the bottom of the pane.
-
Repeat this process for each required permission.
-
Grant Admin consent to the permission, if necessary.
Required Azure App API Permissions
Ensure the following Microsoft Graph permissions are enabled for your new Azure App.
-
Directory.ReadWrite.All
-
Type: Application
-
Admin consent required: Yes
-
Description: Enables the app to read and write data in the organization directory accessible to the service account. Does not permit user or group deletion.
-
-
Files.ReadWrite.All
-
Type: Application
-
Admin consent required: Yes
-
Description: Enables the app to read, create, update, and delete all files the service account user can access.
-
-
Sites.ReadWrite.All
-
Type: Application
-
Admin consent required: Yes
-
Description: Enables the app to edit or delete documents and list items in all site collections accessible to the service account.
-
-
Sites.Selected
-
Type: Application
-
Admin consent required: Yes
-
Description: Enables app-only access to specific SharePoint Online sites, rather than the entire tenant.
-
-
User.Read
-
Type: Delegated
-
Admin consent required: No
-
Description: Enables the app to read basic company information of users.
-
-
User.ReadWrite.All
-
Type: Application
-
Admin consent required: Yes
-
Description: Enables the app to read and write all properties of user profiles.
-
-
User.ReadWrite.CrossCloud
-
Type: Application
-
Admin consent required: Yes
-
Description: Enables the app to read and update external cloud user profiles without a signed-in user.
-
-
UserAuthenticationMethod.ReadWrite.All
-
Type: Application
-
Admin consent required: Yes
-
Description: Enables an app to read and write authentication methods like phone numbers and Authenticator settings, but not passwords or sign-in.
-
Google Drive

|
To add a Google Drive Target:
-
First, configure Google Drive
-
Second, configure a Google Drive Target to scan in Sensitive Data Platform
Set Up Google Drive
-
Create a Project in Google Cloud Platform
-
Create a Service Account
-
Generate a P12 Key
-
Record OAuth 2 Client ID
-
Enable Domain-Wide Delegation in Google Admin Console
-
Enable Required APIs
-
Configure OAuth Consent Screen
-
Add Scopes to the OAuth Consent Screen
-
Verify Configuration
Create a Project in Google Cloud Platform
Procedure:
-
Go to the Google Cloud Console and sign in.
-
Select the Google domain you want to scan.
-
Click New Project.
-
Enter a project name and confirm that the organization is correct.
-
Click Create.
-
Once the project is created, click Select Project.
Create a Service Account
-
Under your project (for example, “Spirion”), go to APIs & Services → Credentials.
-
Click Create Credentials → Service Account.
-
Enter a name for the service account and an optional description.
-
Example: user@mycompany.iam.gserviceaccount.com
-
-
Click Done (no additional access setup is required on the next two screens).
Generate a P12 Key
Procedure:
-
From the Credentials page, click your newly created service account.
-
Select the Keys tab at the top.
-
Click Add Key → Create New Key.
-
Choose P12 as the key type.
-
Download the P12 key file and note the private key password.
-
You will use both later when configuring your Google Drive target in the Sensitive Data Platform console. See P12 Key Download
Record OAuth 2 Client ID
Procedure:
-
Back in Credentials, click Manage Service Accounts.
-
Locate your service account and make note of the OAuth 2 Client ID.
-
You’ll use this ID later when setting up API access.
Enable Domain-Wide Delegation in Google Admin Console
Procedure:
-
Log in to the Google Workspace Admin Console.
-
Go to Access and Data Control → API Controls (under Security).
-
Select Manage Domain-Wide Delegation.
-
Click Add New to create a new API client.
-
Enter the OAuth Client ID you recorded earlier.
-
In the OAuth Scopes section, add the following scopes (one per line):
-
https://www.googleapis.com/auth/userinfo.email
-
https://mail.google.com
-
https://www.googleapis.com/auth/admin.directory.user.readonly
-
https://www.googleapis.com/auth/drive
-
https://www.googleapis.com/auth/userinfo.profile
-
-
Save your changes.
-
Click Edit on the new API client to verify that the scopes were added correctly.
Enable Required APIs
Procedure:
-
In Google Console Platform, go to APIs & Services → Library.
-
Search for and enable the following APIs:
-
Admin SDK API
-
Google Drive API
-
Gmail API
-
-
Each API should show a status of Enabled once complete.
Configure OAuth Consent Screen
Procedure:
-
Go back to APIs & Services → OAuth consent screen. Note: If you have not set up the Google Auth Platform you will be redirected to set it up.
-
Select Internal as the user type.
-
Fill in the following fields:
-
App Name
-
Support Email
-
-
Ensure the correct Authorized Domain is listed.
-
Add Developer Contact Information.
-
Click Save and Continue.
Add Scopes to the OAuth Consent Screen
Procedure
-
Click Add or Remove Scopes and add the following( you will want to enter these into the manual field):
-
https://www.googleapis.com/auth/userinfo.email
-
https://www.googleapis.com/auth/userinfo.profile
-
https://www.googleapis.com/auth/admin.directory.user.readonly
-
https://www.googleapis.com/auth/drive
-
https://mail.google.com
-
-
Save your changes.
Verify Configuration
-
Your configuration should now display all added scopes and enabled APIs.
-
Once verified, your setup is complete — you can now configure Spirion to connect to your Google Drive or Gmail target.
Configure a Google Drive Target
- Target Name: Enter a Target name.
- Admin User Account Name: Enter the admin user account name.
- Service Account Email or Unique ID: Enter the service account email address.
- Key Data File: Click the upload icon (
 ) to locate the key data file on your local computer.
 - Key Data File Password: Enter the password associated with your key data file.
- Private Key Id: Enter the private key identification number.
- Project Id: Enter the Google project ID.
- Click Save to save, Cancel to discard, or Back to return to the previous screen.
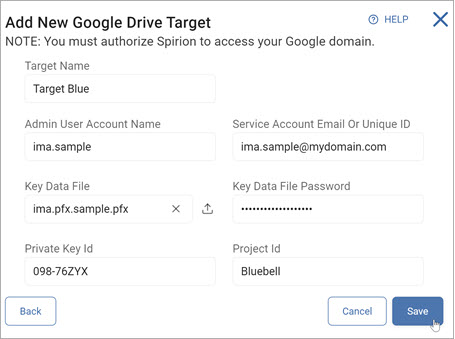
Note: You must authorize Spirion to access your Google domain.
Box
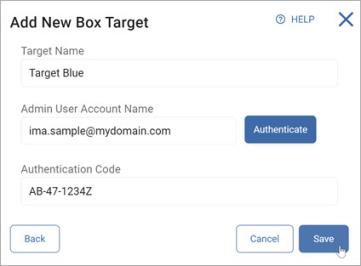
To add a box Target:
- Target Name: Enter the Target name.
- Admin User Account Name: Enter the admin user account name and click Authenticate.
- Authentication Code: Enter the code.
- Click Save to save, Cancel to discard, or Back to return to the previous screen.
Amazon S3

|
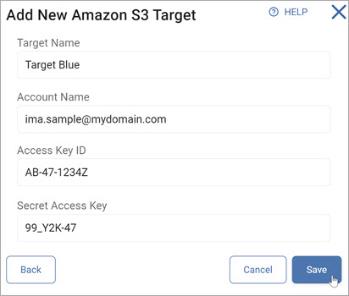
To add an Amazon S3 Target:
- Target Name: Type the Target name.
- Account Name: Type the Account name.
- Access Key ID: Type your Access Key ID.
- Secret Access Key: Type your Secret Access Key.
- Click Save to authenticate and save, Cancel to discard, or Back to return to the previous screen.
Add a Collaboration Tools Target
To add a new collaboration tools:
- In the upper right screen, click Add Target.
- Target Name: In the Add New Target pop-up window, type the name of the Target.
- Click Collaboration Tools.
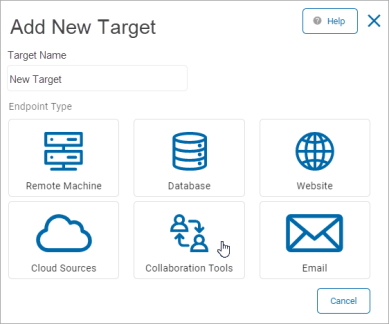
- Select a Collaboration Tool to configure:
SharePoint Online
To add a new SharePoint Target:
-
Target Name: Type the Target name.
-
Address: Type the URL to the SharePoint site being scanned.
-
Domain: Type the domain path.
-
Username: Type the username associated.
-
Password: Type the password associated.
-
Identity Provider ID: Type the Client ID.
-
Security Token Service: Type the token service.
-
Tenant: Type the Tenant name.
-
Certificate File: Upload the Certificate associated with the Tenant.
-
Select applicable:
-
Use SSL
-
Use TLS 1.0
-
Use TLS 1.1
-
Use TLS 1.2
-
Using Certificate Authentication
Certificate Authentication requires a fully registered EntraID Application with a certificate configured for authentication purposes.
-
Information on how to provision that application appropriately can be found here: Register an application with the Microsoft identity platform.
The following data is necessary from the registered app as well as from SharePoint:
- Address: Type the Address
- Identity Provider ID: EntraID Application ClientID
- Tenant: FULL Tenant name (Example: mytenant.onmicrosoft.com)
- Certificate: Upload the certificate (Confirm a certificate has been uploaded to the App - that is the same certificate we will use)
- Password: The password to the certificate
Note: The EntraID application needs to be granted access rights to the SharePoint Sites or Tenant that will be scanned.
If the rights are limited to Read access, then no remediation or modification of files can occur
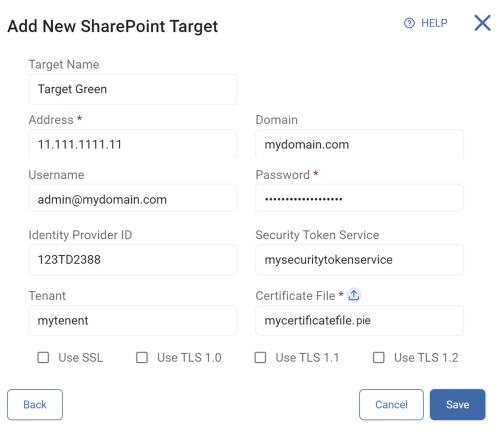
- Click Save to save, Cancel to discard, or Back to return to the previous screen.
Bitbucket
To add a new Bitbucket Target:
- Target Name: Type the Target name.
- Admin User Account Name: Type the admin user account name.
- Server URL: Type the full server URL.
- Password: Type the password associated with the username.
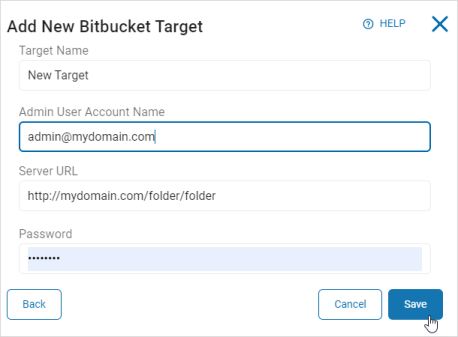
- Click Save to save, Back to return to the previous screen, or Cancel to discard.
Add an Email Target
- In the upper right screen, click Add Target.
- Target Name: In the Add New Target pop-up window, type the name of the Target.
- Click an email type to proceed, Cancel to discard, or Back to return to the previous screen:
Gmail

|
To add a Gmail Target: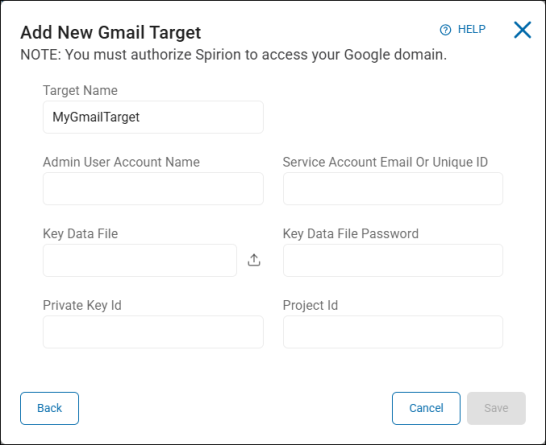
- Admin User Account Name: Type the admin user account name.
- Service Account Email or Unique ID: Type the service account email address or unique ID.
- Key Data File: Click the upload icon () to locate a file on your local computer.
- Key Data File Password: Type the password associated with the key data file.
- Private Key Id: Type the private key identification number.
- Project Id: Type the project ID.
- Click Save to save, Cancel to discard, or Back to return to the previous screen.
Exchange
Note: For Exchange On-Premise Targets, when content or a file is added in draft form (such as a social security number in a new email in draft status), the location is not skipped on subsequent scans after being scanned the first time.
Drafts are excluded from the Search History. This is a known issue.
|
|
|
To add an Exchange Target: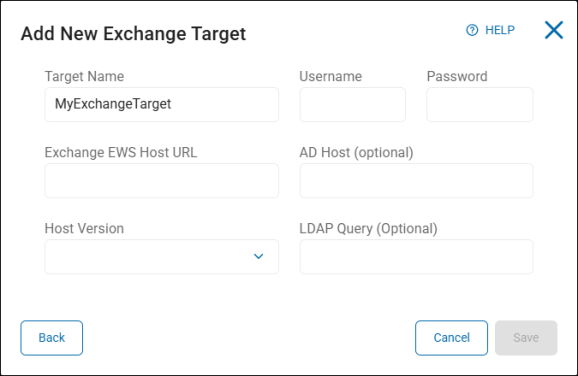
- Username: Type the username for the account.
- Password: Type the password associated with the username.
- Exchange EWS Host URL: Type the full URL of the Exchange EWS host.
- AD Host (optional): Type the host name. This is optional.
- Host Version: Click an option from the drop-down list.
- LDAP Query (optional): Type the query. This is optional.
- Click Save to save, Cancel to discard, or Back to return to the previous screen.
Exchange Online

|
Note: For Exchange Online Targets, Spirion added the ability to authenticate using an (user configured) Azure app.
Note this requires version 13.5 or later agents. If you attempt to use this method with agents earlier than v13.5, an EPS failure occurs requiring the reboot of the machine or manual intervention.
When creating a new scan, you are notified of the agent v13.5 requirement if you are attempting to scan an Exchange Online Target:
If you assign agents to a scan that are pre-13.5, you receive the following message which prevents the scan from being run:
Spirion Hosted Authentication
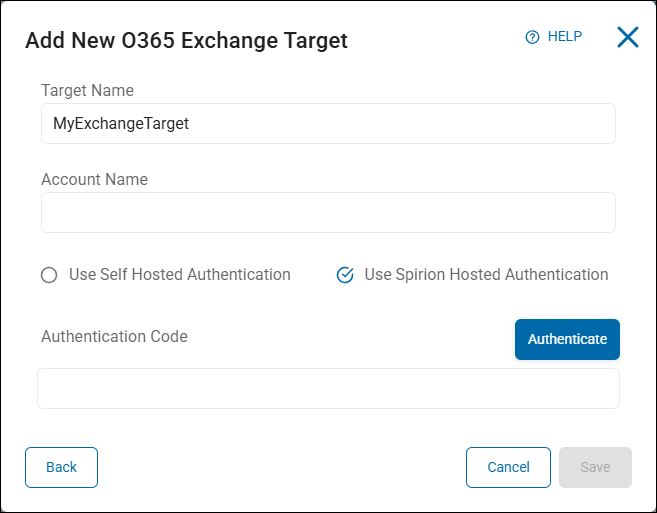
Procedure:
- Target Name: Type the Target name.
- Account Name: Enter the admin account user name
- Select Use Spirion Hosted Authentication
- Click Authenticate.
-
This takes you to the Microsoft (Office 365) login page where you enter the same Admin user account from the previous step and complete the login process.
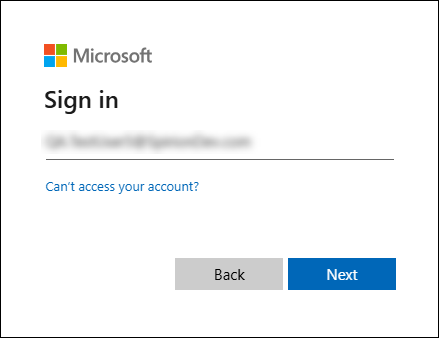
-
You are asked to authorize claims to create the “Spirion Azure App”.
-
Accept the claims. The Spirion Azure App is created. The browser page is redirected to a loopback page with the URL “127.0.0.1/code=xxxx”.
-
Select and copy the entire URL.
-
Paste the URL into the Authentication Code box.
- Click Save to save the Target or Cancel to discard.
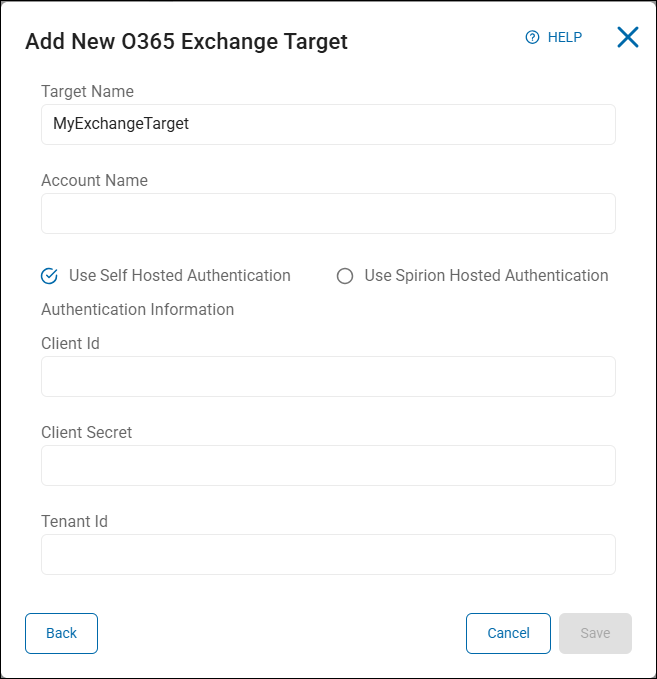
Self Hosted Authentication
Procedure:
- Target Name: Enter the Target name.
- Account Name: Enter the admin user account name
- Select Use Self Hosted Authentication
-
Enter the following information from your Azure App. If you do not have an Azure App, see Create an Azure App (Optional) below:
-
Client ID – Enter your Client ID
-
Client Secret – Enter your Client Secret
-
Tenant ID – Enter your Tenant ID
-
-
To confirm your Azure App has the necessary permissions, see Add API Permissions to Your Azure App below.
- Click Save to create the Target, Cancel to discard, or Back to return to the previous screen.
- This completes the authentication process.
Create an Azure App (Optional)
If you do not have an Azure App, use the following instructions to create the app and record the information you need to create your Exchange Online Target.
App Registration
Procedure:
-
Log in to the Azure Portal
-
Search for and select Microsoft Entra ID

-
Select App Registrations under Manage on the left side menu. (Alternatively, click "Add application registration" under Quick Actions at the bottom of the page)
-
Click New registration
-
Select one of the first two radio buttons based on your needs:
-
Accounts in this organizational directory only (YourDev only - Single tenant)
-
Accounts in any organizational directory (Any Microsoft Entra ID tenant - Multitenant)

Note: Redirect URI is not required
-
-
Click Register at the bottom of the page.
Note the IDs
Record the following information:
-
Application (client) ID
-
Directory (tenant) ID
Certificates and Secrets
Procedure:
-
From the left side menu, under Manage, click Certificates & secrets
-
Click New client secret.

-
Enter an appropriate name and record the name.
-
Record your Client Secret Value and Secret ID.
NOTE: You will not have access to your client secret again.
Add API Permissions to Your Azure App
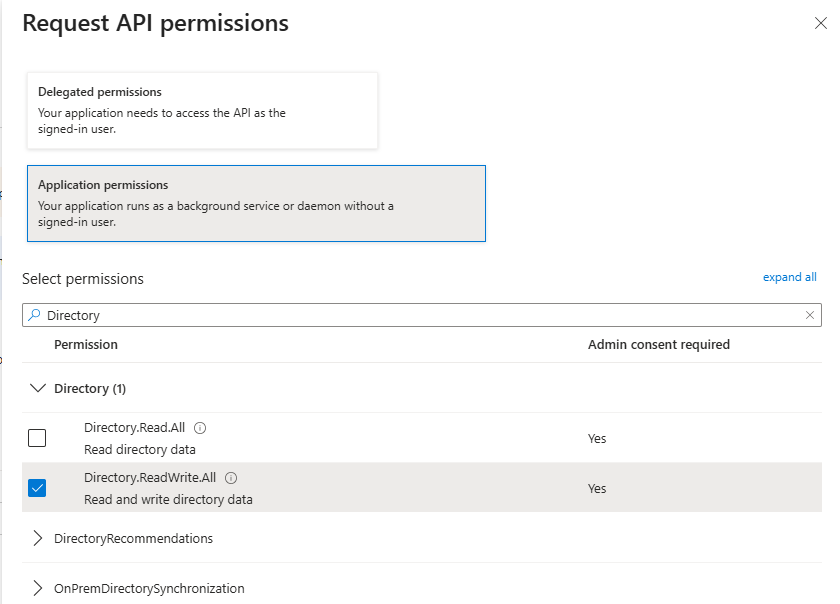
Use the following procedure to add the required API permissions to your Azure App (see "Required Azure App API Permissions" below):
-
One the left side menu, under Manage, select API Permissions
-
Click Add a permission
-
Select Microsoft Graph at the top of the collection of APIs.
-
Select Application Permissions
-
In the Select permissions search field type the name of each permission to find it in the list and then select it. See below.
-
Click the Add permissions button at the bottom of the pane.
-
Repeat this process for each required permission.
-
Grant Admin consent to the permission, if necessary.
Required Azure App API Permissions
Ensure the following Microsoft Graph permissions are enabled for your new Azure App:
-
Files.ReadWrite.All
-
Type: Application
-
Admin consent required: Yes
-
Description: Enables the app to read, create, update, and delete all files the service account user can access.
-
-
Mail.ReadWrite
-
Type: Application
-
Admin consent required: Yes
-
Description: Grants the app access to all mailboxes in an organization and enables the app to access mailboxes without a signed-in user.
-
-
User.Read
-
Type: Delegated
-
Admin consent required: No
-
Description: Enables the app to read basic company information of users.
-
-
User.ReadWrite.All
-
Type: Application
-
Admin consent required: Yes
-
Description: Enables the app to read and write all properties of user profiles.
-
Edit a Target
Procedure:
- Locate the Target you want to edit in the list.
- On the far right of the row, click the more options menu.
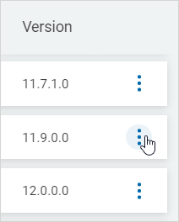
- Click Edit Target.
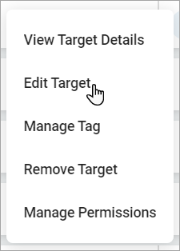
- In the edit pop-up window, make needed changes.
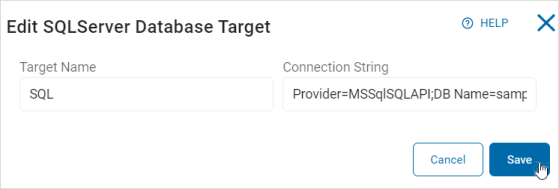
For example:Update the Connection String for the SQL Server Database Target:
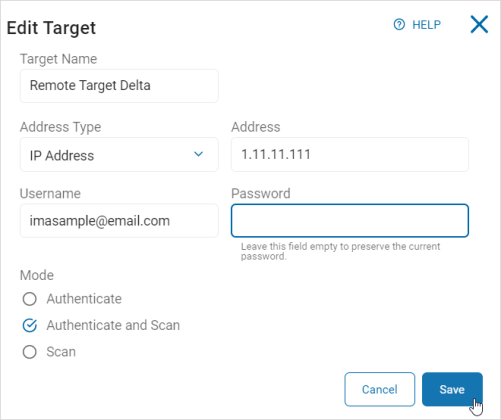
Edit the details of a Remote Connection:
-
Click Save to save changes or Cancel to discard.
-
A toast message is displayed showing a successful update.

Manage Your Tag
Procedure:
- Locate the Target you want to manage in the list.
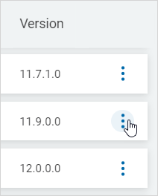
- On the far right of the row, click the more options menu.
-
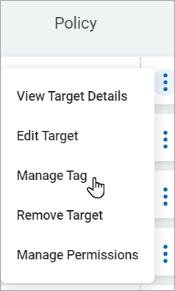
Click Manage Tag.
-
Select Tag(s) to assign to a Target.
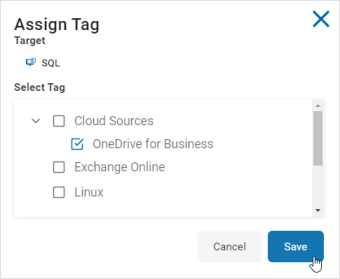
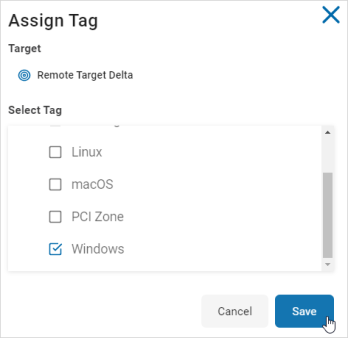
- Click Save to save changes or Cancel to discard.
- A toast message is displayed showing a successful update.

Remove a Target
- Locate the Target you want to remove from the list.
- On the far right of the row, click the more options menu.
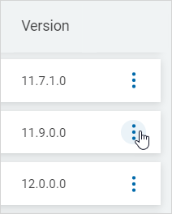
- Click Remove Target.
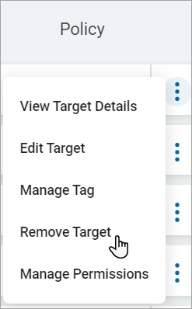
- In the pop-up window that displays, click Confirm to remove the Target or Cancel to discard.

- A toast message is displayed showing a successful removal.

Manage a Target Permission
Procedure:
- Locate the Target for which you want to manage permissions.
- On the far right of the row, click the more options menu.
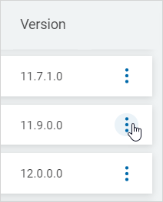
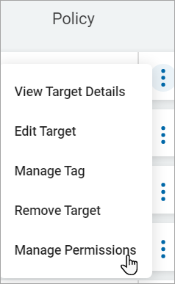
- Click Manage Permissions.
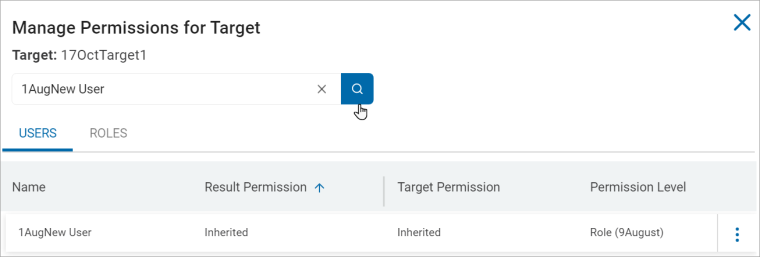
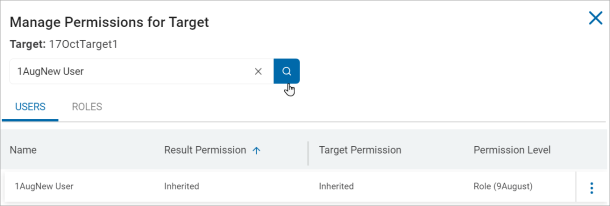
- In the Manage Permissions for Target window, search the user or user role for which to manage the Target's permission.
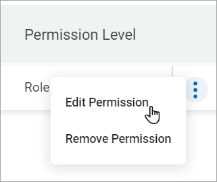
- From the more options menu, click Edit Permission to edit the Target's permission for user or user role.
-
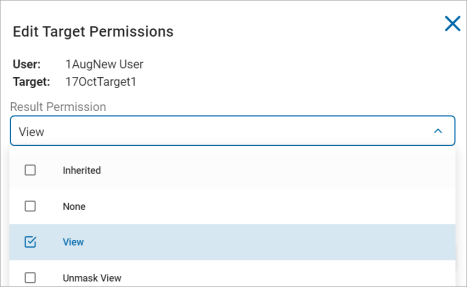
On the Edit Target Permissions window, select any of the following options from the Result Permission drop-down list.
-
Inherited
-
None
-
View
-
Unmask view
-
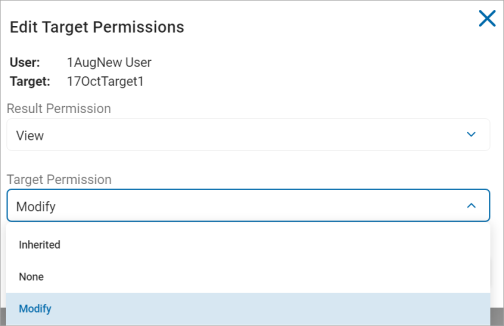
- Select any of these options from the Result Permission drop-down list.
Inherited
None
Modify
- Select Modify under the Target Permission drop-down list.
-
Click Confirm to save or Cancel to discard.
Remove a Target Permission
Use the following steps to remove a Target permission.
- Locate the Target for which you want to manage permissions.
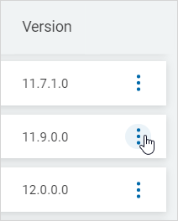
- On the far right of the row, click the more options menu.
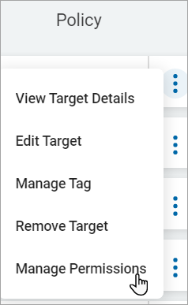
- Click Manage Permissions.
- In the Manage Permissions for Target pop-up window, search the user or user role for which to remove the Target's permission.
- From the more options menu, click Remove Permission to remove permission of user or user role from the selected Target.
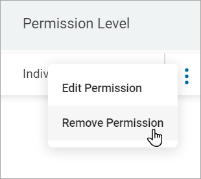
- Click Confirm to save or Cancel to discard.
Bulk Actions
Bulk Assign Tags
Procedure:
- From the All Targets section, select Target group.
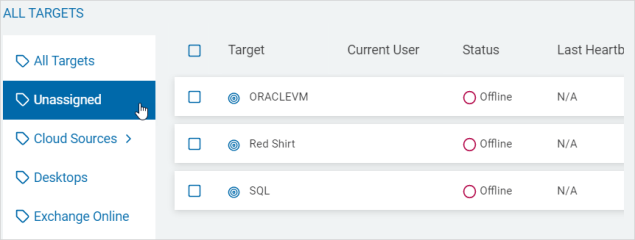
- Check the box to select Targets to bulk assign tags.
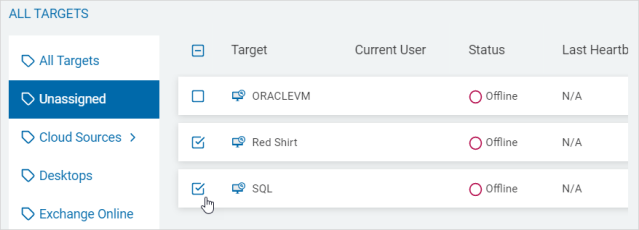
- Click Bulk Actions.
- Click SHOW to highlight the Target selections in a box.

- Click HIDE to clear the Target selections in a box.
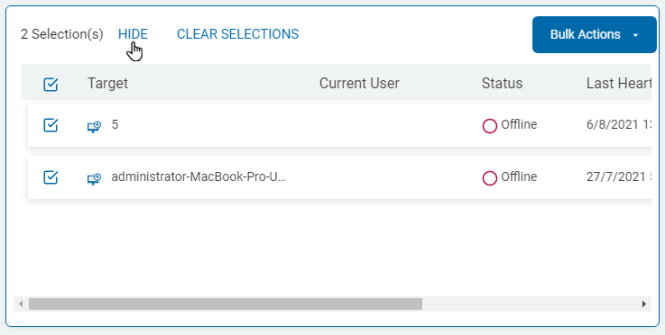
- Click CLEAR SELECTIONS to clear the selected Targets to bulk assign tags.
- Click SHOW to highlight the Target selections in a box.
- Click Assign Tag.

- In the Bulk Assign Tag pop-up window, select the Tags to apply.
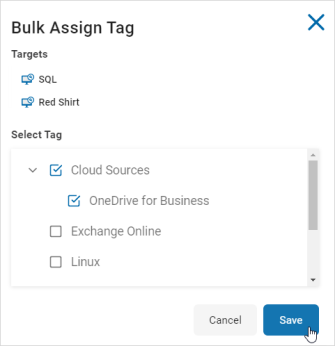
- Click Save to apply the tags or Cancel to discard.
- A toast message is displayed showing the tag(s) are successfully added.

Bulk Import of Targets
Only a user with the Manage permission can bulk import Targets from a tabular file.
-
An Admin has to grant the user this permission in the User Management area.
-
The Bulk Import of Targets feature supports importing 0-1,000+ Targets of multiple types from an imported .csv or Excel template.
-
After importing, the Console checks for errors and generates a new Target for each one included in the template.
-
If errors are detected, no import occurs, and the errors are displayed in the console for the user to work with, if applicable.
To assign a tag to multiple Targets:
- In the Data Assets and Targets screen select the Targets tab.
- In the displayed table, check one or more Targets. The Bulk Actions button displays.
- From the Bulk Actions button select Assign Tag.
- The Bulk Assign Tag window opens. It contains an Targets area showing the selected Targets and a Select Tag area that lists the current tags that are available
Note: If a tag name is reused a numerical increment is added to the tag name.
To bulk import Targets for a multiple Target Types using csv/zip files:
- In the top, right of the screen, click Actions.
- Click Import Targets.
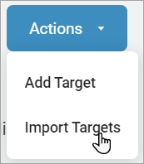
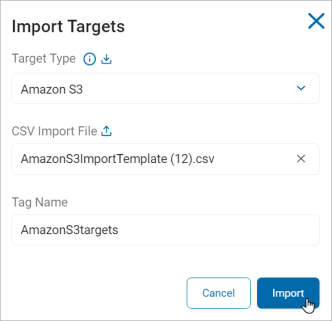
- On the Import Targets pop-up window:
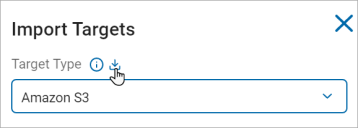
- Select the Target Type from the Target Type drop-down list.
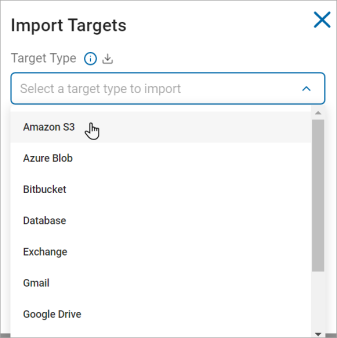
- Click the
 icon to download a csv/zip file template for the selected Target Type.
 - You can also import a file with multiple Target Types.
- You can also import a file with multiple Target Types.
- Downloaded csv/zip file is displayed at the top right of the screen.

- Enter and save details for Targets in the downloaded csv/zip file.
- Select the Target Type from the Target Type drop-down list.
Below are the different Target type templates.
Target Type CSV Import Template
| Target Type | Column Names | Important Notes |
| Amazon S3 |
|
All the column values are mandatory |
| Bitbucket |
|
All the column values are mandatory |
| Database |
|
All the column values are mandatory |
| Exchange |
|
All the column values are mandatory except AD Host and LDAP Query columns |
| Gmail |
|
All the column values are mandatory except Private Key ID and Project ID columns |
| Google Drive |
|
All the column values are mandatory except Private Key ID and Project ID columns |
| Remote Target |
|
All the column values are mandatory |
|
SharePoint |
|
All the column values are mandatory except Domain, Identity Provider ID and Security Token Service columns |
| Website |
|
All the column values are mandatory |
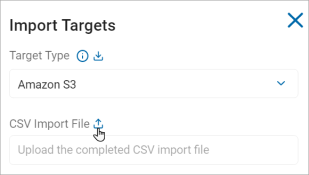
- Click the
 icon to browse and select the completed CSV/ZIP file.
To upload Gmail and Google Drive imports, first place the CSV file and each Target's .p12 file in a zip folder.
-
Enter a Tag name for the imported csv/zip file or Assign the Tag name from the Bulk Actions button.
-
Click Import.
-
A toast message is displayed showing the Target import success at the bottom left of the screen.
