User Guide
Tag Management
Overview
A Tag is a kind of container which holds 1 or more Targets (for example, Marketing Laptops, Windows Servers, HR Databases, etc.) or Assets for the purpose of scanning those Targets/Assets.
-
Tags are useful for purposes such as organizing Targets/Assets for reporting, policy management, Role-Based Access Control, and other operations within the console.
-
Bulk actions can be performed on Assets which are grouped within a single Tag.
Note: An Asset can be both an Asset and a Target. For example, a single workstation acts as both an Asset and a Target (the workstation is scanned for sensitive data by Sensitive Data Platform).
Tag Types
There are three types of Tags:
-
IP Range: Includes Agents and Targets based on an IP range.
-
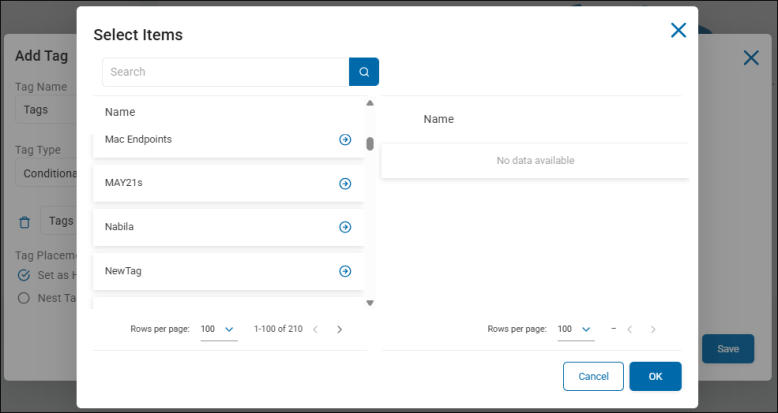
Manual: Includes Agents and Targets manually added to your tag.
-
Conditional: Includes Agents and Targets captured by a set of user-defined parameters.
-
Note: Conditional tags do not update instantly. When you save the tag the conditions are evaluated and applicable endpoints are assigned. A background job runs every hour to re-evaluate and make adjustments as necessary.
-
For example, you create a conditional Tag filtered for > 13 agents. When the Tag is saved, it shows 2 endpoints.
-
Shortly after the Tag is saved, a new v13 Agent registers with the console.
-
It may take up to an hour before the new Agent appears in the Tag.
-
-
-
Tag Examples
-
The Tag Marketing Laptops is a IP Range type Tag that includes a hundred employee laptops (associated machines)
-
The Tag HR Databases is a manual type Tag that includes databases used by the HR department.
-
For example: Oracle_holiday, SQL1, and MayDay2025
-
-
The Tag Cloud Sources is a manual type Tag that includes targets in the cloud.
-
For example: Box2021, S3_dev1, and GitHub2025
-
-
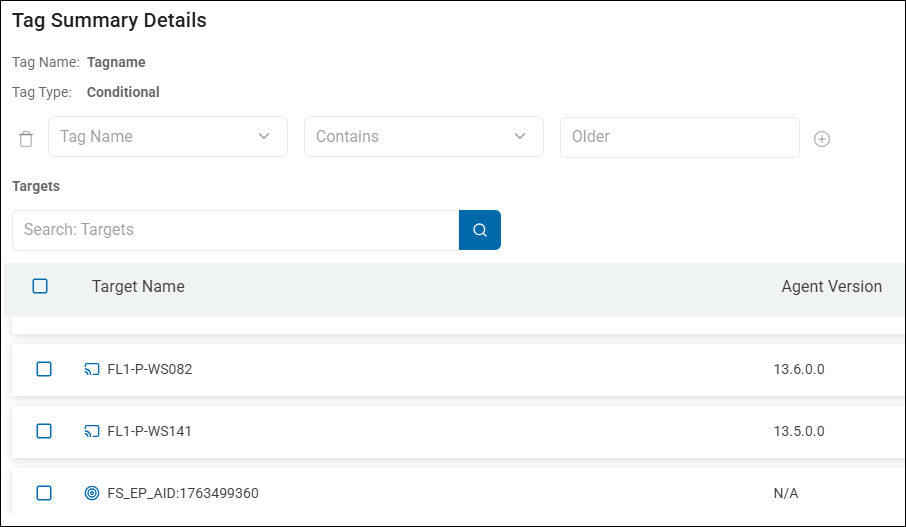
The Tag "macOS" is a Conditional type Tag that captures Agents/Targets (desktops, laptops, servers etc.), also called endpoints, referred to here as "Endpoint Platform," which have MacOS ("MAC" also can be used) in their endpoint platform name. See the image below:

Tag Management
See the topics below for more information:
Access the Tag Management Screen
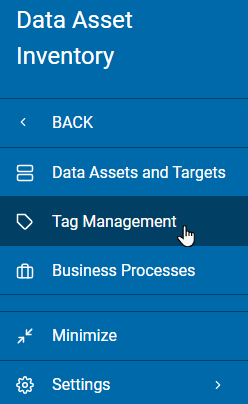
To access this screen:
-
From the left menu, click Data Asset Inventory.
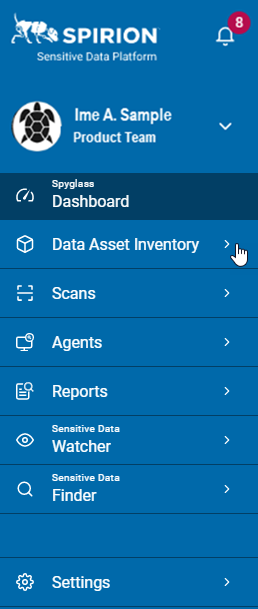
-
Click Tag Management.
View Your Tags
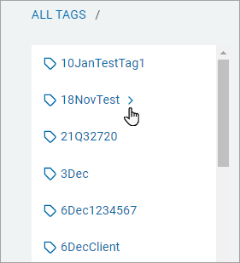
The left-hand side All Tags section displays the Tags.
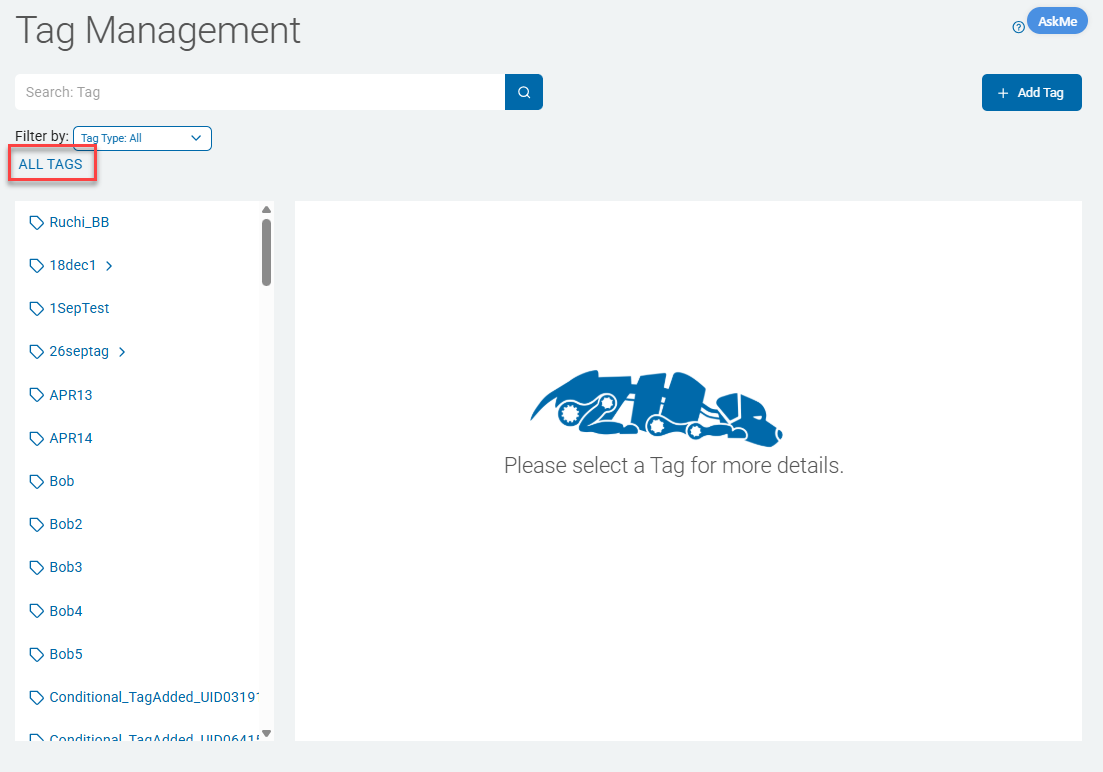
To view your Tags, use the following steps:
-
Click the chevron (>) icon to view the nested tags.
-
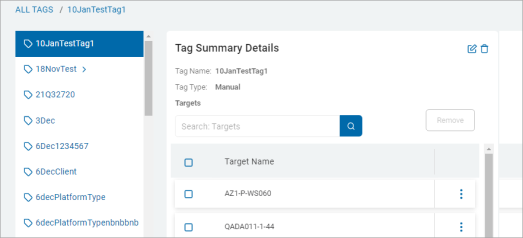
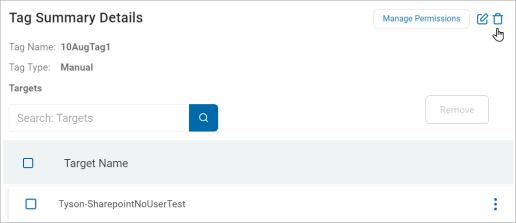
Click a Tag to display its information in the Tag Summary Details section on the right-hand side.
The section displays fields:- Tag Name: The name of the Tag.
- Tag Type: The method of adding a target to a tag.
- IP range
- Manual
- Conditional
- Targets: List of Targets associated with the selected tag. Search entry field enables you to search for specific Targets in the list.
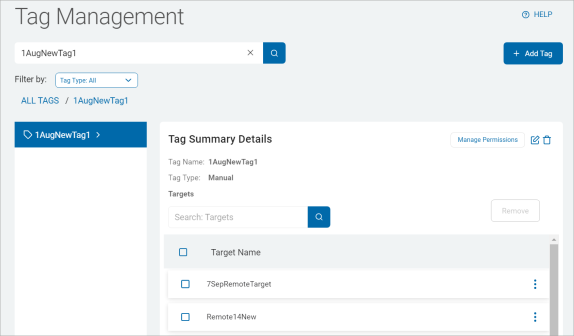
Search for a Tag
-
In the search box, type a Tag name.

-
Click the lens icon (
 ) or click Enter.
 -
The search results are displayed in the All Tags section.
-
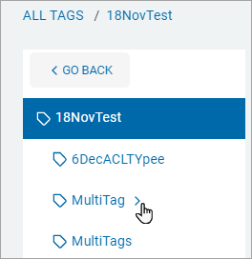
Click the chevron (>) icon next to a tag in the list to expand the tag and view any child tags.
-
The Tag Summary Details display for the selected tag, and, if applicable, the child tag(s) display in the list.
-
Click Go Back to return to the main view.
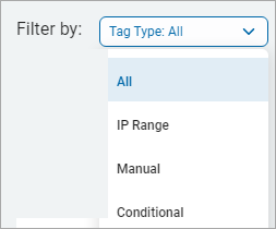
Using Filters to View Tags
Use the Filter feature to view results based on different criteria.
To search with filters:
-
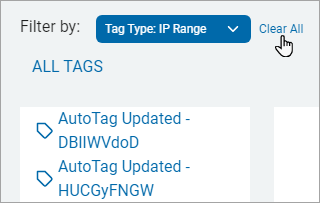
In the top left of the screen, select a tag type from the Filter by option.
-
The search results display in the All Tags section below.
-
Click Clear All to clear your search results.
Add a New Tag
There are 3 types of Tags you can add:
Add an IP Range Tag
To add an IP Range tag:
-
In the top right of the screen, click Add Tag.
-
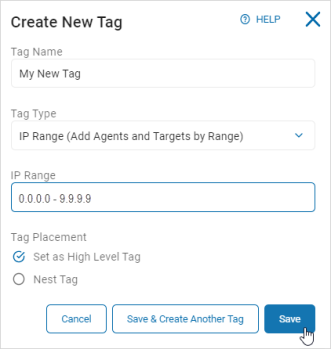
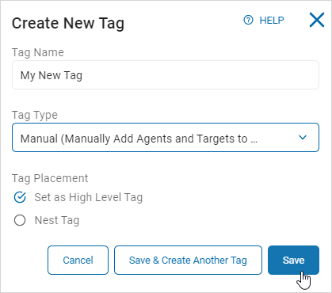
In the Create New Tag pop-up window, complete the following:
-
Tag Name: Enter the tag name.
-
Maximum of 50 characters
-
Alphanumeric and Special characters are supported
-
Duplicate Names are not allowed.
-
All Microsoft Special Characters are allowed:
-
~`!@#$%^&*()_-+={}|[]:"<>?;',./]
-
-
-
Select IP Range from the Tag Type drop-down list.
-
IP Range: Enter the IP range.
-
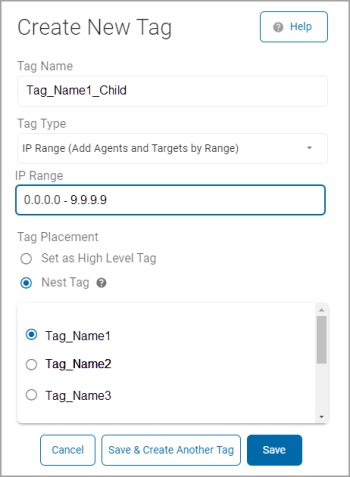
Tag Placement:
-
Set as High Level Tag: Select this option to set the new tag as high-level (parent) tag under which child tags can be nested.
-
Nest Tag: Select a high-level (parent) tag to nest this new tag under as a child tag.
-
-
-
Click Save to save the tag, Save & Create Another Tag to save this tag and create another, or Cancel to discard.
Add a Manual Tag
To add a Manual tag:
-
In the top right of the screen, click Add Tag.
-
In the Create New Tag pop-up window, complete the following:
-
Tag Name: Enter the tag name.
-
Maximum of 50 characters
-
Alphanumeric and Special characters are supported
-
Duplicate Names are not allowed.
-
All Microsoft Special Characters are allowed:
-
~`!@#$%^&*()_-+={}|[]:"<>?;',./]
-
-
-
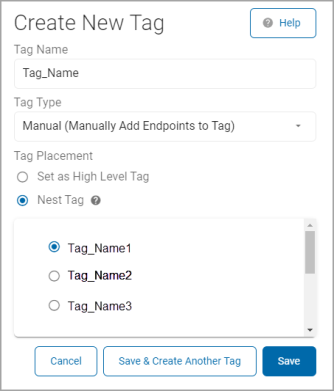
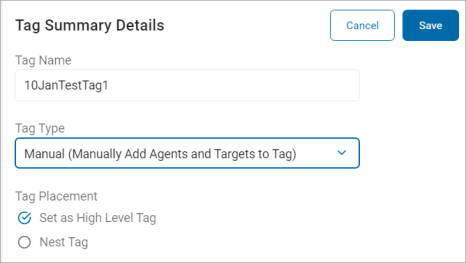
Select Manual from the Tag Type drop-down list.
-
In the Tag Placement section, select an option:
-
Set as High Level Tag: Select this option to set the new tag as high-level (parent) tag under which child tags can be nested.
-
Nest Tag: Select a high-level (parent) tag to nest this new tag under as a child tag.
-
-
-
Click Save to create the tag, Save & Create Another Tag to save this tag and create another, or Cancel to discard.
Add a Conditional Tag
To add a Conditional tag use the following steps:
-
In the top right of the screen, click Add Tag.
-
In the Create New Tag pop-up window, complete the following:
-
Tag Name: Enter a name in the Tag Name box.
-
Maximum of 50 characters
-
Alphanumeric and Special characters are supported
-
Duplicate Names are not allowed.
-
All Microsoft Special Characters are allowed:
-
~`!@#$%^&*()_-+={}|[]:"<>?;',./]
-
-
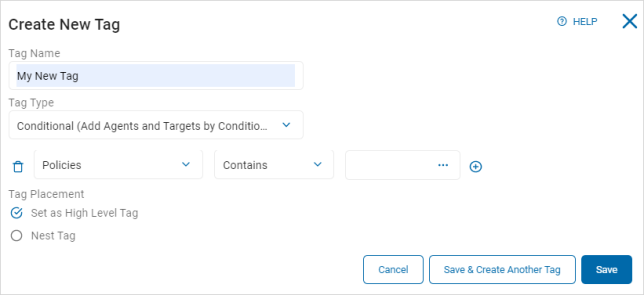
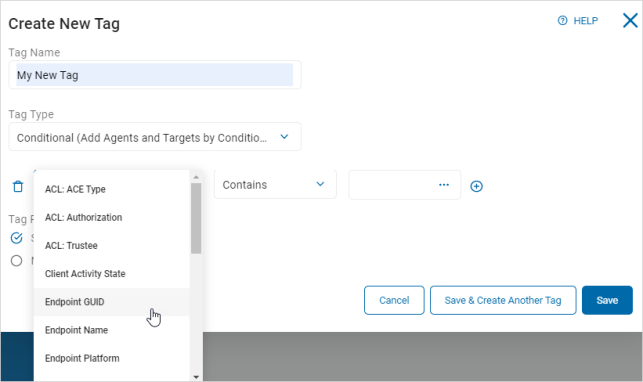
Select Conditional from the Tag Type drop-down list.
-
-
-
Select an option from the Action Type (left) drop-down list.
-
Select an option from the Operator (center) drop-down list.
The values available depend on the selection in the Action Type drop-down list.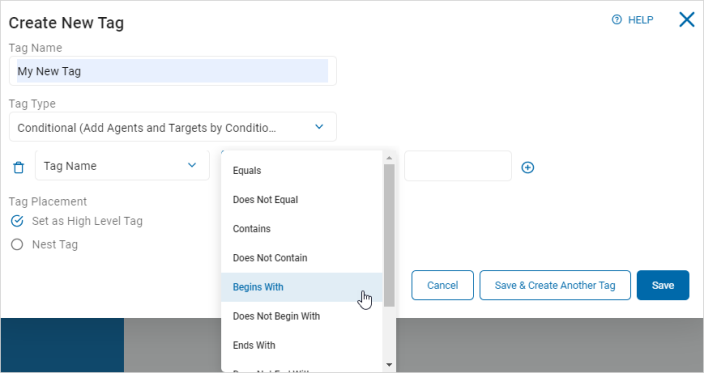
-
Enter or choose a value in the Value Input (right) box.
The values available depend on the selection in the Action Type drop-down list.
-
To add or remove conditions:
-
Click the Add icon (
 ) to add an additional group or value.
 -
Click the Remove icon (
 ) to delete a group or value.
-
-
In the Tag Placement section, select an option:
-
Set as High Level Tag: Select this option to set the new tag as high-level (parent) tag under which child tags can be nested.
-
Nest Tag: Select a high-level (parent) tag to nest this new tag under as a child tag.
-
-
Click Save to save the tag, Save & Create Another Tag to save and create another tag, Cancel to discard.
The following table details the available options for Conditional Tags.
Note: A single result matches all of the conditions: Selecting this option requires a single result in a search location to match all of the conditions in a definition for the rule to be applied.
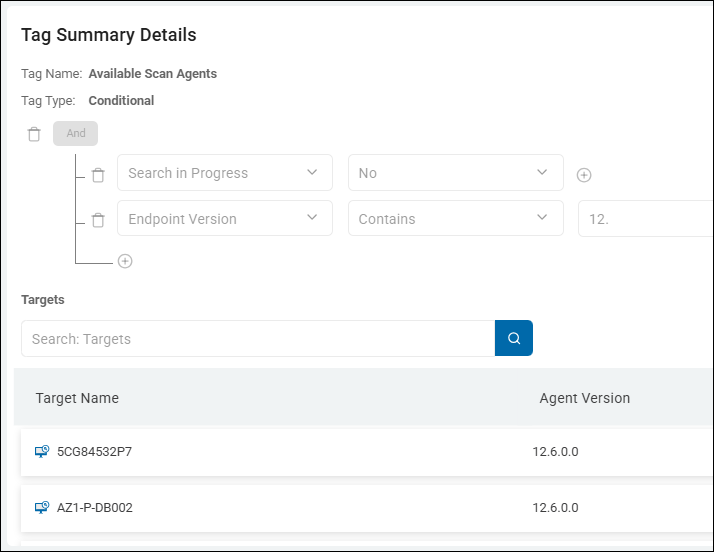
A group of results match all of the conditions: Selecting this option requires a group of results in a search location to match all of the conditions in a definition for the rule to be applied. Additionally, when the filter is set to Quantity, Action, or Data Types; you can create horizontal AND groups. Within a horizontal AND group all conditions must be met by a single result to be considered a match.
| Action Type | Operator | Description | Value Input |
|---|---|---|---|
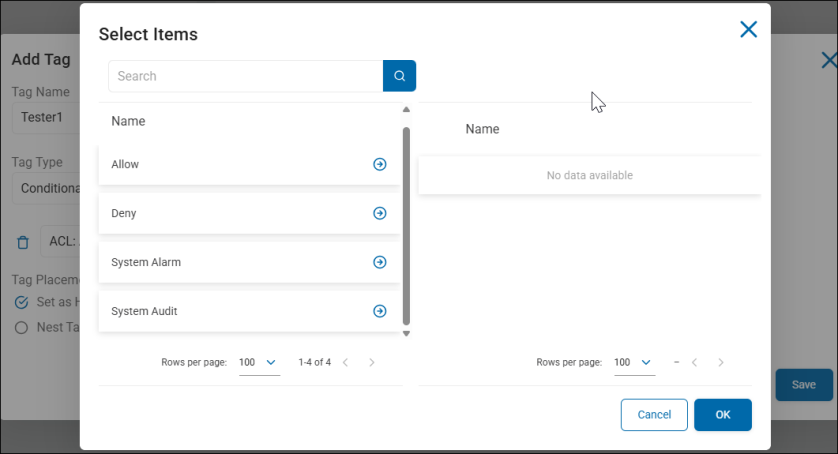
| ACL: Ace Type |
Contains Does Not Contain Is Empty Is Not Empty |
A filter which restricts based upon the ACE (Access Control Entry) Type. |
Specify the value to be used to qualify the data.
|
| ACL: Authorization |
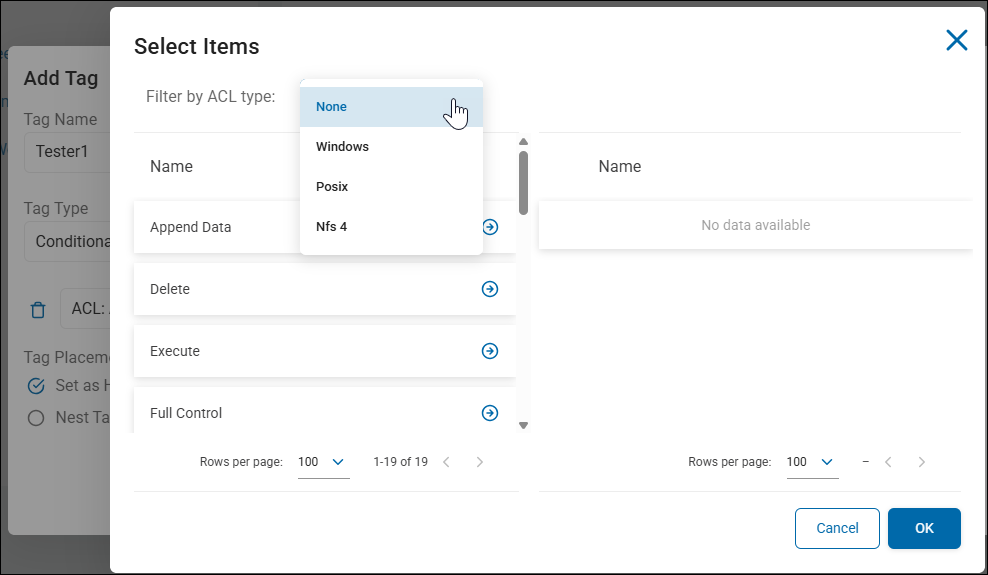
A filter which restricts based upon the specific rights granted to the trustee, such as the ability to read, write or delete the file. |
Specify the value to be used to qualify the data. Filter by ACL type to view specific options:
|
|
| ACL: Trustee | A filter which restricts based upon the individual user or group to which the access rights apply. |
Specify the value to be used to qualify the data. |
|
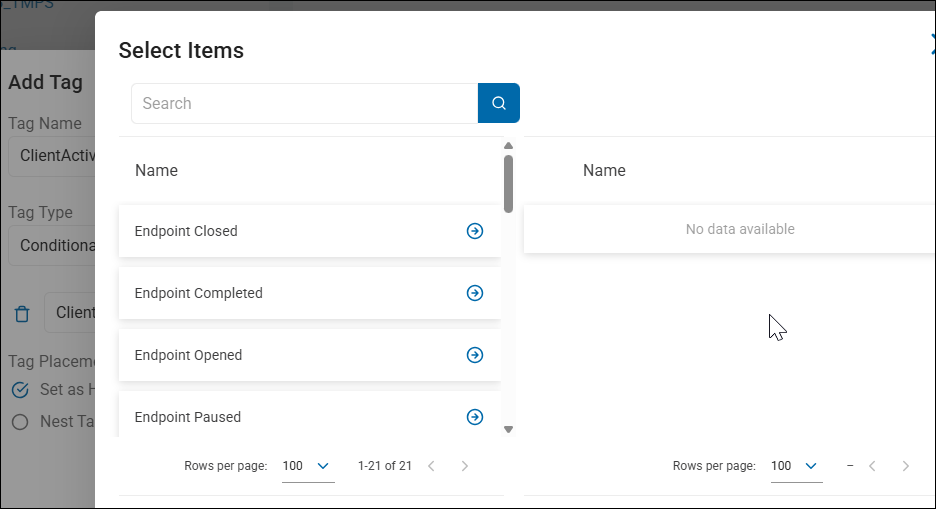
| Client Activity State |
A filter which restricts based on an the activity state of the client endpoint.
|
Specify the value to be used to qualify the data.
|
|
| Endpoint GUID |
Equals |
A filter which restricts by the GUID of the Agent/Target (endpoint) |
Specify the GUID number of the Agent/Target (endpoint) to use to qualify the data.
|
| Endpoint Name | A filter which restricts by the endpoint name of the Agent/Target (endpoint) |
Specify the name of the Agent/Target (endpoint) to use to qualify the data.
|
|
| Endpoint Platform |
A filter which restricts by the endpoint platform of the Agent/Target (endpoint)
|
Specify the platform of the Agent/Target (endpoint) to use to qualify the data.
|
|
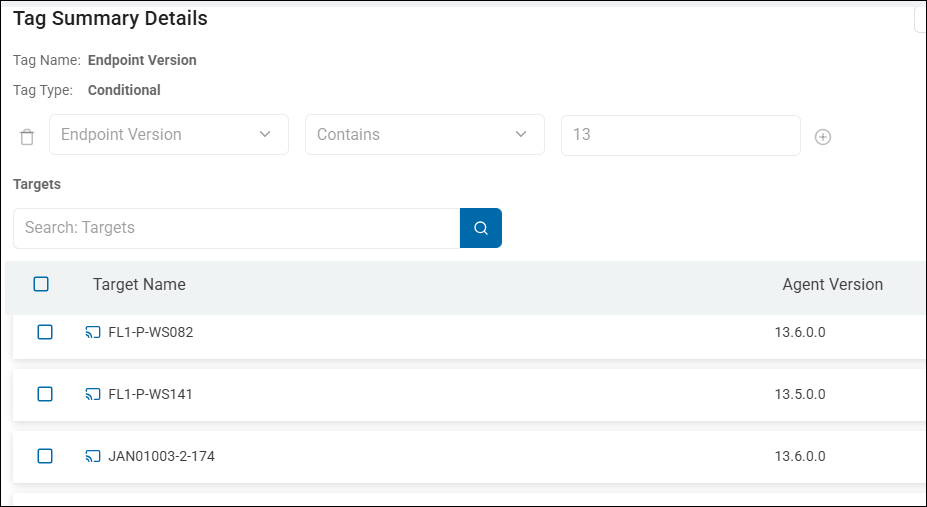
| Endpoint Version |
A filter which restricts by the version of the Agent (endpoint). In the example below, only Agents (displayed as Targets - Agents can act as Targets) whose version number contains a 13 (v13-13.6) are shown.
|
Specify the Agent version to use to qualify the data. Examples: v13.6 Agents only
v12.x Agents
v12.x Agents Available to Scan
|
|
| Last Poll Time |
On |
A filter which restricts by the specified date/time the Agent/Target (endpoint) was polled. Use the available operators to customize how the date is used.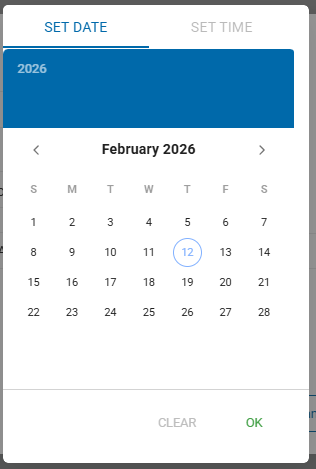 |
|
| MAC Address | Equals
Does Not Equal Contains Does Not Contain Begins With Does Not Begin With Ends With Does Not End With Is Empty Is Not Empty |
A filter which restricts by the MAC address of the Agent/Target (endpoint) |
Specify the MAC address to use to qualify the data. MAC address is a unique identifier composed of 12 hexadecimal digits. The most common format is six pairs of digits separated by:
|
| Match Quantity |
Equals
|
A filter which restricts by the quantity of sensitive data matches on the Agent/Target (endpoint). |
Specify the value to be used to qualify the data. For example, if you create a rule with the following:
Then only Agents/Targets (endpoints) with exactly 10 total sensitive data matches would match this rule. |
| Number of Searches | A filter which restricts by the number of searches performed on the Agent/Target (endpoint) |
Specify the value to be used to qualify the data. For example, if you selected:
Then only Agents/Targets (endpoints) searched a total of 120 or more times are returned. Typically, the greater the number of searches, the fewer Agents/Targets returned. |
|
| Platform Type |
Contains |
A filter which restricts by the Platform type of the Agent/Target (endpoint). |
Specify the Platform type to be used to qualify the data. Platform types include:
*You can select more than 1 platform type. |
| Policies | A filter which restricts by the user-specified Policy or Scan used by the Agent/Target (endpoint). 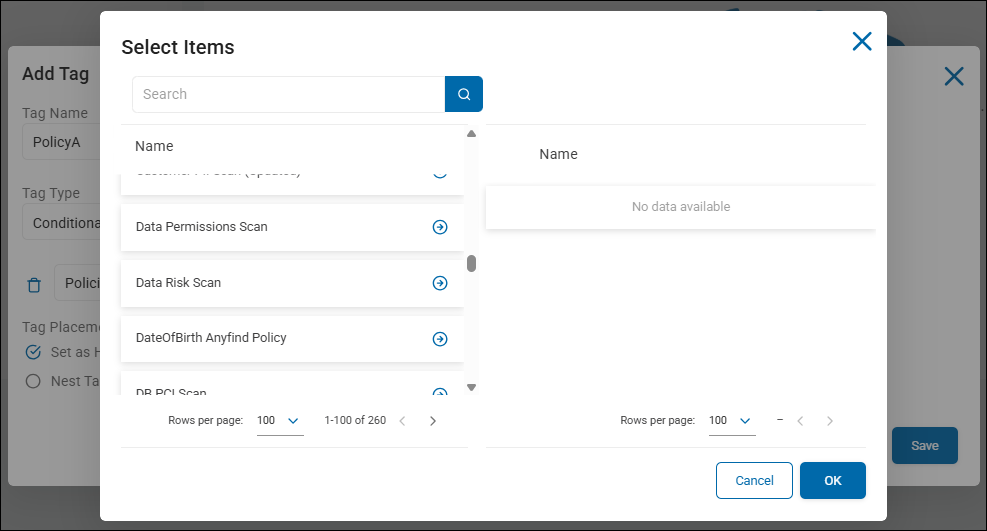 |
Specify the policy or scan to be used to qualify the data. For example:
|
|
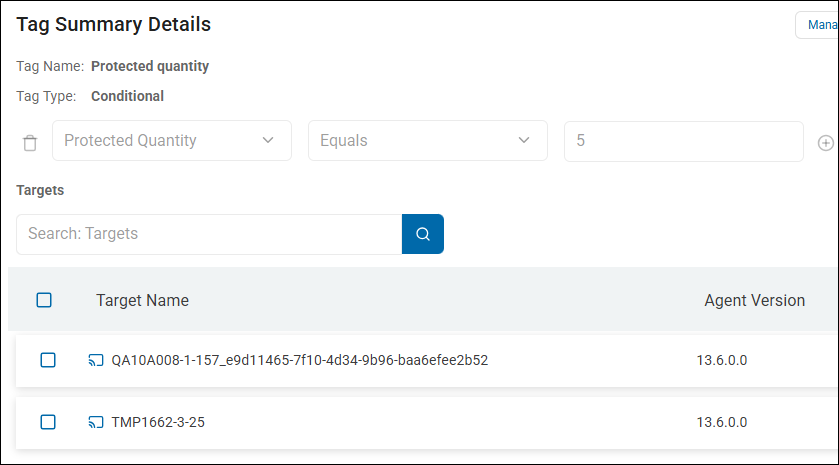
| Protected Quantity | Equals
Does Not Equal Greater Than or Equals Greater Than Less Than or Equals Less Than Is Empty Is Not Empty |
A filter which restricts Agents/Targets (endpoints) by the amount of sensitive data matches with "Protected" status. "Protected" sensitive data matches have at least one of the following actions applied to them:
*Data matches labeled "MIP" and/or "Classified" do not qualify as Protected. |
Specify the value to be used to qualify the data. For example, if you created a rule with the following:
Then only those Agents/Targets (endpoints) with exactly 5 total Protected sensitive data matches are returned. |
|
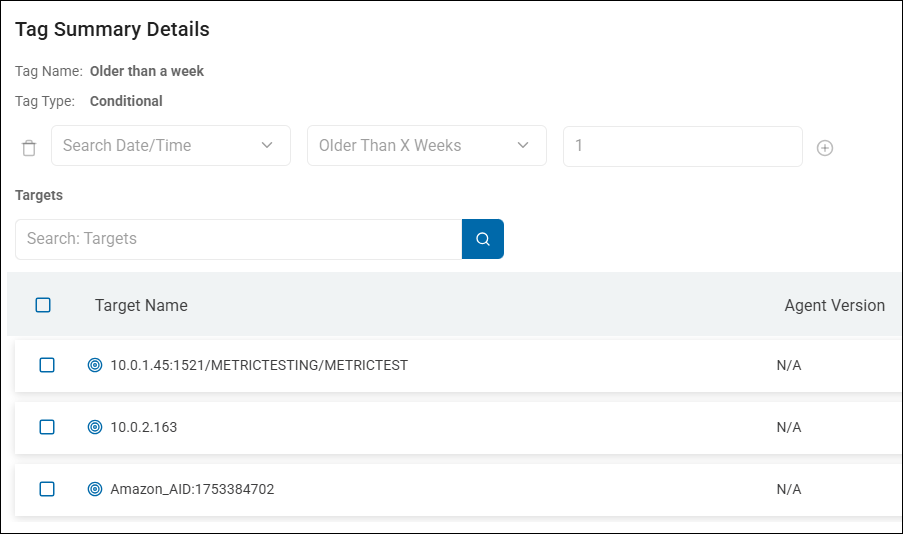
Search Date/Time |
On
Not On After On Or After Before On Or Before Today Yesterday Not Empty Empty Last 7 Days Last 30 Days Last 365 Days (1 Year) Last Week This Week Last Month This Month Last Year This Year Last X Days Last X Weeks Last X Months Last X Years Last X Hours Older Than X Days Older Than X Weeks Older Than X Months |
A filter which restricts based on the date and time that the file was last accessed.
|
If the (All day) option is selected, the time portion of the filter does not display. If the (All day) option is not selected, the time portion of the filter displays and is applied.
|
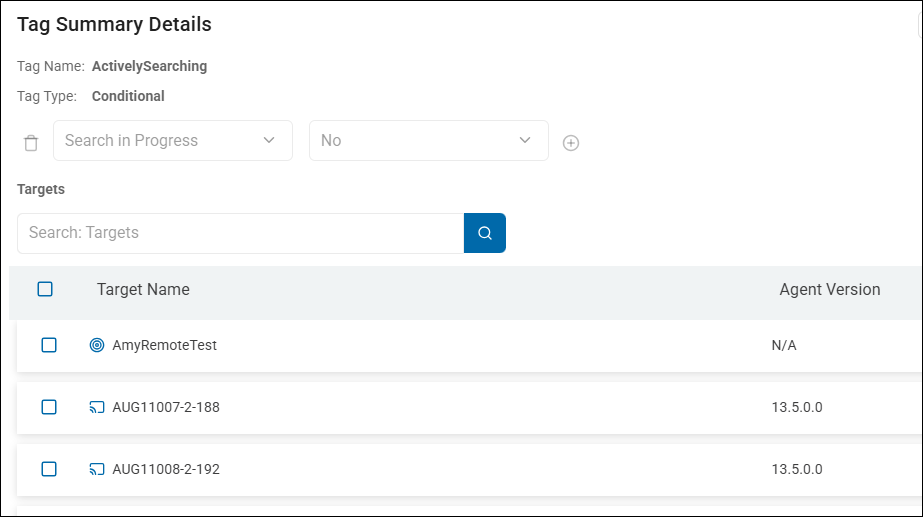
| Search In Progress | No
Yes |
A filter which restricts based on the status of the Agent/Target (endpoint). Are the endpoints being actively scanned by a Spirion Agent? This setting is useful for testing, monitoring, and troubleshooting your Agents/Targets (endpoints).
|
Specify the value to be used to qualify the data.
|
| Tags | Contains
Does Not Contain Is Empty Is Not Empty |
A filter which restricts by specific Tags, manually selected by you when you create this Tag. |
Specify the value to be used to qualify the data. For example, if you created a rule as follows:
Then all Agents/Targets (endpoints) captured by all the Tags selected in the rule, are be returned. All endpoints included in Tags such as:
|
| Tag Name | Equals
Does Not Equal Contains Does Not Contain Begins With Does Not Begin With Ends With Does Not End With Is Empty Is Not Empty |
A filter which restricts by the name of the Tag the Agent/Target (endpoint) is a member of.
|
Specify the value to be used to qualify the data. For example, if you created a rule as follows:
Then all Agents/Targets (endpoints) captured by tags with the term "Older" in the tag name are returned. Such Tags could include:
|
| Unprotected Quantity | Equals
Does Not Equal Greater Than or Equals Greater Than Less Than or Equals Less Than Is Empty Is Not Empty |
A filter which restricts Agents/Targets (endpoints) by the amount of sensitive data matches with "Unprotected" status. Unprotected means sensitive data matches with no actions applied or the following actions applied:
|
Specify the value to be used to qualify the data. For example, if you created a rule with the following:
Then only those locations with 10 total matches would match this rule. |
 )on or off, as applicable.
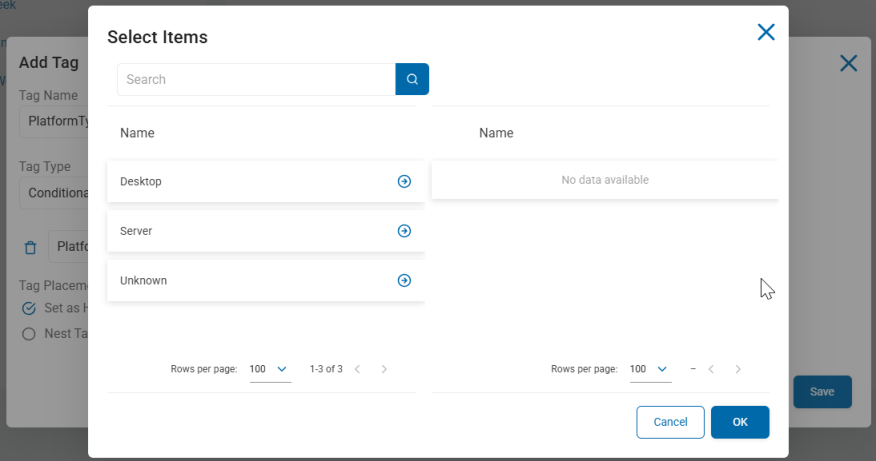
Manage a Tag Permission
To manage a Tag Permission:
-
In the Tag list, locate a tag for which you want to manage permissions.
-
In the Tag Summary Details section, click Manage Permissions.
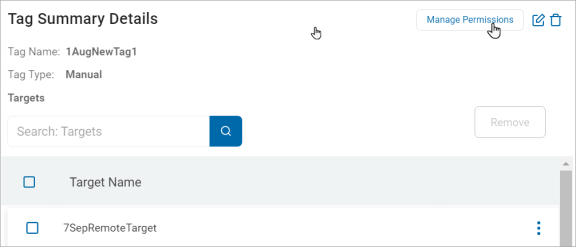
Use the USERS and ROLES tabs to manage the permissions for your Tag (see below).
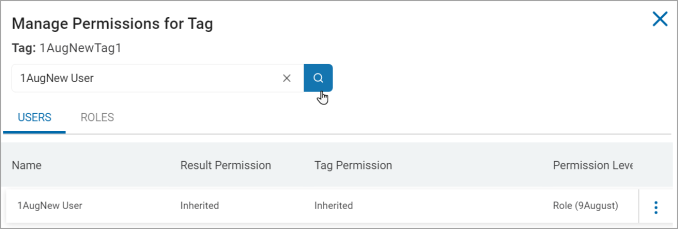
Users Tab
Procedure:
-
Select the USERS tab.
-
Search the user for which you want to edit the tag permission.
-
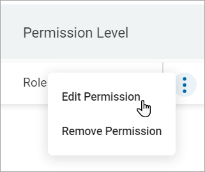
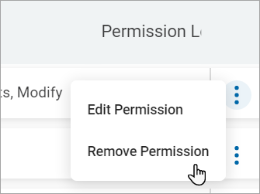
Click Edit Permission from the more options menu.

-
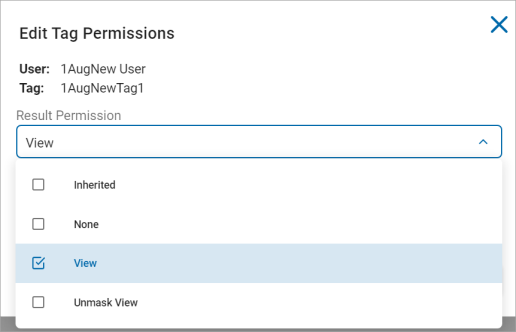
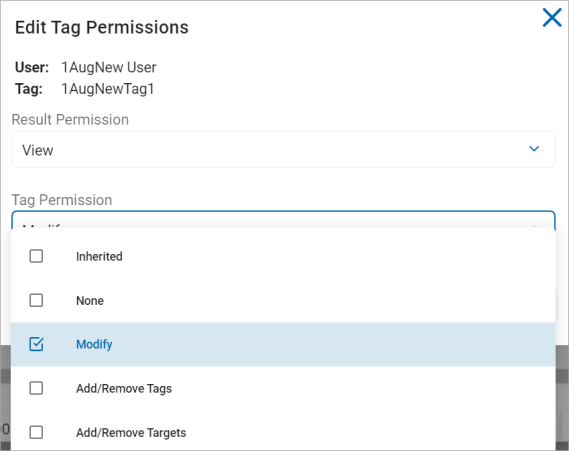
On the Edit Tag Permissions pop-up window, select any of the following options from the Result Permission drop-down list.
-
Inherited
-
None
-
View
-
Unmask view
-
-
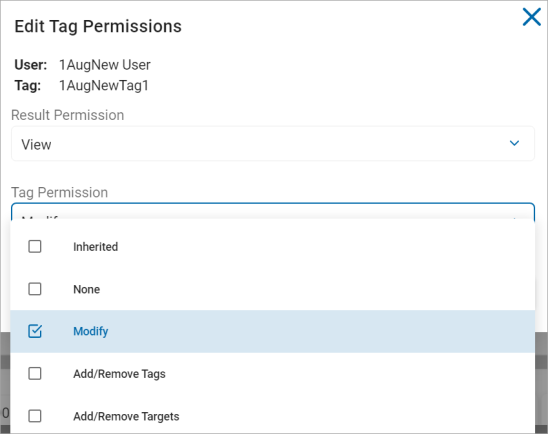
Select any of the following options from the Tag Permission drop-down list.
-
Inherited
-
None
-
Modify
-
Add/Remove Tags
-
Add/Remove Targets
-
-
Click Confirm to save or Cancel to discard.
Roles Tab
Procedure:
-
Select the ROLES tab.
-
Search the user role for which you want to edit the tag permission.

-
Click Edit Permission from the options menu
 .
.
-
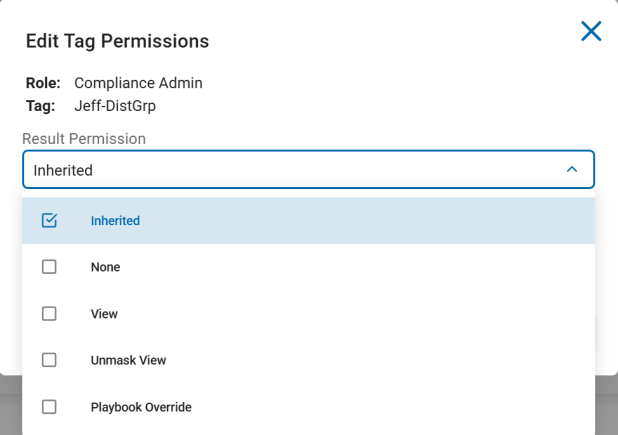
On the Edit Tag Permissions pop-up window, select any of the following options from the Result Permission drop-down list.
-
Inherited
-
None
-
View
-
Unmask view
-
Playbook Override
-
-
Select any of the following options from the Tag Permission drop-down list.
-
None
-
Modify
-
Add/Remove Tags
-
Add/Remove Targets
-
-
Click Confirm to save or Cancel to discard.
Remove a Tag Permission
To remove a Tag Permission:
-
In the Tag list, locate a tag you want to remove.
-
In the Tag Summary Details section, click Manage Permissions.

-
On the Manage Permissions for Tag pop-up window, use the following topics.
Users tab
Search the user for which you want to remove the tag permission.
-
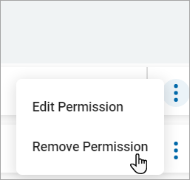
Click Remove Permission from the more options menu.
-
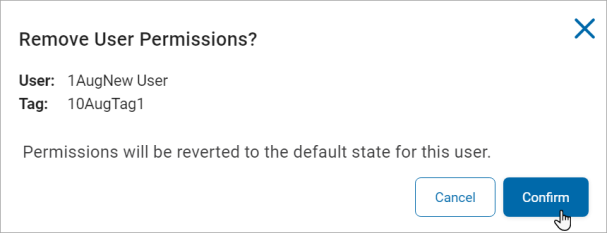
On the Remove User Permissions pop-up window, click Confirm to revert the user permissions to its default state else click Cancel.
Roles tab
Search the user role for which you want to remove the tag permission.
-
Click Remove Permission from the more options menu.
-
On the Remove User Permissions pop-up window, click Confirm to revert the user role permissions to its default state else click Cancel.

Edit a Tag
To edit a Tag:
-
In the Tag list, locate a tag you want to edit.
-
In the Tag Summary Details section, click the
 icon.
icon.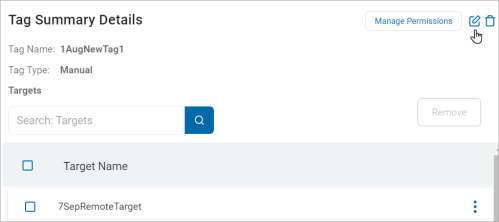
-
Make changes to any of the following:
-
Tag Name: Enter a new tag name.
-
Tag Type: Select an option from the drop-down list.
- IP Range: Delete the existing text and type a new range.
- Manual:
- Conditional: Delete existing conditions and input new conditions.
- Tag Placement: Select an option from the drop-down list:
- Set as a High Level Tag or Nest Tag
- Set as a High Level Tag or Nest Tag
-
-
Click Save to save or Cancel to discard.
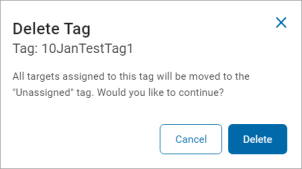
Delete a Tag
To delete a Tag:
-
In the Tag list, locate the tag you want to delete.
-
In the Tag Summary Details section, click the delete icon.
-
In the Delete Tag pop-up window, click Delete to confirm deletion or Cancel to discard.