
User Guide
Getting Started with Agents
Overview
An Agent is a kind of program, called a worker process, installed locally or on a remote VM, which scans and evaluates locations (cloud or local) for sensitive data such as social security numbers, credit card numbers, etc.
-
Also see What is an Agent?
You manage your various Agents on the "Agent Management" page in Spirion Sensitive Data Platform.
-
Your environment may come to employ dozens of Spirion Agents each scanning your environment for sensitive data (PII or SPI).
-
Some Agents may be responsible for scanning Mac laptops, while others are responsible for scanning SQL databases, File Servers, G-mail accounts, or OneDrive accounts.
-
The Agent Management page enables you to organize, sort, group, search, and monitor your Agents and their status.
Function and Purpose
-
Location: Agents are installed either locally or remotely on a VM
Function
Agents evaluate and scan locations for sensitive data.
-
Agents perform their scanning and evaluation function by following an Agent Policy.
-
An Agent Policy is a set of rules for the Agent to follow.
-
For more on creating and working with policies, see Working with Policies
-
-
Agents are typically installed on a Windows, Mac or Linux desktop, server, or virtual machine (VM).
-
Agents installed on a single desktop (to scan that individual desktop), act as both an Agent and a Target. For more information about Targets, see What is a Target?
-
-
Agents scan source system files for sensitive data such as social security numbers, credit card numbers, dates of birth, etc.
-
Agents connect to the source or Target (OneDrive, SharePoint, box, etc.) to be scanned and access the files and their contents.
-
Multiple agents (called a Discovery Team) scan the same source, in parallel. Each agent scans a separate file at a time
-
A Discovery Team is composed of a minimum of 3 Agents
-
Agents act in tandem
-
One Agent acts as a "Discovery Agent," (also called a queue manager) and discovers the files to be scanned in the source system
-
One or more additional "Search Agents" connect to the queue manager agent and use the list to scan the identified source system files for sensitive data.
Spirion Agents and Discovery Teams
-
-
-
Agent Scanning Performance
-
Spirion recommends running a minimum of 10 Agents for speed and efficiency
-
Fault tolerance: By employing multiple agents, scanning continues even if a scan node fails (at least one scan node must be active)
-
Speed multiplier: The more Agents you run, the faster your data is scanned
-
Throughput: Each Agent can scan 40-75 GB of data per day (24 hours), or roughly 1.8 GB per hour
-
The first initial scan of your source systems can take up to several weeks
-
Follow-up scans can be completed in a day or less as Sensitive Data Platform scans only those files that have a changed state (see Differential Scanning).
Example
There can be 10 agents configured in a single scan, scanning a single source or Target (OneDrive, Google Drive, remote machine, local machines, Oracle, etc.).
-
One of those 10 agents is designated as the "discovery" agent
-
The role of this agent is to enumerate through the source to find all files that will need to be scanned.
-
While enumerating through the source, the discovery agent is adding the file it discovers to a job queue (RabbitMQ for Spirion Agents v13-13.5, PostgreSQL for Spirion Agents v13.6+).
-
-
The other 9 agents participate in the scan, now designated as "search" agents
-
These agents:
-
Act in parallel for speed and efficiency
-
Access the job queue on the discovery agent machine
-
Pull the next job in line, which contains all of the info about the files each must scan.
-
Each of the search agents pull one "job" from the job queue at a time
-
Each of the search agents only searches the files listed in that job
-
-
All 9 search agents search different files from the same source at the same time.
-
There can be multiple agents connecting to and accessing files in a source, but only a single file is scanned by a single agent at a given time.
-
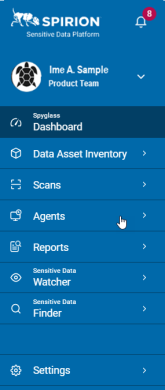
Access the Agent Management Page
To access this page:
-
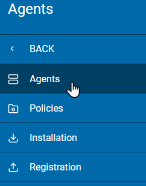
From the left menu, click Agents.
-
Click Agents.
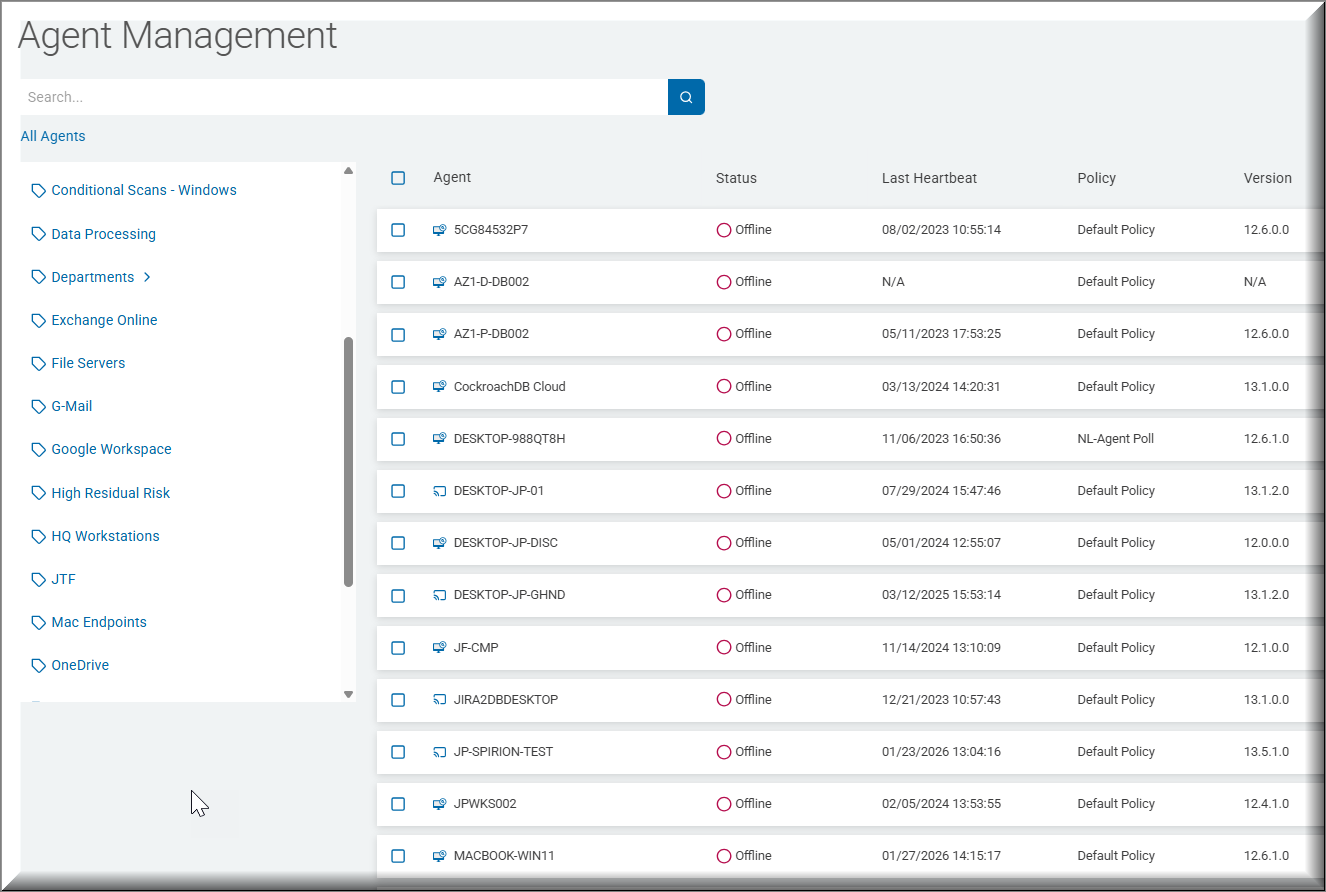
Access and View Agent
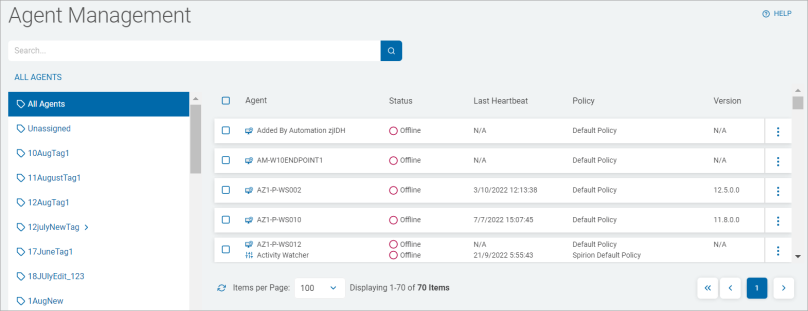
The Agent Management page displays:
-
Search field at the top of the page
-
Agent collections (in Tags) on the left of the page
-
Table of individual Agents at the center of the page
-
Note: An Agent can act as both an Agent and a Target depending on the use case. The terms are used interchangeably on this page.
-
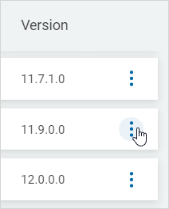
Icons: The icons on the Agent Management page indicate the version of the Agent
-
 - This icon signifies Windows Agents version 13 and later.
 -
 - This icon signifies either Windows Legacy Agents (earlier than version 13.0) or Mac/Linux Agents
-
Agent Search
If you know the name of your Agent, this is the fastest way to find your Agent.
-
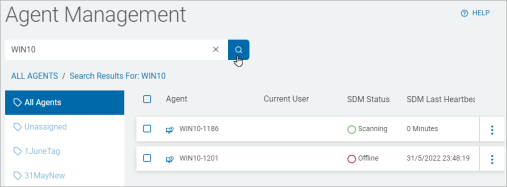
Enter the name of the Agent you are searching for and click the magnifying glass icon or press Enter.
-
To view all Mac Agents enter the search term MAC
-
To view all Linux Agents enter the search term Linux
-
Note: The Search field is used to search for Agents by Agent name, and not to search for Agent Tag names (listed in the pane on the left side of the page)
Agent Collections (in Tags)
-
Agents are collected in Tags, which act as a container for one or more Agents
-
This facilitates Agent organization and management
-
Bulk actions can be applied to a batch of agents. typically, all agents collected within a given Tag (example: QA_Dec2025) are selected and then a bulk action is run against all of them.
-
Note: These Tags can also contain Targets
-
-
To see all available Agents select the All Agents entry in the list.
-
To see all Agents not assigned to any Tags, select the Unassigned entry in the list.
-
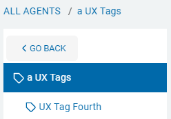
For Tags with a carrot ( >), click the carrot to view the child Agent Tag(s) of a parent Agent Tag.
Agent Table
Table columns:
- Agent: The name and type of Agent. Agent type is indicated by the icon displayed.
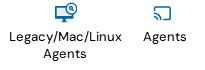
Legacy Agents - Left icon above. Windows Agent pre-version 13 or Mac/Linux.
Agents - Right icon above. Windows Agents version 13 or later
- Status: The Status of each Agent is calculated as follows:
Agent Ready - Agent reporting to the console as ready
Discovery - Discovery Agent is performing a discovery scan of its Target (scanning metadata only)
Scanning - Agent is performing a sensitive data scan of its Target
Error - Agent has thrown an error
Offline - Agent has not reported to the console in over 2 reporting time intervals.
- Last Heartbeat: The last activity recorded that shows the agent is successfully communicating with the console. Heartbeats are recorded every five minutes.
- Policy: The name of the policy currently assigned to the agent.
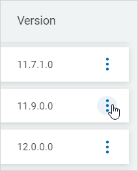
- Version: The version of the installed agent.
- More options: Expand a section to view more details and click the more options icon (
 ) to view additional options.
Expand a parent Agent procedure:
-
Click the right arrow to expand an agent list, if required.

-
Click Go Back to return to the list of All Agents.
View Details of a Specific Agent/Target
To view the details of a specific Agent:
-
On the Agent Management screen, locate the Agent you want to view.
-
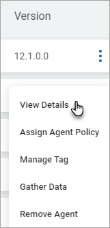
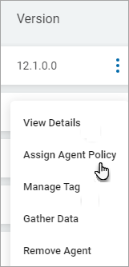
On the far right of the row, click the more options menu.
-
Click View Details.
-
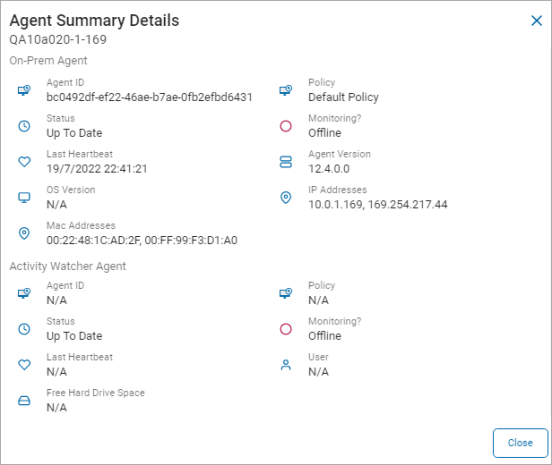
The Agent Summary Details pop-up window displays the details of the Agent:
-
On-Prem Agent
-
Agent ID
-
Status
-
Last Heartbeat
-
OS Version
-
Mac Addresses
-
Policy
-
Monitoring
-
Agent Version
-
IP Addresses
-
-
Activity Watcher Agent
-
Agent ID
-
Status
-
Last Heartbeat
-
Free Hard Drive Space
-
Policy
-
Monitoring
-
User
-
-
-
Click Close to exit the window.
Search for a Specific Agent
Procedure:
-
To search for an Agent, either:
-
Type a name in the search box and click the lens icon
-
Enter the name on your keyboard.
-
-
Click the x to clear a search term.
Assign an Agent Policy
To assign an Agent policy:
-
On the Agent Management screen, locate the Target you want to manage.
-
On the far right of the row, click the more options menu.
-
Click Assign Agent Policy.
-
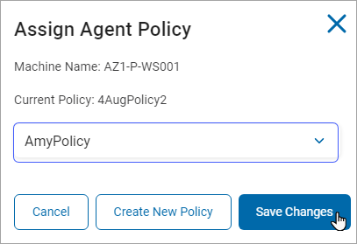
In the Assign Agent Policy pop-up window, select an agent policy.
-
Click Save Changes to save the changes
-
Click Create New Policy to create a new policy on the Policies screen
-
Click Cancel to discard
-
See Working with Policies for more information on adding/creating a policy
-
The Agent Operation settings use the Temp File Location if it has an assigned value.
The file location must have a Windows file path and cannot be a mapped network drive.
Set up Temp File options for clean-up either:
-
To begin shredding temp files immediately or delay until the scan is complete.
-
To asynchronously shred temp files, or shred in sync with the scan.
When scanning, compressed files can be downloaded to the Temp File.
-
To save processing time, the compressed file is decompressed one file at a time and the same set of decompressed files are used for each discovered location.
-
The file will not be compressed or decompressed again.
-
The Temp File is shredded intermittently to limit space usage and processing time.
Assign Agent Tags
To assign Agent Tags:
-
On the Agent Management screen, locate the Agent you want to assign a Tag(s).
-
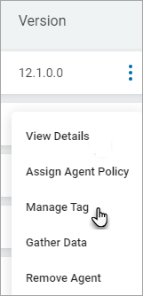
On the far right of the row, click the more options menu.
-
Click Manage Tag.
-
In the Assign Tag pop-up window, select the Tags to add to this Agent (referred to as a "Target" in this dialogue.
-
Click the down arrow to expand a Tag section.
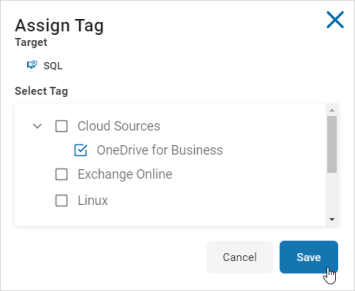
-
Click Save to save changes or Cancel to discard.
Gather Agent Data
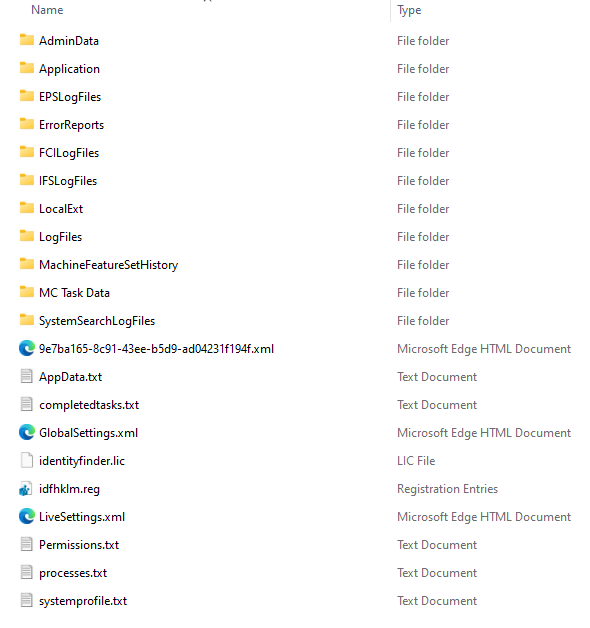
The Gather Agent Data button gathers the following information from the machine the agent is running on:
-
Logs and system information
-
EPS log files
-
Error reports
-
FCI log files
-
IFS log files
-
System search log files
-
-
Processes actively running
-
Permissions
-
Registry values
To make an Agent data request:
-
On the Agent Management page, locate the Agent that will gather the data.
-
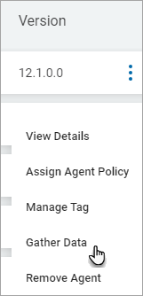
On the far right of the row, click the more options menu.
-
Click Gather Data.
-
The status of the request appears on the bottom left of the screen:

-
An example of the data contained in the gather data zip file is shown below.
Remove an Agent
If you wish to delete an Agent, Spirion recommends you remove the Agent (from its Target) instead.
-
Important! If you delete an agent, you cannot simply re-add it later. While it is technically possible to undelete an agent, Spirion strongly recommends you do not delete agents.
-
To enable the deleted Agent you must manually open the registry and remove the endpoint ID (ID of the Agent), before Sensitive Data Platform can create a new one.
-
-
Note: Sensitive Data Platform cannot merge endpoints (Agents, in this case) once they’ve been deleted — the platform treats the new endpoint (Agent) as completely separate.
To remove an Agent (from a Target):
-
On the Agent Management page, locate the Agent you want to remove.
-
On the far right of the row, click the more options menu.

-
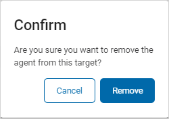
Click Remove Agent.

-
In the Confirm pop-up window, click Remove to confirm Agent removal or Cancel to discard.
Bulk Assign Tags
To assign large groups of Tags to an Agent/Target at once, use the procedure below.
Note: An Agent can be both an Agent and a Target
-
On the Agent Management screen, locate the Agents you want to bulk assign tags to with either of these methods:
-
Search for the Agents
-
Select the Tag which contains the Agents/Targets from the Tag list
-
-
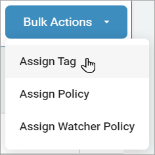
In the top right of the screen, click Bulk Actions.
-
Click Assign Tag.
-
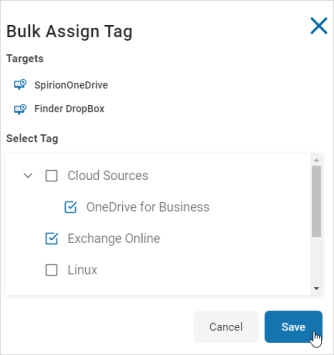
In the Bulk Assign Tag pop-up window, select the Tag(s) you want to assign to the Agents/Targets (referred to as Targets here) listed.
-
Click Save to assign the Tags or Cancel to discard.
-
A confirmation alert appears in the bottom left of the page.
Bulk Assign Policy
To assign a policy on more than one Agent/Target at once:
-
On the Agent Management screen, select the Agents/Targets you want to assign policy to.
-
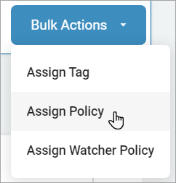
In the top right of the screen, click Bulk Actions.
-
Click Assign Policy.
-
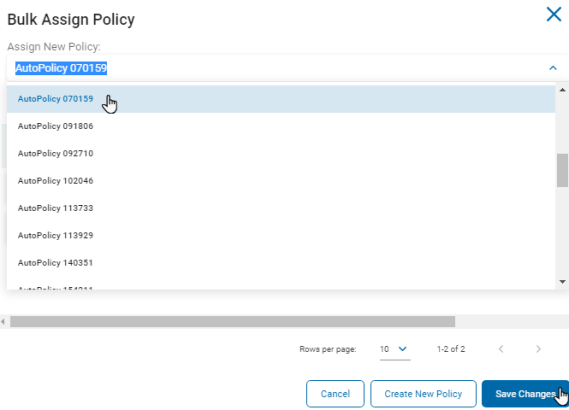
In the Bulk Policy pop-up window, select the policy you want to assign to the Target(s) listed.
-
Click Save to assign the policy or Cancel to discard.
-
A confirmation alert appears in the bottom left of your screen.
Bulk Assign Watcher Policy
To assign a watcher policy on more than one Agent (note that an Agent can be both an Agent and a Target) at once:
-
On the Agent Management screen, select the Agents you want to assign the new policy to.
-
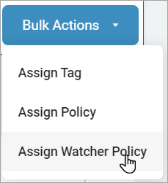
In the top right of the screen, click Bulk Actions.
-
Click Assign Watcher Policy.
-
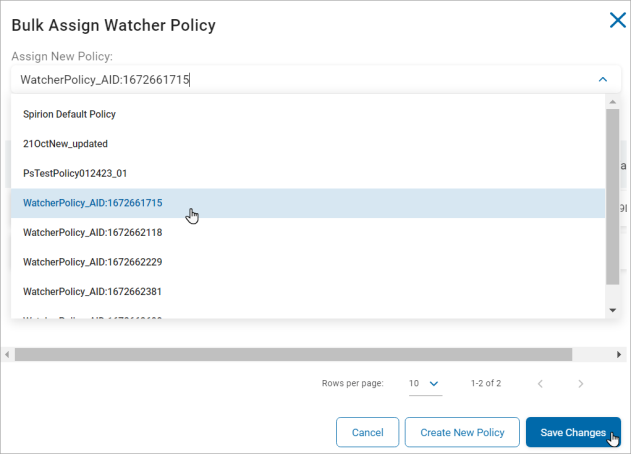
In the Bulk Assign Watcher Policy pop-up window, select the policy you want to assign to the Agent(s) listed.
-
Click Save Changes to assign the policy or click Create new Policy to create a new policy on Activity Watcher Policy screen or Cancel to discard.
-
See Working with Activity Watchers Policies for more information on adding/creating a Watcher policy.
-
-
A confirmation alert appears in the bottom left of your screen.