
User Guide
Example Data Asset Inventory Setup
The following topics provide examples of how to:
-
Set up a Data Asset Inventory (DAI)
-
Add Assets
-
Add Targets
-
-
Create a Scan
-
Add a new Scan
-
Run a Scan
-
-
Review the results in SDV3
Sample Data Asset Inventory Setup
-
Goal: Set up a Data Asset Inventory to scan an SQL server for all databases that contain credit card numbers and determine the SDV3 score to determine their valuation, volume, and vulnerability.
How to Add a New Asset to your Data Asset Inventory
Procedure:
-
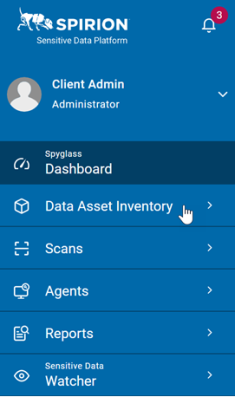
In the left navigation menu, click Data Asset Inventory.
-
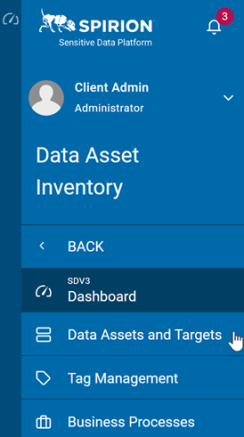
Click Data Assets and Targets.
-
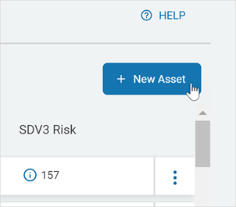
Click the blue +New Asset button.
-
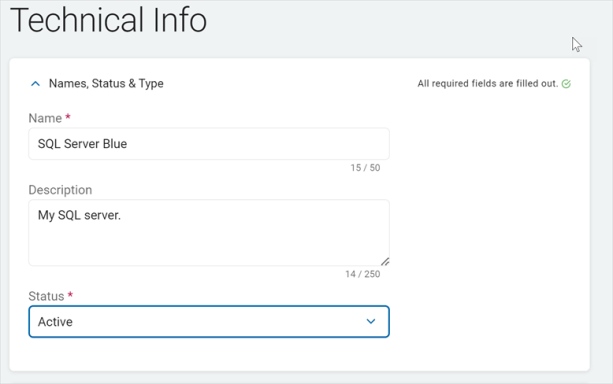
Expand the Technical Info section and fill in the following (required):
-
Name: Enter the name of the Asset. For example: SQL Server Blue.
-
Description: Enter a short description of the Asset that gives you an easy way to remember the Asset and its contents. For example: My SQL server.
-
Status: Select an option from the drop-down list. For example: Active.
-
-
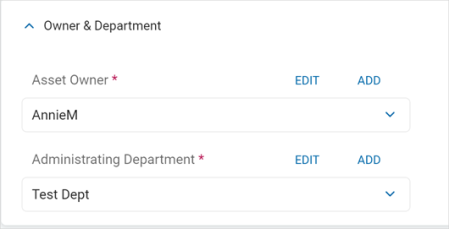
Expand the Owner & Department section and fill in the following (required):
-
Asset Owner: Click an option from the drop-down list or click Add to add a new owner.
-
Administering Department: Click an option from the drop-down list or click Add to add a new department.
-
-
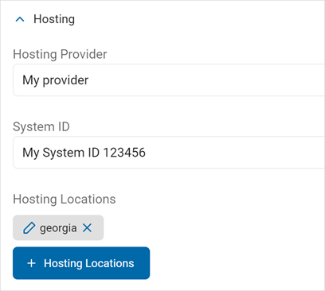
Expand the Hosting section and fill in the following (optional):
-
Hosting Provider: Enter the hosting provider name.
-
System ID: Enter the System ID.
-
Hosting Locations: Click the blue +Hosting Locations button and select and click Add Location, search for existing locations, or click the blue +Hosting Locations button again to add a new location.
-
-
Expand the Security Measures section and fill in the following (required):
-
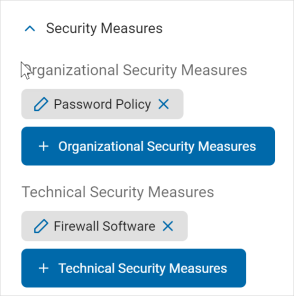
Organizational Security Measures: These are policies on how to use this data that affect the overall security without a physical component.
For example, a password policy or PCI training.
Do the following:-
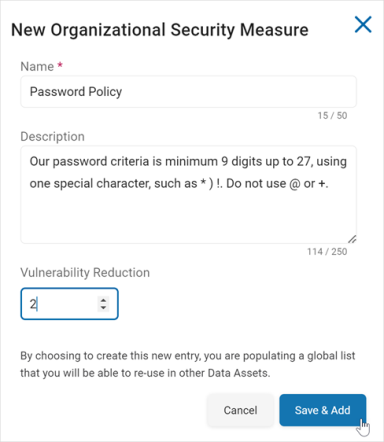
Click +Organization Security Measures.
-
Click +Organization Security Measures again.
-
Name: Enter a descriptive name such as Password Policy.
-
Description: Enter a short description of what the policy is, such as password minimum length, special characters, restricted characters, etc.
-
Vulnerability Reduction: Use the up-down number control to set a value of how much using this Security Measure reduces the vulnerability of the data. This can be valued from 1 (lowest) to 10 (highest).
-
-
-
-
Click the blue Save & Add button to add or the Cancel button to discard and start over.
-
Locate the new Security Measure in the list and click Add Selected.
-
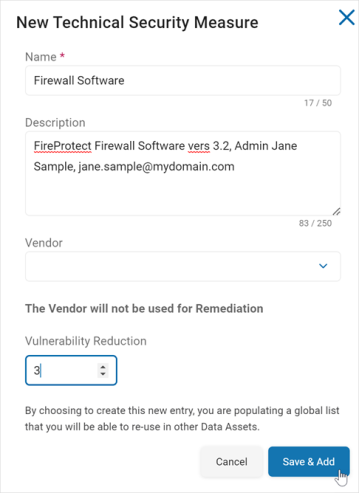
Technical Security Measures: These are physical measures that reduce the vulnerability of your data.
-
For example, firewalls, anti-virus software, malware intrusion, etc.
Do the following:
-
Click the blue +Technical Security Measures button.
-
Click +Technical Security Measures again.
-
Name:Enter a description name, such as Firewall Software.
-
Description: Enter a short description of the measure, such as software name, admin, etc.
-
Vendor (optional): Select the vendor name from the drop-down list.
-
Vulnerability Reduction: Use the up-down number control to set a value of how much using this Technical Security Measure reduces the vulnerability of the data. This can be valued from 1 (lowest) to 10 (highest).
-
-
-
Click Save & Addto add or Cancel to discard and start over.
-
Locate the new Technical Security Measure in the list and click Add Selected.

-
Click Next.
How to Associate a Target with Your Asset
Procedure:
-
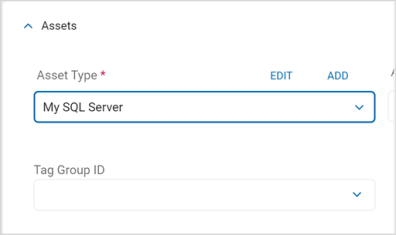
On the Target tab, select the following:
-
Asset Enter (required): Choose the asset type from the drop-down list. For example: My SQL Server.
-
Asset Subtype (optional): Choose the subtype from the drop-down list.
-
-
Tag Group ID (optional): Choose the ID from the drop-down list.
-
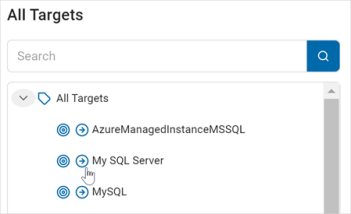
In the All Targets section, select your new Target. You can search for it by name or locate it in the All Targets section.
-
Click the right arrow icon to add it to the Selected Targets section.
-
You can click the left arrow of a Target in the Selected Targets section to remove the Target.
-
Click Next.
How to Add Data Content
Procedure:
-
On the Data Content tab, do the following:
-
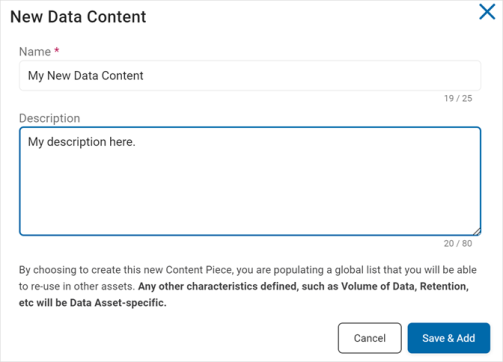
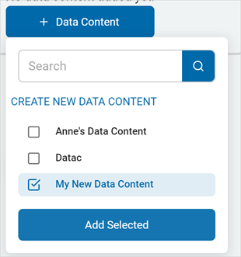
Click +Data Content.
-
Click Create New Data Content.
-
Name: Enter the name of the content. For example: My New Data Content.
-
Description: Enter a short description.
-
-
Click Save & Add to add or Cancel to discard and start over.
-
-
Select the new content from the list and click Add Selected.
-
Click Next.
How to Add a Business Process
On the Business Processes tab, you can add a process you have set up. This is optional.
Procedure:
-
Click Business Processes.
-
Select a business process from the list.
-
Click Attached Selected.
-
Click Next.
Review Your Asset
On the Summary tab, you can review all your information and you can view whether or not you have met all the required data fields.
Do the following:
-
Review each section for accuracy.
-
Ensure all required fields are filled out.
-
Click Finish & Save to save your Asset.
How to Add a New Target to Scan
If you need to add a new Target, use the following steps:
-
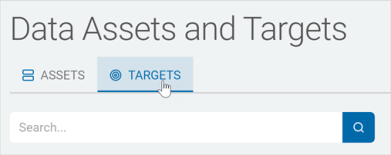
On the Data Assets and Targets screen, click the Targets tab.
-
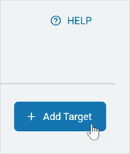
Click +Add Target.
-
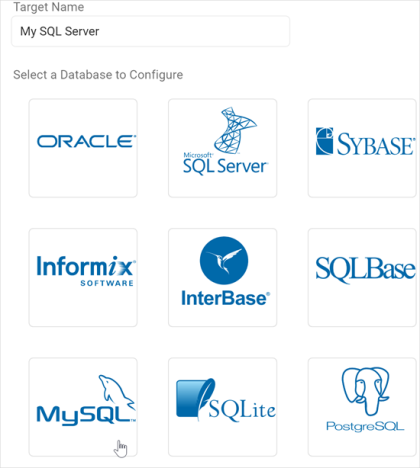
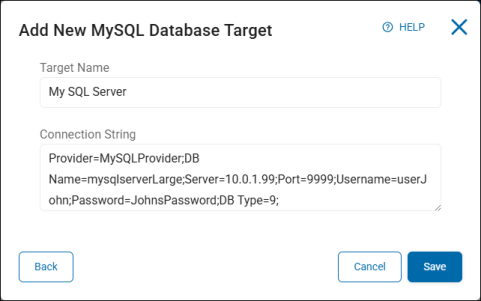
Target Name: Enter the target name. For example: My SQL Server.
-
Target Enter: Click Database.
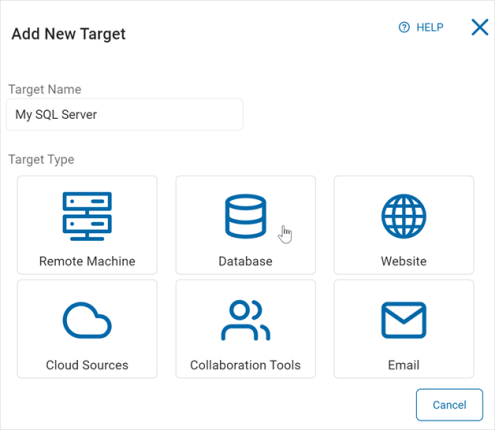
-
Click a database to configure. For example: My SQL
-
Connection String: Enter the string needed to connect to the database.
-
Sample connection string: Provider=MySQLProvider;DB Name=mysqlserverLarge;Server=10.0.1.99;Port=9999;Username=userJohn;Password=JohnsPassword;DB Type=9;
-
-
Click Save to add or Cancel to discard.
-
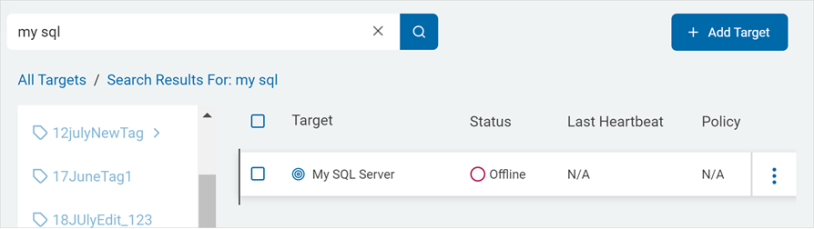
You can search for your Target by name or in the All Targets section.
How to Create and Run a New Scan
-
Use the steps in Create a New Scan to create a scan using the Asset and Targets you have just created.
-
[This is where the specific parameters of the credit card scan will go].
Run the new Scan
Procedure
-
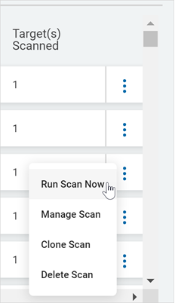
In the Scans section, locate your new Scan:
-
Click the ellipse menu and select Run Scan Now.
-
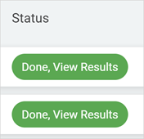
When the Scan is finished, it displays a status of Done, View Results.
-
Review your SDV3 Dashboard
When you new scan is completed, the data points are displayed in your SDV3 dashboard.